
Step-by-Step Guide: How to Put an Infant Car Seat Cover On
This post contains affiliate links. As an Amazon Associate, we earn from qualifying purchases.
To install an infant car seat cover, you must first remove the old cover, detach or work around the harness system, and fit the new cover by threading harness straps through the designated slots and securing all fasteners. The catch is that a “universal” method doesn’t exist. Cybex models forbid removing the harness, Nuna seats have hidden plastic tabs that snap, and all manufacturers warn that damaging the EPS foam under the fabric voids the seat’s safety certification.
That gap between the simple goal and the model-specific execution is where most installations fail. A cover pulled over the wrong side of the harness buckle, or a snapped plastic tab, turns a routine swap into a compromised safety shell.
What follows: a three-point pre-installation checklist drawn from OEM manuals, a walkthrough of the two main harness types (removable vs. Integrated), and the brand-specific quirks for Cybex, Nuna, and Evenflo that the quick-start guides leave out. By the last section, you’ll be able to match the cover to the seat’s engineering, not just its shape.
Key Takeaways
- Check your manual first. The single biggest mistake is assuming all covers install the same way. Cybex seats have non-removable harnesses; Nuna seats have hidden tabs.
- Never cut, compress, or remove the EPS foam. This energy-absorbing polystyrene is fused to the seat shell. Damaging it during cover installation invalidates the seat’s crash protection.
- Harness height is non-negotiable. After reinstalling the cover, you must re-thread the harness straps to the slot at or just below your child’s shoulders. An incorrect height can cause injury in a crash.
- Only use manufacturer-approved covers. An aftermarket or homemade cover that wasn’t crash-tested with your specific seat model can interfere with the harness fit and the seat’s structural performance.
- Inspect every snap and loop. A loose or misrouted fastener can create slack in the cover system, which may allow the harness to loosen or the child to slump in a collision.
The 3-Step Checklist Before You Start
Before you touch a single snap, run through this list. Skipping it is how you end up with a cover that looks right but compromises the seat’s safety.
Before you start: Verify your seat hasn’t been in a crash, confirm the cover is OEM-approved for your exact model, and clear a flat workspace. A dropped buckle or a lost plastic clip on a carpet means a full seat teardown to find it.
1. Pull the official manual for your exact seat model.
Don’t rely on memory or a generic YouTube video. The differences between a Cybex Cloud T and a Nuna REVV are not cosmetic, they’re structural. Your manual has a “Removing and Replacing Seat Covers” section. Find it.
2. Identify your harness system type.
This decides half the job. There are two kinds: – Removable harness: Common on many Graco, Chicco, and Evenflo seats. The entire harness assembly (straps, buckle, adjuster) detaches from the shell, allowing the cover to slide on and off like a sleeve. – Integrated harness: Used on Cybex Cloud T and Cloud G Pro seats. The “No Rethread Harness System” is built into the seat shell and cannot be removed. The cover must be installed around the fixed buckle and straps.
3. Locate and protect the EPS foam.
That rigid, foam-like material lining the interior shell is Expanded Polystyrene (EPS) foam. It’s not padding; it’s a critical energy-absorbing component. Every manual states it clearly: “DO NOT damage, remove or dispose of any EPS foam.” When maneuvering the cover, be conscious of any EPS blocks around the head, sides, and leg area. A dent or crack here means the seat should be replaced.
Step-by-Step Installation Walkthrough
The process splits here based on your harness type. Picking the wrong path means forcing parts, breaking clips, or creating dangerous harness slack.
For Seats with a Removable Harness
Most convertible and all-in-one seats use this design. The harness comes out in one piece.
Step 1: Unbuckle and loosen the harness completely.
Pull the adjuster strap at the front of the seat until the shoulder straps are at their longest. Unbuckle the chest clip and the crotch buckle. This gives you slack to work with.
Step 2: Detach the harness from the shell.
Look for where the shoulder straps connect to the back of the seat shell. There will be a plastic button, a lever, or a slot system. Press, lift, or slide to release each strap. The crotch buckle strap usually unclips from a slot or a plastic anchor near the child’s legs. Keep all hardware together in a bowl.
Step 3: Remove the old cover.
Start at the top. Unhook any elastic loops from the plastic shell, undo snaps, and unzip any zippers. Work the fabric off the shell like a tight sweater, pulling gently over the headrest and sides. If it resists, check for a hidden fastener, often under the leg rest or deep in a crevice.
Step 4: Fit the new cover.
Drape the new cover over the shell, aligning any logos or patterns. Start by securing the bottom elastic hooks or loops. Then, work the fabric smooth over the sides and up the back. Ensure all EPS foam areas remain exposed and uncompressed.
Step 5: Reattach the harness.
Feed the shoulder straps back through their designated slots in the cover and the shell. You must match the slot height to your child’s shoulders, at or just below for rear-facing. The crotch buckle strap feeds through its own slot near the seat’s center. Click everything back into place on the shell’s back.
Step 6: Secure all fasteners.
Zip, snap, and hook every closure. Tug the cover snug. There should be no loose fabric that could bunch under the child or interfere with the harness tightness.
For Seats with an Integrated Harness (Cybex Cloud T/G Pro)
The Cybex manual is explicit: “NEVER remove or attempt to remove parts of the Harness System.” The cover installs around it.
Step 1: Loosen the harness fully.
Pull the adjuster strap until the shoulder straps hang loose. Unbuckle the chest clip and crotch buckle.
Step 2: Feed the harness through the cover openings.
Your new cover will have precise slits for the harness. Start by feeding the harness buckle tongue up through its designated hole in the seat pan. Then, gently guide each shoulder strap through its corresponding slot in the cover’s back. Do not force anything.
Step 3: Drape and secure.
Position the cover over the seat, ensuring the harness components sit correctly in their openings. The manual instructs to “feed the Harness Buckle into the Seat Cover” carefully. Then, secure the bottom elastic bands, followed by the side and rear fasteners.
Common mistake: Trying to remove the integrated harness to make the cover swap easier. On a Cybex, this isn’t an option. Forcing it can damage the harness anchor points on the shell.
Step 4: Check for independent movement.
Once fastened, gently pull on the harness straps. They should move freely through the cover slots without dragging the fabric. If the cover pulls tight when you tighten the harness, you’ve misrouted a strap.
Manufacturer-Specific Quirks and Warnings
Generic advice gets you a cover that’s on the seat. Brand-specific knowledge gets you a cover that’s safe.
Nuna EXEC next & REVV: The Hidden Tab Hazard
Nuna’s care guide details a specific warning for their snap fasteners: “Undo the snaps on the front of the seat, being careful not to damage the hidden white plastic tabs.” These tabs are part of the shell’s molding. If you pry a snap apart without supporting the tab, it can snap off. A broken tab may prevent the cover from securing tightly, creating slack.
Evenflo LiteMax NXT: The 1-Inch Head Clearance Rule
The Evenflo manual specifies that a child can use this seat only if “the top of child’s head is 2.5 cm (1 in.) below the top of the car seat shell.” When installing a thicker aftermarket cover or insert, you effectively raise the child’s position inside the shell. That can put their head above the safe limit even if their body length suggests they still fit. Always re-check this clearance with the new cover installed.
Cybex Cloud G Pro: The Non-Negotiable Base
The Cloud G Pro is designed for use with its specific SensorSafe base. The cover installation process doesn’t change, but the manual stresses that you must never use the seat without the base properly installed in the vehicle. A cover that interferes with the seat’s click-in connection to the base is a critical failure.
| Brand & Model | Key Quirk During Cover Install | Consequence If Missed |
|---|---|---|
| Cybex Cloud T / G Pro | Harness is NOT removable; cover must feed around it. | Forcing harness removal damages anchor points, voiding safety certification. |
| Nuna EXEC next / REVV | Hidden white plastic tabs under front snaps can snap. | Broken tab prevents secure cover attachment, creating dangerous slack. |
| Evenflo LiteMax NXT | Added cover thickness reduces shell head clearance. | Child’s head may exceed the 1-inch safety limit, increasing injury risk. |
| Generic Aftermarket Cover | Not crash-tested with your specific seat model. | May compress incorrectly, interfere with harness routing, or detach in a crash. |
What Most People Get Wrong (And How to Fix It)
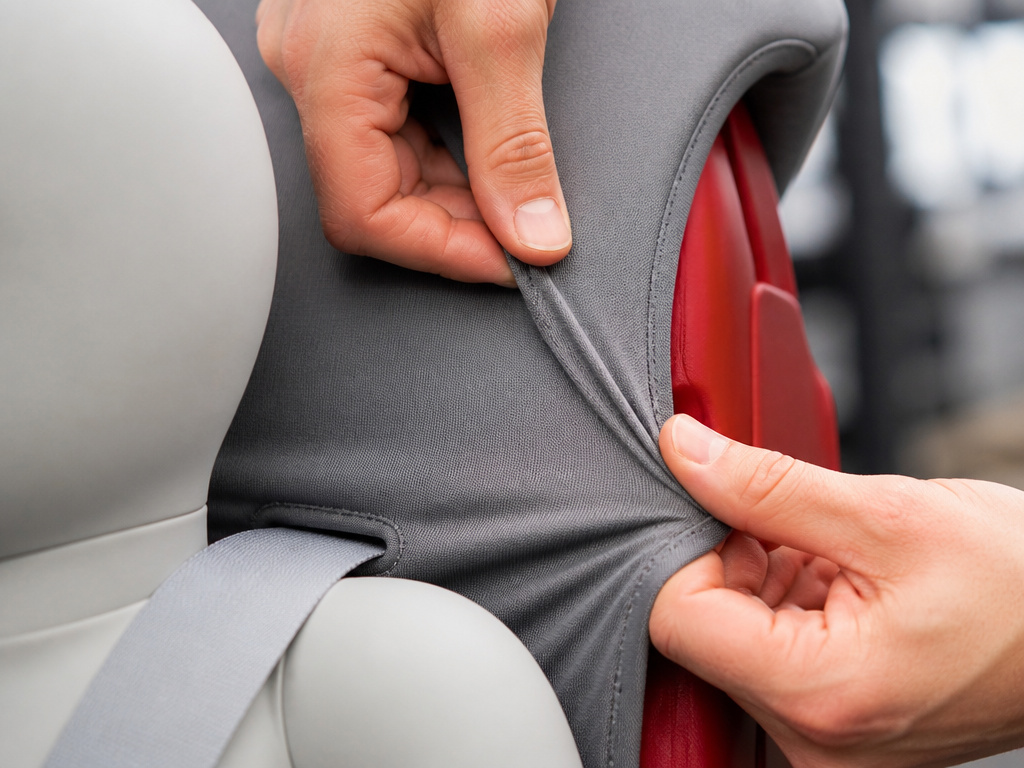
The goal isn’t just a clean cover. It’s a cover that doesn’t change how the seat protects.
Wrong: Assuming all covers and seats are compatible.
Manufacturers crash-test each seat model with its specific cover. The fabric’s tension, thickness, and friction are part of the safety equation. Using a non-OEM cover is a gamble.
The part nobody mentions: An aftermarket cover that’s too slick can allow a child to submarine (slide under the harness) in a frontal collision. One that’s too thick can prevent the harness adjuster from locking properly.
Wrong: Not re-checking harness height after installation.
You took the straps out to put the cover on. You must put them back through the correct slots for your child’s current size. For rear-facing infants, the harness straps must be at or just below the shoulders. Straps above the shoulders can cause the child to be thrown upward in a crash.
Wrong: Leaving the cover slightly loose.
A cover that isn’t drum-tight can bunch under the child, creating pressure points and, more critically, allowing the harness to loosen over time as the child moves. After installing, run your hand between the cover and the shell. It should be smooth, with no folds or gaps.
Frequently Asked Questions
Can I wash my infant car seat cover?
Yes, but you must remove it first. Most covers are machine washable on a cold, delicate cycle with mild detergent. Do not use bleach or fabric softener. Always air dry or tumble dry on low heat. Never wash the cover while it’s on the seat, and never put the entire seat in a washing machine.
Is it safe to use an aftermarket car seat cover?
No, unless it is sold and approved by your car seat’s manufacturer. The car seat cover benefits include sun protection and cleanliness, but safety is paramount. Aftermarket covers have not been crash-tested with your seat and can interfere with harness fit, buckle placement, and airbag deployment in a crash.
How do I know if my car seat cover is installed correctly?
The cover should be taut with no wrinkles or loose fabric. All snaps, zippers, and hooks should be fully engaged. The harness straps should feed cleanly through their designated slots without being pinched by the fabric. There should be no gap between the cover and the EPS foam lining the shell.
My cover has a tear. Can I just patch it?
Do not patch a torn car seat cover. Even a small tear can compromise the fabric’s integrity and, more importantly, may hide damage to the underlying EPS foam. Contact the manufacturer to order a replacement infant car seat cover specific to your model. Using the seat with a damaged cover is not safe.
Why does my new cover feel tighter than the old one?
New fabrics haven’t been stretched by use. This is normal and actually correct, a tight fit is what you want. As long as you can secure all fasteners without excessive force and the harness straps move freely, the tightness is a sign of a proper, safe installation. It will loosen slightly with use.
Can I use a head support or insert with my new cover?
Only if it is sold by your car seat’s manufacturer and designed for your exact model. The manual for the Evenflo LiteMax NXT warns, “DO NOT attach additional padding, toys or other devices not made by Evenflo.” Aftermarket head support pillows or infant car seat insert products can push a child’s head forward, compromising airway alignment, or interfere with the harness system.
The Bottom Line
Putting a cover on an infant car seat is a maintenance task with safety stakes. The difference between a correct install and a dangerous one hinges on three things: knowing your harness type (removable or integrated), protecting the EPS foam at all costs, and threading the harness straps back through the correct height slots. Always consult your specific seat’s manual, the 10 minutes it takes to find the “Seat Cover” section beats discovering a broken tab or a misrouted buckle after the fact. For extreme temperatures, a manufacturer-approved winter car seat cover or cooling car seat cover is a safe alternative to bulky aftermarket ones. When in doubt, a recommended car seat covers guide that sticks to OEM options is a safer starting point than a generic online store.
