
How to Set Up an Infant Car Seat Correctly the First Time
This post contains affiliate links. As an Amazon Associate, we earn from qualifying purchases.
To set up an infant car seat, you secure it using either the vehicle’s LATCH lower anchors or the seat belt, never both. The seat must be rear-facing in the back seat, installed at the manufacturer’s specified recline angle. After tightening, it should not move more than 2.5 cm (1 inch) side-to-side or front-to-back when tested at the belt path. The harness straps must be at or just below the child’s shoulders and snug enough that you cannot pinch any excess webbing.
That 2.5 cm rule is not a suggestion. It’s the physical threshold Transport Canada uses to certify a seat as crash-ready. Most installs fail it because people check for wobble at the top of the seat shell, not down where the belt or anchors actually hold it.
What follows is the breakdown most manuals leave out: the real difference between LATCH and belt, the math for the hidden lower anchor weight limit, and the one adjustment that stops 90% of failed installs before you even buckle the baby in.
Key Takeaways
- Use LATCH or the seat belt, never both together. The seat is only crash-tested one way at a time.
- The lower anchors have a weight limit. It’s often 65 lbs minus the weight of the car seat itself. Exceed it, and you must switch to the seat belt.
- A proper install allows less than 2.5 cm (1 inch) of movement when you grip the seat where the belt or LATCH strap threads through.
- For premature infants under 37 weeks or under 5 lbs, the AAP mandates a 90–120 minute hospital observation before the first car trip to monitor breathing.
- The harness is correct when the straps are at or below the shoulders and you cannot pinch any vertical slack in the webbing at the child’s collarbone.
LATCH vs Seat Belt: The “Never Both” Rule
The choice isn’t about which is safer. Both LATCH and a properly locked seat belt meet the same federal safety standard, FMVSS 213b. The choice is about which one gives you a tighter, simpler install in your specific vehicle. The NHTSA states you must pick one method. Using both can create conflicting pressure points that the seat was never designed to handle in a crash.
Where this goes sideways: Threading both the seat belt and the LATCH strap. This overloads the seat’s structure in an unpredictable way, and in a severe collision, it can cause the plastic shell to crack at the anchor points. You won’t see the damage until it’s too late.
LATCH is often easier. You click the connectors onto the metal bars between the seat cushions and tighten the strap. It’s a dedicated system. The Joie i-Snug 2 manual, for example, specifies that a correct LATCH connection gives two audible clicks and turns the connector indicators completely green.
The seat belt method is universal. You must lock the belt according to your vehicle’s manual—usually by pulling it all the way out and letting it retract. Then you thread it through the seat’s designated rear-facing belt path, which is different from the forward-facing path on convertible seats. This is the only way to install an infant seat without its base, a common need for taxis or grandparents’ cars.
| Installation Method | Best For | When to Switch |
|---|---|---|
| LATCH (Lower Anchors) | New parents, frequent seat transfers. Provides a consistent, easy-to-repeat anchor point. | When child + seat weight exceeds the lower anchor limit (check seat label). |
| Seat Belt | Older vehicles without LATCH, installing without the base, or when the LATCH spacing is awkward. | When the belt buckle stalk is too long and prevents a tight install against the seat bight. |
| Seat Belt + Base | Most daily use. The base stays secured; you click the carrier in and out. | When the child outgrows the infant seat’s height or weight limit. |
Your vehicle manual dictates LATCH positions. Many cars only allow LATCH in the window seats, not the center. If your chosen safest seat position is the rear middle, you’ll likely be using the seat belt. Always check both booklets.
The Hidden Math of Lower Anchor Weight Limits
LATCH anchors are not infinitely strong. Vehicle and car seat manufacturers set a combined weight limit for the child plus the car seat. The NHTSA provides the formula: the limit is typically 65 pounds minus the weight of the car seat itself.
Most infant seats weigh between 8 and 12 pounds. If your seat weighs 10 pounds, the lower anchor limit is 55 pounds. Since infant seats max out at a child weight of 22-35 pounds, you might hit the LATCH limit before the child outgrows the seat. A 30-pound toddler in a 10-pound seat is 40 pounds total—still under the 55-pound limit in this example. But you must know your seat’s weight to do the math.
The limit is printed on a label on the side of the car seat or in the diagrams in the manual. If you can’t find it, assume the 65-pound rule. The moment your child’s weight plus the seat’s weight exceeds that limit, you must uninstall the LATCH connectors and reinstall the seat using the vehicle’s seat belt. This is a non-negotiable safety step.
Getting the Recline Angle Right (It’s About Airway)
An infant’s head is heavy and their neck muscles are weak. A rear-facing seat cradles them so that in a sudden stop, the force is distributed across their back, not their neck. If the seat is too upright, the head can flop forward and restrict their airway. Too reclined, and the child can be ejected upward in a crash.
Every seat has an approved angle range, usually indicated by a built-in level line or bubble. The Cybex Cloud G Pro manual states the seat must be installed so this indicator is level to the ground. You adjust the angle on a base by extending or retracting a foot or adjusting a recline mechanism.
Park your car on level ground to check this. Use a rolled towel or pool noodle under the base’s front edge only if your manual permits it to achieve the correct angle. Aftermarket seat protectors or non-approved padding can change the angle and are often not safe.
The 2.5 cm Movement Test That Decides Everything
A tight install transfers crash forces to the vehicle’s frame. A loose install lets the seat whip forward, multiplying the forces on your child. The test is simple, but most people do it wrong.
Grab both sides of the child car seat where the seat belt or LATCH belt is threaded through the child car seat or base. Try to move the child car seat from side-to-side and front to back. It should not move more than 2.5 cm (1 inch).
The key phrase is “where the belt is threaded.” You are not shaking the top of the carrier or the handle. You are gripping the seat or base down at the vehicle seat cushion, at the exact point where the securing mechanism holds it. If you have a base, test the base. If you’ve installed the carrier directly with a belt, test the carrier.
If it moves more than an inch, you need more tension. For a seat belt install, kneel into the seat or base and use your body weight to press it down into the vehicle cushion while you pull the shoulder belt tight. For LATCH, tighten the strap while applying downward pressure. Then re-test.
Harnessing Your Child: The Pinch Test and Shoulder Height

The harness is the final link. A loose harness means the child can be thrown against the inside of the shell. The BeSafe iZi Go Modular manual is blunt: “Make sure you can fit no more than one finger between the harness and your child (1 cm).”
First, set the shoulder strap height. For rear-facing, the straps must be at or just below the child’s shoulders. You usually adjust this by rethreading the harness or moving a headrest. Do this before you install the seat—it’s much easier.
Place the child in the seat. Buckle the crotch buckle and chest clip. The chest clip should be at armpit level. Now tighten the harness. Pull the adjustment strap until the straps are snug against the child’s body with no visible slack.
Perform the pinch test. Try to pinch the harness strap vertically at the child’s shoulder. If you can pinch any excess webbing, it’s too loose. Tighten and try again. The straps should lie flat, not twisted. This is a step you must repeat every single time you buckle your child in. Their winter coat adds bulk, so always harness them without the coat, then place the coat over the secured straps.
Special Case: Preterm and Low Birth Weight Infants
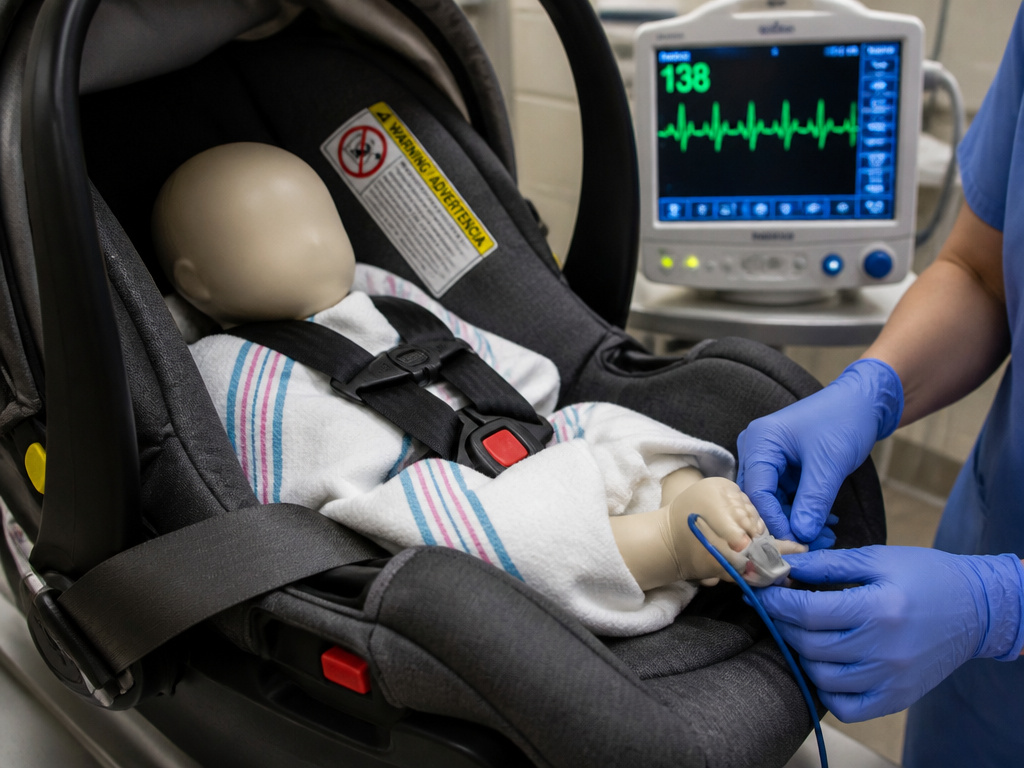
This is not a minor detail. The American Academy of Pediatrics has a specific protocol cited in the Cybex manual, and it’s a matter of life and breath.
Infants born before 37 weeks or weighing less than 5 pounds at birth are at risk for apnea and bradycardia when semi-reclined in a car seat. The AAP requires a 90 to 120 minute observation period in the hospital before the first trip home. Hospital staff monitors the infant’s breathing and heart rate while they are properly positioned in their actual car seat.
If your child falls into this category, do not skip this. Schedule the observation with the hospital’s car seat clinic or pediatric staff. Minimize trip duration afterward, and have an adult ride in the back to monitor the infant. This is one area where following the official child passenger safety ratings means following medical advice first.
What to Do After a Crash
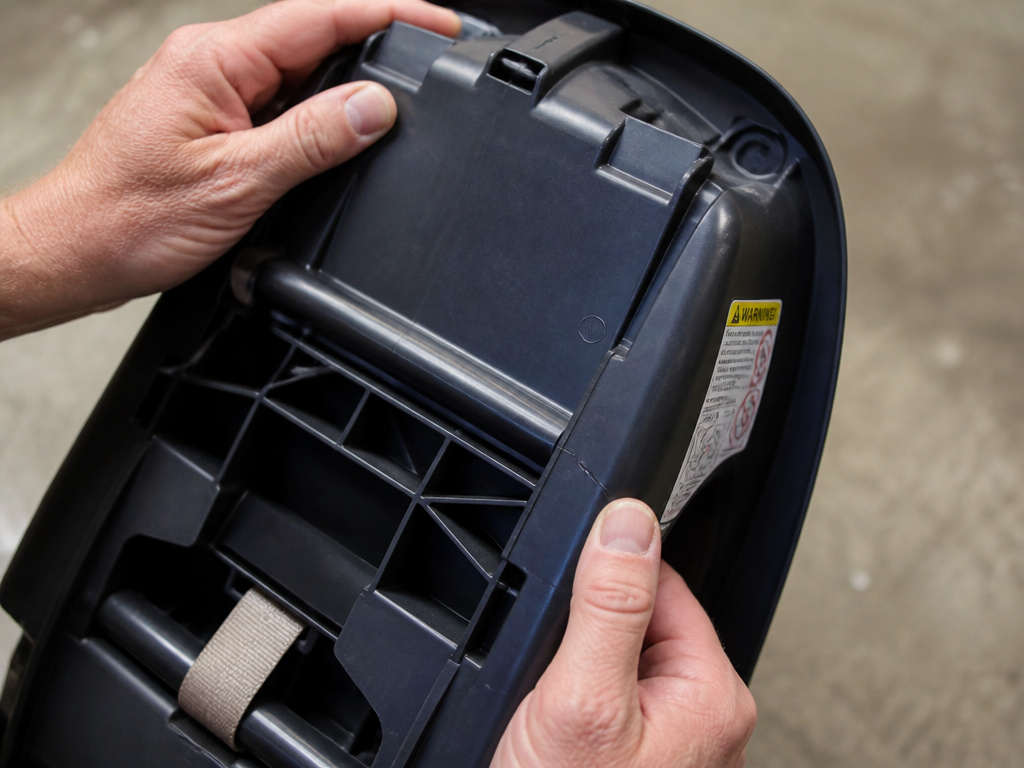
Manufacturer instructions are unanimous: replace the car seat after any moderate or severe crash, even if the child wasn’t in it. NHTSA defines a “minor crash” as one where all the following are true: the vehicle could be driven away, the door nearest the seat was not damaged, no occupants were injured, airbags did not deploy, and there is no visible damage to the seat.
If your crash doesn’t meet all five of those criteria, the seat’s structural integrity is in question. The plastic may have microfractures. Insurance should cover the replacement cost. This is why registering your seat with the manufacturer is critical—they can contact you directly for recalls.
Frequently Asked Questions
Can I use both LATCH and the seat belt for extra safety?
No. Never. It is unsafe and not approved by any car seat manufacturer or vehicle maker. The systems are designed to work independently. Using both can stress the seat in ways it wasn’t crash-tested for, potentially causing failure.
How do I know when my child has outgrown the infant seat?
Check two limits: weight and height. Your seat has a maximum weight (often 30-35 lbs) and a maximum height (often 30-32 inches). The child also outgrows it when the top of their head is less than 1 inch from the top of the seat shell. Whichever comes first.
Is the center seat really the safest?
Statistically, yes. It’s the farthest from any point of impact. However, it’s only the safest if you can achieve a proper, tight install there. Many vehicles don’t allow LATCH in the center, so you must become proficient at a seat belt install. We detail the trade-offs in our guide on can you put an infant car seat in the middle.
How tight should the harness really be?
Tight enough to pass the pinch test. You should not be able to pinch any vertical slack in the harness webbing at the child’s shoulder. If you can, tighten it more. The straps should be snug against the body without pressing into the skin.
Can I use aftermarket accessories like strap covers or head supports?
Only if they came with the seat or are sold by the seat manufacturer as approved accessories. Non-approved items can interfere with the harness routing, alter crash performance, and may be flammable. When in doubt, leave it out.
How often should I check the installation?
Check for tightness at the belt path every time you use the seat for the first week after installation, then once a month. Check the harness fit and the child’s growth position every single time you buckle them in.
Before You Go
Setting up an infant car seat boils down to three non-negotiable checks: a base or seat that moves less than an inch at the belt path, harness straps at or below the shoulders that pass the pinch test, and the correct recline angle for your child’s size. LATCH is a convenience, not a safety upgrade over a locked seat belt.
Your first install will take 20 minutes. Your tenth will take two. The learning curve is steep but short. Find a certified child passenger safety technician in your area for a free check—they catch the errors you don’t feel. Then drive. The goal isn’t perfection. It’s the confidence that comes from knowing the 2.5 cm margin is on your side.
