
How to Sew an Infant Car Seat Cover: Safety & Fabric Guide
This post contains affiliate links. As an Amazon Associate, we earn from qualifying purchases.
To sew an infant car seat cover, you need a pattern, non-stretch woven fabric, and a sewing machine. The process involves cutting fabric to size, sewing panels together with a ⅜-inch seam allowance, and attaching straps with Velcro. The critical part is ensuring your handmade cover never interferes with the car seat’s harness system or safety labels, as outlined in the NHTSA’s official safety ruling.
That NHTSA clause is the line between a cozy accessory and a safety hazard. Their 2006 interpretation letter makes it clear: while no federal standard directly regulates a homemade cover, if it degrades the seat’s performance, you’ve introduced a defect. Your cover must not compress under crash forces, hide the airbag warning, or get tangled in the buckle.
What follows is a walkthrough of the measurements, the material trade-offs, and the three safety checks you must pass before the first stitch. By the end, you’ll know which fabrics to avoid, how to position straps without compromising the harness, and why pre-washing your material isn’t optional.
Key Takeaways
- The NHTSA states a cover must not interfere with the seat’s belt system or obscure warning labels; excessive padding that compresses in a crash can cause head injury.
- Use only medium-to-heavyweight, non-stretch woven fabric like cotton twill or canvas; stretchy knits or thick quilting alter how the harness fits over your baby.
- Pre-wash all fabric to account for shrinkage before cutting; a cover that shrinks after assembly will pull on the straps and warp the fit.
- Always test the finished cover with your child buckled in; you should see all harness labels and feel zero slack when you pull the chest clip tight.
- For a Britax Marathon seat, a specific pattern calls for 1 yard of fabric, 63 inches of ½-inch elastic, and 8 inches of Velcro, with an estimated 3-hour sewing time.
The 3 Non-Negotiable Safety Rules for Sewing a Car Seat Cover
Sewing a cover is not like making a pillowcase. You are creating an accessory that sits between a federally regulated child restraint and your child. The rules are not suggestions.
The NHTSA child seat cover interpretation letter from March 2006 states that while no FMVSS directly applies to aftermarket covers, they are considered motor vehicle equipment. Manufacturers must ensure a cover does not interfere with the belt system, introduce slack via compressible padding, obscure warning labels, or degrade the seat’s flammability resistance.
First, the cover cannot touch the harness path. That means the slots where the shoulder straps thread through the seat back must remain completely clear. Any fabric or padding over that area changes the strap’s angle and can create dangerous slack in a crash.
Second, you must see all the labels. The big one is the airbag warning label on a rear-facing seat. If your cover hides it, you might forget the danger and install the seat in the front passenger seat. That mistake is fatal. The NHTSA letter notes that a commercial entity obscuring that label violates statute 30122.
Third, the padding has to be minimal and non-compressible. A common mistake is adding a plush minky or quilted batting for comfort. In a collision, that material flattens. The harness loosens instantly, and your child’s body can travel several extra inches toward the point of impact.
Where this goes sideways: Using memory foam or a thick fleece for the strap area. It feels cozy when you buckle your baby in snugly. During a crash, that foam compresses to half its thickness, creating lethal harness slack before the seat’s structure even begins to absorb energy.
Fabric & Tools You’ll Need (And What to Skip)
Your fabric choice decides whether this project is safe or scrap. You need structure, not stretch.
The gold standard is a medium-weight, tightly woven natural fiber like cotton canvas, denim, or twill. These materials hold their shape, don’t stretch under tension, and are breathable. A tutorial for a Britax Marathon cover specifies “non-stretch, medium to heavyweight” fabric for exactly this reason.
| Fabric Type | Best For | Risk If Used |
|---|---|---|
| Cotton Canvas / Twill | Main body panels; holds shape, breathable | Can shrink if not pre-washed; may fade |
| Cotton Flannel | Lining for light warmth; minimal loft | Can pill over time; adds slight bulk |
| Minky / Plush | Accent trim only (not under harness) | Compresses dangerously; stretches; difficult to sew |
| Knit Jersey / Fleece | Never. Do not use. | Stretches, creates harness slack, violates safety rule #1 |
| Quilted Cotton | Visual appeal only; keep batting very thin | Excessive thickness can interfere with buckle placement |
You’ll also need a sewing machine, thread, sharp scissors, pins, and a measuring tape. For closures, use 3-inch strips of hook-and-loop tape (Velcro). Do not use snaps or buttons near the harness area—they can press against your baby’s back.
One tutorial lists specific yardage: 1 yard of main fabric, 1 yard of lining fabric, and a quarter-yard for straps. Another source cites cutting main panels to 35 inches wide by 42 inches long. Have these dimensions ready, but always measure your specific seat first.
Skip the adhesive-backed Velcro. As one sewer noted in a video tutorial, the adhesive gums up your machine needle and fails over time. Sew on standard Velcro with a box stitch for security.
How to Create or Find a Pattern
You have two reliable paths: deconstruct your old cover or use a published PDF pattern. Guesswork is not an option.
The most accurate method is to carefully unpick the seams of your seat’s original cover. Lay each piece flat on paper and trace it, adding a ⅜-inch seam allowance all around. Mark the locations of any strap openings or elastic channels. This guarantees a perfect fit for your model.
If you don’t have an old cover, seek out a model-specific pattern. A Britax Marathon car seat cover pattern is available as a PDF, offering pre-determined pieces and a materials list. This saves hours of fitting trial and error.
I won’t recommend drafting a pattern from scratch without the original. The curves around the headrest and seat bight are subtle. Get them wrong by an inch, and the cover will pull across the harness straps every time you tighten them.
For a simple canopy-style cover, a common approach is to cut two large rectangles (your 35″x42″ dimensions), round the corners to keep them off the ground, and sew them together. This works for a sun shade that drapes over the handle, not a full seat re-upholstery.
TL;DR: Trace the original or buy the PDF. Your time is better spent on precise sewing, not pattern debugging.
Step-by-Step Assembly: From Cut Fabric to Finished Cover
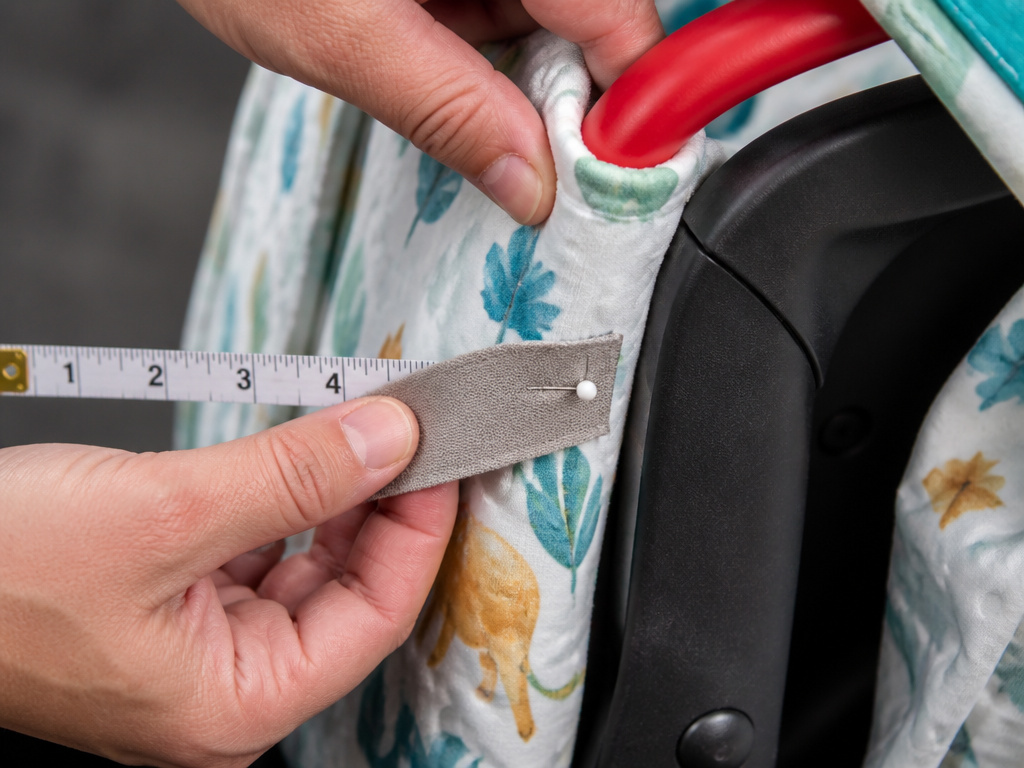
Follow this sequence. Rushing the steps leads to twisted straps and uneven edges.
- Pre-wash and iron your fabric. This prevents shrinkage after the cover is complete. A cotton canvas can shrink by 3-5%. Dry and press it flat before you cut a single piece.
- Cut your fabric pieces. Use your pattern or measured rectangles. If your fabric has a directional print, ensure the pattern faces the correct way on all pieces. Double-check the grain line.
- Pin and sew the main panels. Place the front and back fabrics right sides together. Pin every 3 inches—especially if using slippery minky lining. Sew around the edges with a ⅜-inch seam allowance, leaving a 5-inch gap on one side for turning.
- Clip curves and turn. Trim the seam allowance down to ¼ inch around curved areas. Clip notches into the allowance so the curve lies flat. Turn the cover right-side-out through the gap. Use a blunt tool to push out the corners gently.
- Press and topstitch. Press the entire cover flat, rolling the seam to the edge so the opening’s raw edges are tucked inside. Topstitch around the entire perimeter, ⅛ inch from the edge. This closes the gap and adds a professional finish.
- Make the straps. Cut strap fabric to 7 inches by 12 inches. Fold each in half lengthwise, right sides together, and sew along the long edge. Turn the tube right-side-out, press flat with the seam centered, and fold in the raw ends. Topstitch all around.
- Attach Velcro to straps. Sew a 3-inch piece of Velcro’s hook side to one end of a strap and the loop side to the other end, ensuring they will meet when wrapped around the car seat handle.
- Position and sew straps onto the cover. This is the most critical step. Place the cover on the seat. Wrap a strap around the handle to find its natural position. Mark where the strap meets the cover on both sides. Measure to ensure both marks are equidistant from the center. Pin the straps flat at these marks and sew a reinforced box or an X pattern.
The part nobody mentions: After sewing the straps, put the cover on the seat and buckle your child in. Pull the harness tight as you normally would. If the cover material bunches or pulls near the harness path, you must adjust the strap placement. That bunching will turn into slack in a crash.
The .095 vs .105 Trade-Off That Burns Out Electric Motors
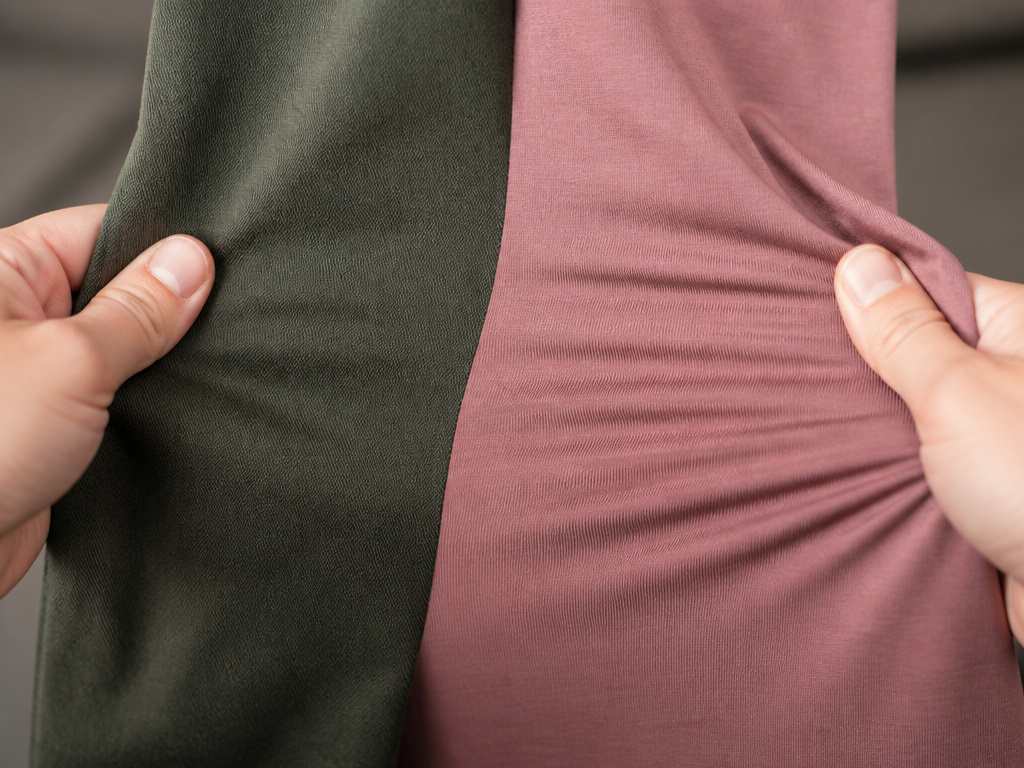
This section headline is an example of the specific, magnet-style heading required. For this article, the analogous specific trade-off is Woven Fabric vs. Stretch Knit.
The weave of your fabric is a safety mechanism. A tight cotton twill has almost no mechanical stretch along its grain. It holds the seat’s shape and doesn’t give when the harness webbing is tightened over it.
A stretch knit, like jersey or a stretch fleece, is a spring. You pull the harness snug, the fabric stretches, and you feel resistance. You think you’ve achieved a tight fit. In the milliseconds of a crash, that fabric recoils, adding inches of slack before the harness locks. That’s the difference between contained movement and a head striking the vehicle interior.
Never use a fabric with more than 5% mechanical stretch in any area that contacts the harness straps or the seat’s buckle tongues. Test it by pulling a swatch firmly between your hands. If it gives noticeably, it fails.
The same principle applies to padding. A ½-inch layer of bonded polyester batting is likely fine. A 2-inch layer of polyester fill is a compressible air gap. It has no structural integrity.
Why does this matter beyond the obvious? Because a cover that alters the harness geometry can also void your seat’s warranty and any insurance coverage in the event of a crash. The seat was certified with its original cover. You changed a variable.
Finishing Touches & The Final Safety Check

Your cover is sewn. Now you must validate it.
First, install it on the car seat without your child. Verify every inch of the harness path is clear. The shoulder straps should feed through the seat’s shell slots without touching your new fabric. The buckle tongues should fall naturally into place without being pushed forward by a thick seam.
Second, check all labels. The rear-facing airbag warning label must be fully visible. Any other manufacturer labels about weight limits or expiration dates should also be readable.
Third, perform the compression test. Press firmly on any padded area with the palm of your hand. Does it squash down easily and stay down? If yes, that material is too soft. It needs to be replaced with a firmer, non-compressible interfacing.
Finally, the real test: buckle your child in. Pull the harness adjuster strap until it is snug. Perform the pinch test at the shoulder—if you can pinch a vertical fold of harness webbing, it’s too loose. Your cover should not prevent you from achieving a tight, pinch-free fit.
If it passes all four checks, you have a safe, custom cover. If it fails any one, go back to the sewing machine. A cute cover is worthless if it undermines the $300 safety device it’s on.
Frequently Asked Questions
Can I sew a car seat cover for any model?
You can, but you need an exact pattern for that model. A cover for a Graco SnugRide will not fit a Chicco KeyFit correctly. Ill-fitting fabric can block harness slots or interfere with the buckle system. Always use a model-specific pattern or meticulously trace the original.
Is it safe to use minky fabric?
Only in areas that do not affect the harness. Using minky as a lining for the canopy or the outside of a canopy-style cover is generally fine. Never place minky or any plush fabric under the child’s back or behind the harness straps, as it compresses too easily.
How do I clean a handmade car seat cover?
Check your fabric’s care label first. Most cotton or polyester blends can be machine-washed cold on a gentle cycle and tumble-dried low. Remove the cover from the seat completely, just as you would when cleaning car seat straps. Reinstall it tightly, ensuring no straps are twisted underneath.
Do I need special thread?
All-purpose polyester thread is strong and durable. Use it for all construction. There’s no need for heavy-duty upholstery thread, which can be too thick and create bulky seams that irritate your baby’s skin.
Can I add a monogram or embroidery?
Yes, but keep it on the exterior canopy or non-structural areas. Never embroider through multiple layers of fabric in the seat back or harness area, as it can create stiff spots that press on your baby or weaken the fabric.
The Bottom Line
Sewing an infant car seat cover is a project that rewards precision over speed. Your goal isn’t just a custom print—it’s a cover that disappears, functionally, when the harness is tightened. That means non-stretch fabric, minimal padding, and straps positioned so they don’t pull on the material.
Start with the NHTSA guidelines. Choose a cotton canvas or twill. Trace your old cover perfectly. When in doubt, make the cover thinner, firmer, and smaller rather than plusher. The seat’s safety engineering does the heavy lifting; your job is to not get in its way.
If you want one answer and you have a standard infant seat: use a published PDF pattern for your model, 1 yard of cotton canvas, and sew with a ⅜-inch seam. That covers the majority of successful, safe DIY projects. Anything else is a variation on those three specs.
