
How to Get a Free Car Seat Base Check & The One-Inch Rule
This post contains affiliate links. As an Amazon Associate, we earn from qualifying purchases.
Yes, you can get your car seat base checked for free by a certified Child Passenger Safety Technician (CPST). These are trained professionals, often found at local fire departments, police stations, or hospitals, who offer no-cost inspections to ensure your base is installed correctly and meets safety standards.
The catch is that “free” means the inspection costs nothing. It doesn’t mean the check is quick or that every station offers walk-in service. A proper inspection takes 20 to 30 minutes, and many locations require appointments. They’ll test for the specific movement limit the National Highway Traffic Safety Administration (NHTSA) sets: no more than 25 mm (one inch) of side-to-side or front-to-back movement at the belt path.
What follows is a breakdown of exactly what gets checked, where to find a free station, and how to verify the work yourself afterward so you never leave with doubts.
Key Takeaways
- Free inspections are performed by certified Child Passenger Safety Technicians (CPSTs), not just any firefighter or officer. You must ask for a CPST.
- The NHTSA’s pass/fail standard is the 25 mm (1 inch) rule at the belt path. More movement than that means a failed installation.
- Manufacturer warranties can be voided by improper use, like using non-original parts or installing a seat in an unapproved vehicle position, as stated in manuals for seats like the BeSafe iZi Modular.
- You can perform a preliminary check yourself by looking for green indicators on ISOfix connectors and load legs, and ensuring the recline indicator line is in the correct color zone.
- Always bring your car seat manual and your vehicle’s owner’s manual to the inspection. The technician needs both.
Where to Find a Free Car Seat Base Check
You don’t pay for the service, but you do have to find it. Start with the NHTSA’s online inspection station locator. This tool lists certified locations, but the listings aren’t always current. Calling ahead is non-negotiable.
Common mistake: Assuming all fire stations offer checks. Many do, but only if a certified technician is on duty that shift. You must specifically ask for a CPST appointment.
Your local fire department is the most common place, but police stations, hospitals, and some health departments also host events. Community safety days are another option, though they can be crowded. The key is verification—confirm they have a currently certified technician available. A free car seat check is worthless if the person doing it isn’t up to date on the latest seat models and vehicle systems.
If your local fire department doesn’t have a technician, they can usually point you to the nearest station that does. This network is well-connected. Some private baby stores also host monthly inspection clinics with a CPST present, though these can book up weeks in advance.
What Do They Check During a Free Inspection?
A full inspection is a methodical process, not a quick glance. The technician follows a checklist that cross-references your car seat manual, your vehicle manual, and the child’s height and weight.
They start with the base itself. Is it the right one for your specific infant carrier? Is it expired? Models like the BeSafe iZi Modular i-Size base have a strict 7-year service life from the date of manufacture, while the BeSafe Beyond Base lasts 15 years. Using an expired seat is an instant fail.
Then comes the installation check. With the base secured in your vehicle, the technician will grab it at the belt path—the spot where the seat belt or lower anchors thread through the base. They’ll pull and push firmly side-to-side and front-to-back.
A properly secured convenience base should not move more than 25 mm (1 in.) from side-to-side or front-to-back at the lower anchor connector assembly/vehicle belt path. Evenflo SafeMax Car Seat Base User Manual
That 25 mm is the absolute ceiling. Less is better. They’re also checking that any built-in level or recline indicator is correct. For a rear-facing infant seat, the base must often be reclined to a specific angle, marked by a colored indicator line sitting in a blue or green zone.
| Checkpoint | Pass Condition | What Happens If It Fails |
|---|---|---|
| Movement at Belt Path | ≤ 25 mm (1 inch) side-to-side & front-to-back | Base is removed and reinstalled; technique is corrected. |
| Recline/Angle Indicator | Indicator line within correct colored zone (e.g., blue for infant) | Base is adjusted using vehicle seat contour or built-in adjuster. |
| ISOfix/LATCH Connectors | Audible “click” & visual indicator is green (not red/yellow) | Connectors are detached and re-engaged; vehicle anchor points are checked for debris. |
| Load Leg / Support Leg | Firmly contacting vehicle floor, indicator shows green | Leg is extended or retracted until contact is solid and indicator changes. |
| Expiration Date | Base is within manufacturer’s service life (e.g., 7-15 years) | Inspection stops; you cannot use an expired base. |
They’ll verify the LATCH system’s lower anchor weight limits if you’re using it. The rule is simple: stop using LATCH and switch to the seat belt once the combined weight of the child and the car seat exceeds 65 pounds. They’ll also ensure the tether is used for forward-facing seats, as it’s required by both seat and vehicle manufacturers.
Finally, they check the child’s fit in the seat installed on the base. The harness straps should be at or below the shoulders for rear-facing seats, and the chest clip should be at armpit level. This holistic approach is why a proper car seat safety inspection covers more than just the base.
The 25 mm Rule: Why That Specific Number?
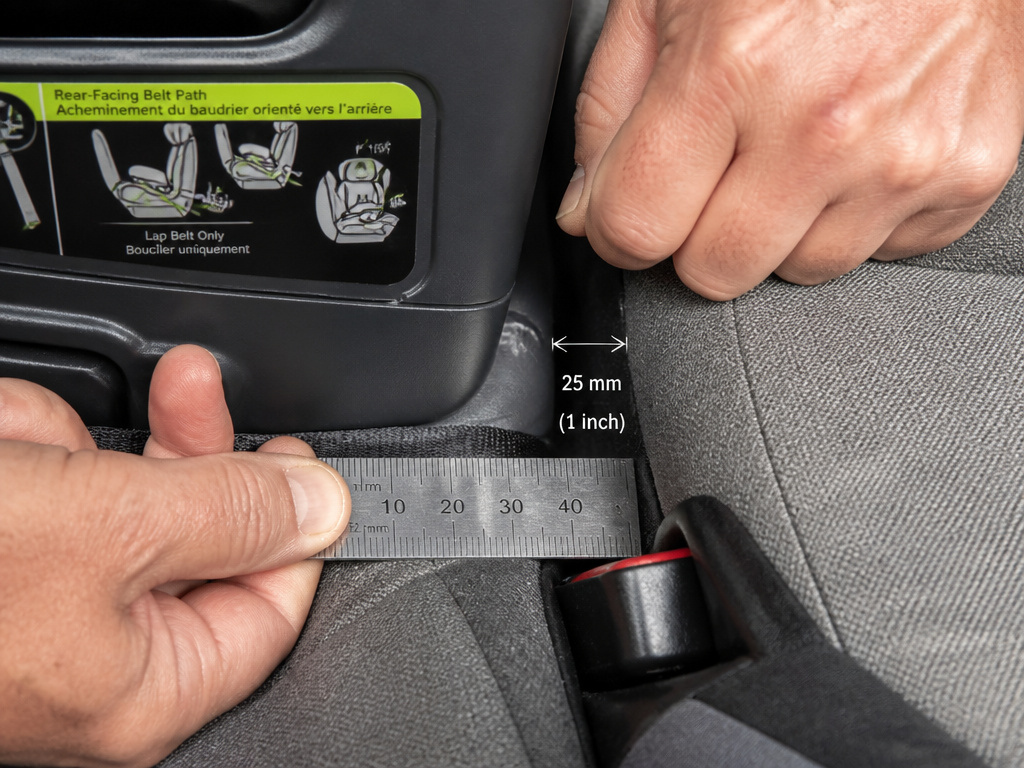 The one-inch movement limit isn’t arbitrary. In a crash, a car seat acts as a cocoon, managing crash forces around the child. The base is the foundation. If it can shift more than an inch under a technician’s firm hand, imagine the forces in a 30 mph collision.
The slack allows for rotation and jarring motion, increasing the risk of the seat impacting the vehicle’s interior or the child’s body moving beyond the harness’s protective geometry. The 25 mm standard, endorsed by the NHTSA car seat installation guide, is the engineering tolerance for that system to work as designed.
This is where DIY checks often fall short. You might push on the seat back and think it’s solid, but the test is at the belt path. You also need to use your full body weight, leaning into the seat. Most parents don’t press hard enough, fearing they’ll break something. A technician will.
How to Check a Car Seat Base Yourself First
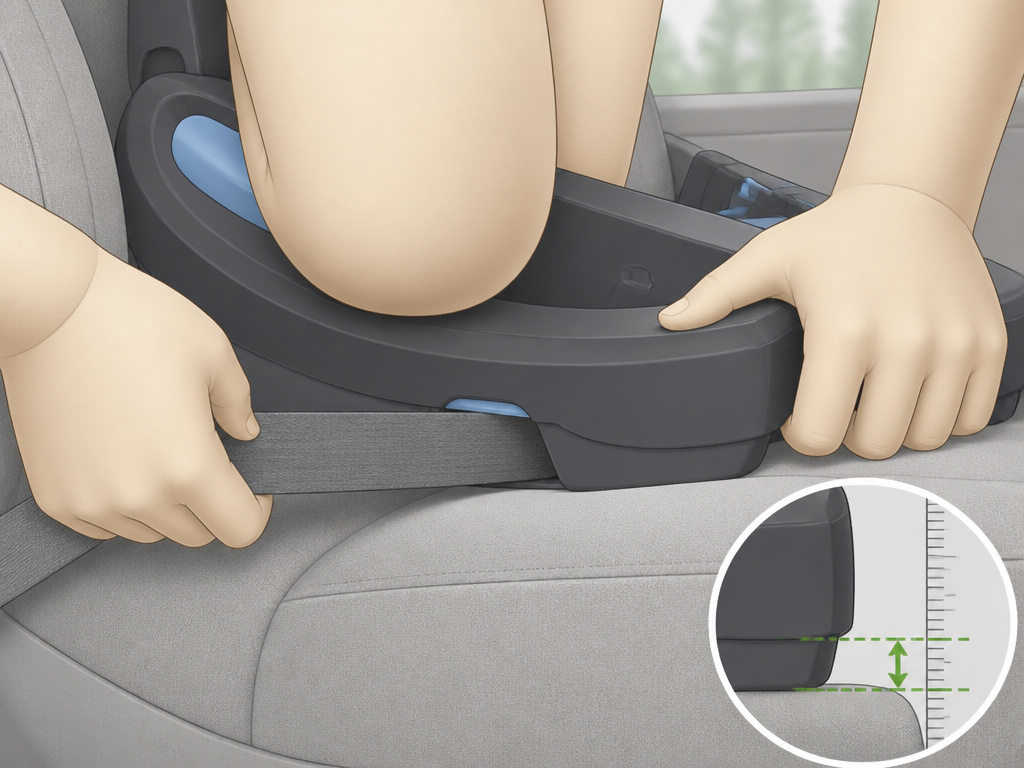 You should still know what to look for before you go. It makes you a better participant and catches obvious issues.
First, find the belt path on your base. For seat belt installations, it’s where the belt routes through. For LATCH/ISOfix, it’s where the lower anchor connectors click into the vehicle’s bars. Grab the base there and pull hard side-to-side, then front-to-back. Use your knee to press the base deep into the vehicle seat cushion while you pull. If it shifts more than an inch, it’s not tight enough.
Second, check every visual indicator. – ISOfix/LATCH Connectors: They should show solid green. Any sliver of red or yellow means it’s not fully latched. – Load Leg/Support Leg: It must touch the vehicle floor firmly. The indicator on the leg itself should be green. – Recline Indicator: The bubble or line must be within the correct zone. For a newborn, this is usually the more reclined blue zone on seats like the Evenflo SafeMax.
Third, consult both manuals. Your vehicle’s manual will specify which seating positions allow LATCH installation and if there are any oddities with the seat belt retractors. Your car seat manual has the final say on approved recline angles and weight limits. Skipping this step is the number one reason for installation failure at a professional car seat inspection.
What a Free Check Won’t Cover
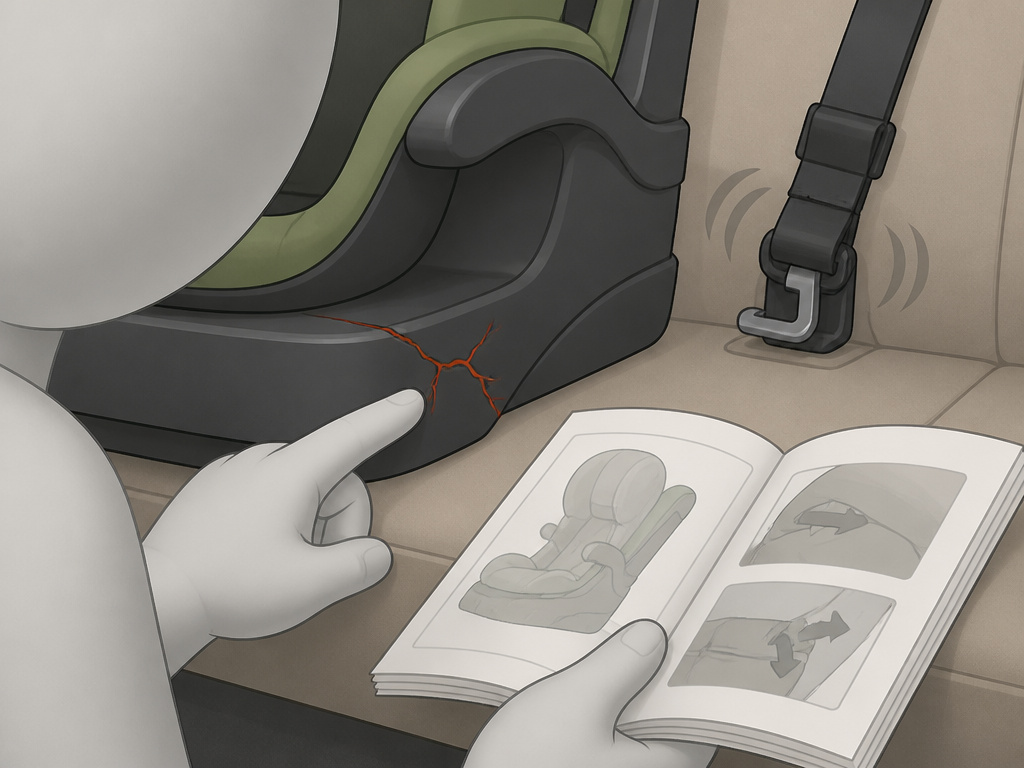 A technician’s primary goal is to ensure the seat is installed correctly per manufacturer and federal standards. They are not mechanics.
They won’t diagnose why your vehicle’s LATCH anchors are loose—that’s a job for your dealership. They won’t repair a cracked base or replace missing parts. They also can’t force you to replace a seat that is expired or has been in a moderate to severe crash, but they will tell you the manufacturer’s policy. For example, the BeSafe Beyond Base manual states it must be replaced after any collision at 10 km/h (about 6 mph) or above.
They also won’t install it for you. Their job is to educate and verify. You will do the final tightening under their guidance. This hands-on practice is the real value—you learn how to get it right every time.
When You Might Need More Than a Free Check
The free system works for standard passenger vehicles. It hits limits with unconventional situations.
Older cars without LATCH, taxis, ride-shares, and airplanes present unique challenges. For aircraft, the FAA requires the seat to be installed in a forward-facing passenger seat using the airplane’s lap belt. Most infant seats are not certified for airline use, and their bases never are. You’ll need to check your specific seat’s manual, like the Evenflo SafeMax manual which shows how to install the carrier directly with the aircraft belt.
If you’re using a seat in a pickup truck with no back seat, or in a vehicle with advanced airbags, the technician will reference your vehicle manual first. Many modern cars have sensors that automatically disable the passenger airbag, but not all car seat manufacturers allow their use in the front seat. This is a hard stop. If the manuals conflict, the answer is no.
For these complex cases, the certified child passenger safety technician is your best resource, but the solution may involve buying a different seat or using a different vehicle.
Frequently Asked Questions
Is it really free, or are there hidden costs?
The inspection service itself is free. Some stations may ask for a voluntary donation, but you are not required to pay. The only potential cost is if they identify an expired, recalled, or incompatible seat, and you need to purchase a new one.
How long does a car seat check take?
Plan for at least 20 to 30 minutes. A thorough inspection isn’t rushed. It includes checking the seat, the base, the vehicle, the child’s fit, and educating you on the process.
Can I just go to any fire station?
Not all fire stations have a certified technician on duty at all times. Always call ahead to confirm they offer car seat checks and schedule an appointment. Asking for a CPST by title ensures you get the right person.
What should I bring to the appointment?
Bring your car seat base, the infant carrier, the car seat manual, your vehicle’s owner’s manual, and, if possible, the child who will be using it. Having the child there ensures a perfect harness fit check.
What if my car seat base fails the check?
The technician will work with you to fix it. They’ll uninstall it, show you the mistake (often a twisted belt or an unlocked LATCH connector), and guide you through reinstalling it correctly until it passes the 25 mm test. It’s a learning session, not a failure.
Before You Go
A free check is the smartest first step after installing any car seat base. It gives you confidence that the 25 mm rule is met and all the indicators are green. But the real lesson is in the manual—yours, for your specific seat model. The Mass.gov car seat inspection FAQ echoes this: the seat should not move more than one inch where it is belted. That number is your benchmark. Use it, and you’ll know the base is secure before you even drive to the inspection station.
