
How to Get Baby to Like Car Seat: The Essential Methods
This post contains affiliate links. As an Amazon Associate, we earn from qualifying purchases.
Get a baby to like their car seat by fixing the harness first, not by adding toys or music. A loose or high harness strap pushes into their neck and shoulders, creating a feeling of confinement that no distraction can override. Start with a week of daily five-minute indoor sessions with the seat unbuckled, then graduate to buckled, stationary car time before ever turning the engine on.
That gap between a snug, safe fit and a comfortable one is where most resistance starts. A harness that’s too high digs. A buckle that’s too low pinches. The seat’s own recline angle can tilt a baby’s head forward, blocking their airway and triggering a panic reflex they can’t articulate. You’re not dealing with a preference. You’re troubleshooting a physical interface.
What follows: the harness adjustment specs most manuals bury, the one-week indoor training sequence that changes everything, and the two environmental fixes (sound and temperature) that work only after the physical fit is solved.
Key Takeaways
- Check harness strap height first. For rear-facing seats, the straps must be at or just below the shoulders. A strap above the shoulders forces the child’s weight onto the narrowest part of the strap, creating a pressure point that feels like a constant pinch.
- Start training indoors for one week. Place the car seat in the living room for five minutes daily, unbuckled. Let your baby explore it. On day four, buckle them in for two minutes while you sit right there. This builds a neutral-to-positive memory before the car’s motion and isolation are added.
- Rule out overheating before you rule out hatred. A car seat’s deep bucket and padded inserts trap body heat. Feel the back of your baby’s neck after ten minutes in the seat. If it’s damp or hot, they’re not fussy—they’re cooking. Remove the infant insert as soon as their shoulders no longer fit comfortably, per the Joie i-Snug 2 manual.
- The sound of the car is part of the solution, not a problem. Continuous road noise at 60-70 decibels is a natural white noise machine. If you drive in silence, you’re missing a powerful sleep cue. Use a portable white noise player only if your car is unusually quiet.
- Never use aftermarket inserts, head supports, or strap covers not approved by your seat’s manufacturer. The Chicco OneFit LX manual explicitly warns against this. These items change the harness geometry and can create dangerous slack in a crash, but they also make the immediate fit uncomfortable for daily use.
Why Babies Resist: It’s Usually a Fit Problem
You strap them in, and the protest starts. It’s easy to call this a behavioral issue. Look at the harness first.
A rear-facing harness should be threaded through slots at or just below the child’s shoulders. If the slots are above, the strap angles down across their collarbone. In a crash, this position is safer for keeping the child contained. In daily use, it directs all the strap’s pressure onto a two-inch band of muscle and bone. The child feels pinned, not held.
Common mistake: Using the infant insert past its size limit. The foam wedge is for newborns who need the curved support. By the time a baby’s shoulders press against the sides, the insert forces their spine into an unnatural C-curve and overheats them.
The UPPAbaby MESA V2 Infant Insert is designed for children 4–11 lbs. The Joie i-Snug 2 manual says to remove the body portion when the infant’s shoulders no longer fit comfortably. That’s not a vague suggestion—it’s a comfort threshold. A baby swimming in space is insecure. A baby crammed into a too-small insert is in pain.
Check the crotch buckle position. As your baby grows, the buckle tongue should move outward to the next slot. A buckle too close to the body forces the harness straps to pull inward, tightening across the thighs and hips. You’ll see red marks within twenty minutes.
Harness Fit: The #1 Physical Discomfort
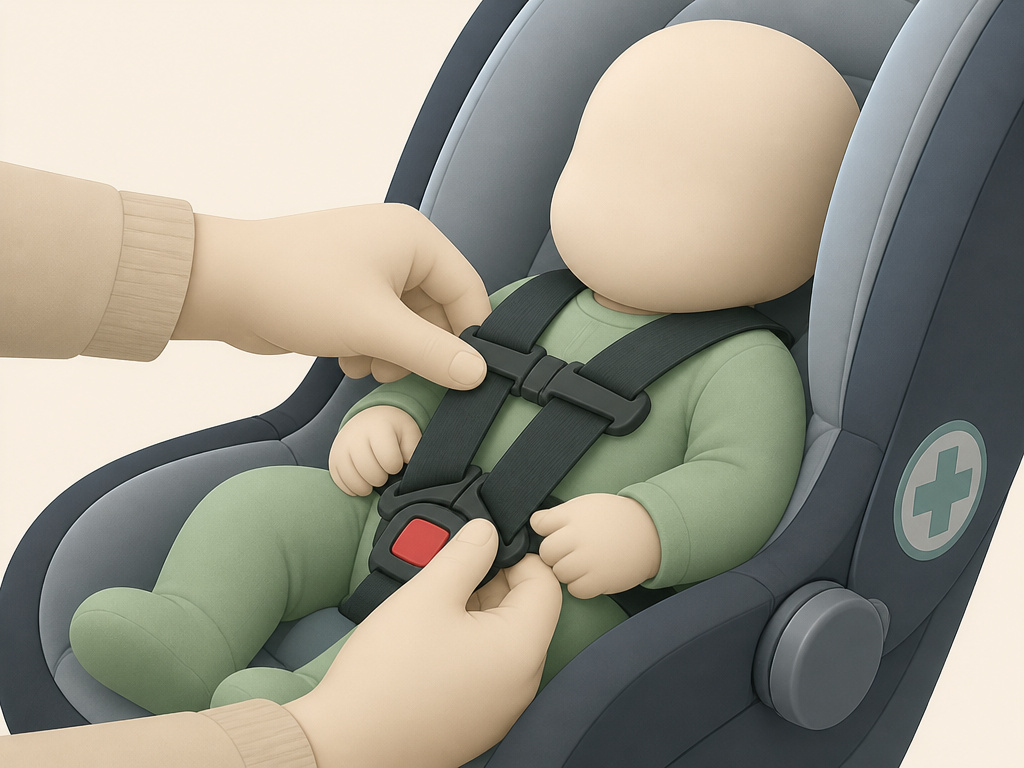
The harness should be snug enough that you cannot pinch any horizontal slack in the strap at the child’s shoulder. The “pinch test” is the safety standard. The comfort standard is subtler: the straps should lie flat and straight without twisting.
A twisted strap digs its edge into the skin. It also doesn’t retract evenly, leaving one side tighter than the other. Before each ride, run your fingers down each strap from buckle to back. A single twist can turn a ten-minute drive into a meltdown.
Here is the adjustment sequence that works, drawn from the step-by-step diagrams in the Maxi-Cosi Pria manual:
| Step | Action | Comfort Check |
|---|---|---|
| 1. Height | Set harness slots at or below shoulders (rear-facing). | Slots more than 1/2″ above shoulders will cause neck pressure. |
| 2. Buckle | Move crotch buckle to furthest position that still allows secure latch. | Buckle should not press into baby’s thighs when buckled. |
| 3. Tightness | Buckle, pull harness adjuster strap until snug, then perform pinch test. | You should not be able to pinch horizontal slack. |
| 4. Chest Clip | Position clip at armpit level. | Clip too low allows straps to slip off shoulders; too high risks neck injury. |
If the harness is correct and crying persists, the problem is almost never the harness. It’s the next layer: timing and environment.
The First 48 Hours: Timing Is Everything
Your baby’s first experiences with the car seat set the pattern. If the first three trips are to the pediatrician for shots, you’ve paired the seat with discomfort and strange smells. You need to break that chain.
Start with the car seat inside your home. Unbuckle it. Let it become part of the landscape for a few days. Then, follow this one-week schedule:
- Days 1-3: Place the seat in the living room during playtime. Let your baby touch it, put toys in it, sit in it (unbuckled) for a minute while you hold them. Zero pressure.
- Day 4: Buckle them in for two minutes while you sit on the floor facing them, talking or reading. Unbuckle before any fussing starts. You’re building a positive, controlled association.
- Day 5-6: Move the seat to the stationary car. Buckle them in for five minutes while you sit in the back seat with the doors open. Still no engine.
- Day 7: Start the engine. Sit in the back with them for a five-minute drive around the block. Your presence is the anchor.
This gradual car seat training method feels slow. It rebuilds the experience from the ground up, separating the confinement from the motion and the isolation. Most parents skip straight to the drive. That’s like taking a child who’s afraid of water straight to the deep end of the pool.
Where this goes sideways: Starting a long road trip as the first positive experience. The extended confinement with no escape confirms every fear. Break the trip into 20-minute segments with breaks for holding and feeding outside the seat, even if it adds an hour to your travel time.
Sensory Solutions: Sound, Sight, and Temperature
Once the fit is right and the timing is gradual, you can layer in sensory help. These are supports, not fixes. A perfect harness is the fix.
Sound: The car’s own road noise is a rhythmic, monotonous sound that triggers a calming reflex. If your car is a quiet electric model, you might need to add white noise. A portable machine is safer than a phone app that requires a data connection. The sound should be continuous and not too loud—about the volume of a shower.
Sight: For rear-facing babies, their view is the back of the seat and the ceiling. This is visually sterile. A soft, high-contrast mirror approved for car seat use (like the Britax See-Safe) lets them see your face. It also lets you see them without twisting. The mirror must be securely attached to the vehicle headrest, not the car seat itself.
Temperature: This is the silent agitator. Car seat foam and fabric are insulators. On a 72°F day, the seat’s microclimate can reach 85°F within fifteen minutes. Feel the back of the neck and upper back. If it’s sweaty, they’re overheated. * Dress the baby in thin, breathable layers. * Use a sunshade on the window. * Cool the car before placing them inside. * Remove bulky coats before buckling. A puffy coat compresses in a crash, creating deadly harness slack, but it also makes them hot and restricted immediately.
These practical calming strategies work because they address the environment your baby actually experiences, not the one you assume is fine.
What Not to Do: Products That Backfire
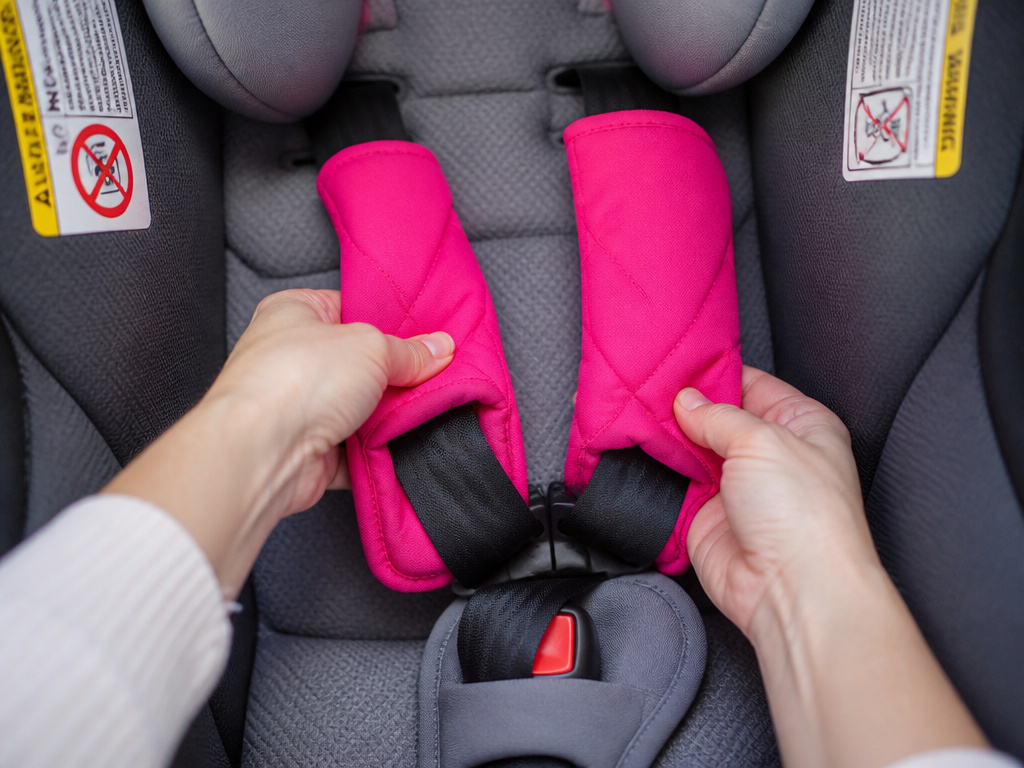 The market is full of gadgets promising car seat peace. Almost all of them either compromise safety or fail to address the root cause.
Aftermarket Head Supports & Strap Covers: These change the harness routing and can hide dangerous slack. The Chicco OneFit LX manual explicitly states: “Do not use accessories, pads, or products not included or approved by Chicco USA.” Beyond safety, they often make the fit worse by pushing the child’s head forward or making the straps too bulky to tighten evenly.
Toys That Attach to the Handle: A dangling toy is a distraction for a mildly fussy baby. For a baby in true distress, it’s a frustrating object they can’t reach or control. It also becomes a projectile in a sudden stop.
Rolling Down Windows for “Fresh Air”: The blast of wind and noise can be overwhelming, not calming. It also drowns out your voice if you’re trying to talk to them.
The only add-ons worth considering are those that solve a verified sensory issue: a mirror for visual connection, a portable white noise machine for a too-quiet car, or a seat protector approved by your car seat manufacturer to protect your vehicle upholstery. Everything else is clutter.
When to Seek Help: Medical and Professional Checks
 If you’ve corrected the harness, followed a gradual training schedule, managed the sensory environment, and your baby still screams until they vomit, look deeper. This level of distress can signal a physical problem the seat is exacerbating.
Reflux: A semi-reclined car seat position can allow stomach acid to creep up. If crying starts within minutes of being placed in the seat and is accompanied by spit-up or swallowing motions, talk to your pediatrician. They may recommend a smaller feed before travel or a trial of medication.
Torticollis or Muscle Imbalance: A baby with a neck preference might find the symmetrical head support of a car seat painful. They constantly fight to turn their head to the preferred side and can’t. A pediatric physical therapist can diagnose this and give you stretches to do.
True Motion Sickness: This is rare in infants but can appear in older babies. Symptoms include pale skin, excessive drooling, and vomiting that occurs after motion starts, not before. If you suspect this, focus on cooler air flow on the face and try to time drives after naps, not before.
For installation checks, find a certified Child Passenger Safety Technician (CPST). The Chicco manual directs you to visit safercar.gov and select “Find Local Child Seat Help” or call 1-866-SEAT-CHECK. A CPST can verify your harness adjustments and installation angle—sometimes the seat’s recline is off by a few degrees, causing discomfort.
Frequently Asked Questions
How long does it take for a baby to get used to a car seat?
Most babies show significant improvement within two weeks of starting a gradual, positive association plan that includes indoor practice. If you only use the seat for necessary trips, the adjustment can take months because every experience is stressful. Consistency in short, positive sessions matters more than total time.
Is it okay to let a baby cry in the car seat?
For safety, you cannot pull over every time crying starts. For short periods, yes, you may need to continue driving while they cry. For prolonged, intense screaming that suggests distress beyond frustration, you should pull over at the first safe opportunity to check for a physical cause like a twisted harness, overheating, or a need to burp. The debate on letting baby cry in car seat hinges on balancing safety and emotional well-being.
My baby falls asleep in the car seat but cries when awake. Why?
This is a classic sign the issue is boredom or feeling confined, not pain or fear. The motion lulls them to sleep, but when awake, the lack of engagement and restricted movement frustrates them. This is where a mirror for visual contact and your voice become key tools.
Can I use a car seat outside the car to help my baby like it?
Yes, but only for very short, supervised periods when the seat is on a flat, stable floor indoors. Never use it as a replacement crib, bouncer, or high chair for sleeping or feeding. The semi-reclined position is not safe for unsupervised sleep due to the risk of positional asphyxia.
Do some car seats are more comfortable than others?
Yes, but comfort is subjective and fit-specific. A seat with multiple recline positions, like the Chicco OneFit LX, can better accommodate a child’s preferred angle. Seats with softer, breathable harness pads (like those on the UPPAbaby MESA V2) can reduce strap pressure. However, the most expensive seat will still be hated if the harness is adjusted incorrectly for your child’s body. Focus on fit over features.
Before You Go
Getting a baby to like their car seat is a process of elimination. Start with the harness height and tightness—the physical interface. Then control the first experiences with short, positive sessions at home. Finally, manage the sensory environment: sound, sight, and temperature.
The goal isn’t just a quiet car ride. It’s a child who feels secure and comfortable in the device that keeps them safest. That security makes every trip easier, from the school run to the cross-country vacation. Skip the gadgets. Master the basics. The rest follows.
