
A Parent’s Guide on How to Carry a Car Seat in the Airport
This post contains affiliate links. As an Amazon Associate, we earn from qualifying purchases.
To carry a car seat in an airport, you have three choices: check it with luggage, carry it on the plane, or gate-check it at the jet bridge. The safest and most efficient method for most parents is to use a dedicated car seat travel bag with backpack straps, carry the seat through security, and gate-check it. This protects the seat from baggage handling damage and keeps your hands free for your child and other carry-ons.
That gate-check clause is where the entire airport experience pivots. It’s the difference between wrestling a bulky seat down the jet bridge while holding a toddler and handing it to an agent at the plane door, untouched by the main baggage system. The seat goes from the jet bridge to the plane’s cargo hold and back to you on arrival, skipping the carousel.
What follows: the physical mechanics of four carrying methods, the exact security checkpoint procedure that tripped up a passenger in 2026, and the decision tree that tells you when to check, carry, or gate-check based on your seat type and flight details.
Key Takeaways
- A 2026 TSA incident at Bozeman Airport involved a knife concealed in a booster seat, proving security agents will inspect car seats thoroughly. Never pack prohibited items in or near the seat.
- For hands-free mobility, a car seat backpack is superior to a hand-carry bag or a luggage dolly for most lightweight seats like the Cosco Scenera.
- Gate-checking is almost always better than standard baggage check. The seat travels a shorter distance on specialized carts, reducing the risk of structural damage from conveyor belts.
- If you plan to use the seat on the plane, it must be FAA-approved and you must purchase a separate ticket for the child. Airlines will not allow installation in an exit row.
- Renting a seat from your car rental company is a gamble. As one parent reported after 30 flights, they once received only a booster seat for a 3-year-old, which is not a safe restraint for a child that age.
The 2026 TSA Incident That Rewrote the Rules
Forget generic advice about keeping your car seat clean. In July 2026, the Transportation Security Administration documented a case at Bozeman Yellowstone International Airport where a passenger attempted to carry a multitool knife onto a plane by taping it to a child’s booster seat. The TSA’s public statement was blunt: “If your packing strategy involves tape and a hiding spot… It’s probably not coming through the checkpoint.”
Where this goes sideways: Using a car seat to conceal any item. Security officers are trained to inspect child seats thoroughly, and any attached or hidden object will be treated as an attempt to bypass screening. The delay lasts at least 30 minutes, and you risk missing your flight.
This changes the calculus. Your car seat isn’t just baby gear at security; it’s an object of heightened scrutiny. The standard procedure is to send the seat through the X-ray belt separately, just like a laptop. If it’s too large for the tunnel, a TSA officer will physically inspect it. Having it easily accessible in a simple travel bag, not buried under layers of padding and extra luggage, makes this process faster and raises fewer flags.
The underlying mechanism is security theater with a real consequence. Anomalies in an X-ray image, like the dense plastic and metal of a car seat, can obscure other items. Officers must resolve every ambiguity, which means hands-on inspection. Adding more material around the seat, or worse, attaching foreign objects, guarantees a manual check.
Check It, Carry It, or Gate-Check It? The Decision Tree
Your first and most important choice isn’t how to carry the seat, but where it travels. This decision dictates everything that happens in the terminal. The wrong pick here costs you time, money, or safety.
| Method | Best For | Risk If You Choose Wrong |
|---|---|---|
| Standard Check | Heavy, bulky convertible seats; long layovers | Baggage system conveyor belts can crack plastic shells. The seat may arrive at the final baggage carousel, not the gate. |
| Carry-On | Lightweight, FAA-approved seats (Cosco Scenera) | The seat must fit in the overhead bin; flight attendants can refuse it if the bin is full. You must have purchased a seat for your child. |
| Gate-Check | Virtually all car seats and strollers | The seat is handled by airline personnel at the jet bridge and returned plane-side at your destination. Minimal conveyor exposure. |
Gate-checking is the default winner for most travel scenarios. It removes the seat from your hands at the last possible moment and returns it first. You avoid the baggage fee most airlines charge for a standard-checked car seat. The process is simple: ask for a gate-check tag at the check-in counter or the gate, attach it to your seat, and leave it in the designated area at the jet bridge entrance.
The carry-on path has one non-negotiable requirement: the seat must have a label stating it is FAA-approved for aircraft use. You cannot install it in an exit row or a seat that blocks another passenger’s egress. If you haven’t bought a ticket for your child, the airline will not allow you to use the seat in an empty seat, you’ll be forced to gate-check it at the last second.
TSA official travel regulations are clear that strollers and car seats can undergo screening separately from other luggage. Knowing this procedure ahead of time prevents bottlenecking at the checkpoint.
Standard checking should be your last resort. It subjects the seat to the same mechanical stresses as your suitcase. If you must check it, using a padded car seat travel bag is non-negotiable. Not just for cleanliness, but because the bag absorbs impacts that would otherwise transfer directly to the seat’s plastic frame.
The 4 Tools That Replace a $200 Service Visit
You don’t need expensive specialty gear. You need the right combination of cheap, durable tools that turn a car seat from a burden into manageable luggage. The goal is free hands.
-
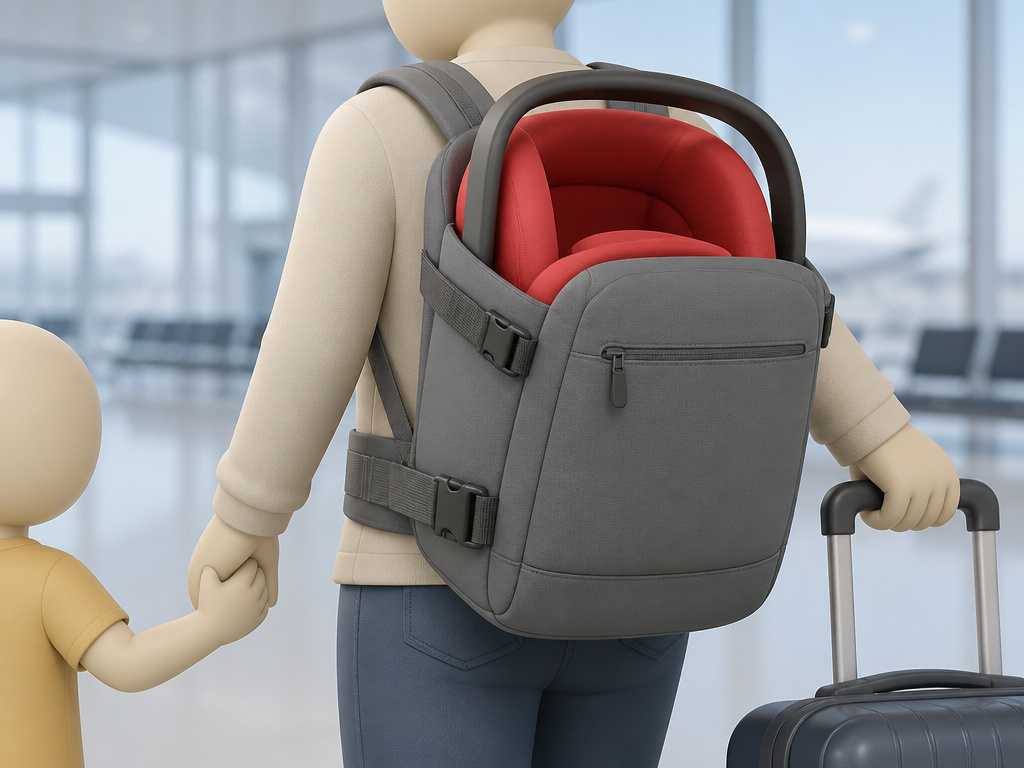
The Car Seat Backpack ($20–$40). This is a simple nylon bag with two padded shoulder straps. You slide the seat in, clip the straps, and wear it like a backpack. It’s the best solution for lightweight seats like the Cosco Scenera or Finale. Your hands remain free for a child, a boarding pass, or a suitcase handle.
- Consequence if skipped: You are left carrying a wide, awkward object in your arms or balanced on a suitcase. After 300 yards in a terminal, your lower back will ache.
-
The Luggage Dolly ($30). A compact, foldable dolly with an extendable handle and stretch straps. You strap the car seat to it vertically and pull it like a wheeled suitcase. It excels for heavier convertible seats.
- Consequence if skipped: Attempting to carry a 25-pound seat any distance will exhaust you before you reach security. The dolly transfers the weight to the ground.
-
The Padded Travel Bag ($25–$60). This is mandatory if you are checking the seat. Look for a bag with at least 0.5cm of foam padding, full-length zippers, and carrying handles. Some double as backpacks.
- Consequence if skipped: Checking an unprotected seat guarantees scuffs, tears, and potential structural damage from baggage handlers. Airlines may deny damage claims if the seat wasn’t in a protective bag.
-
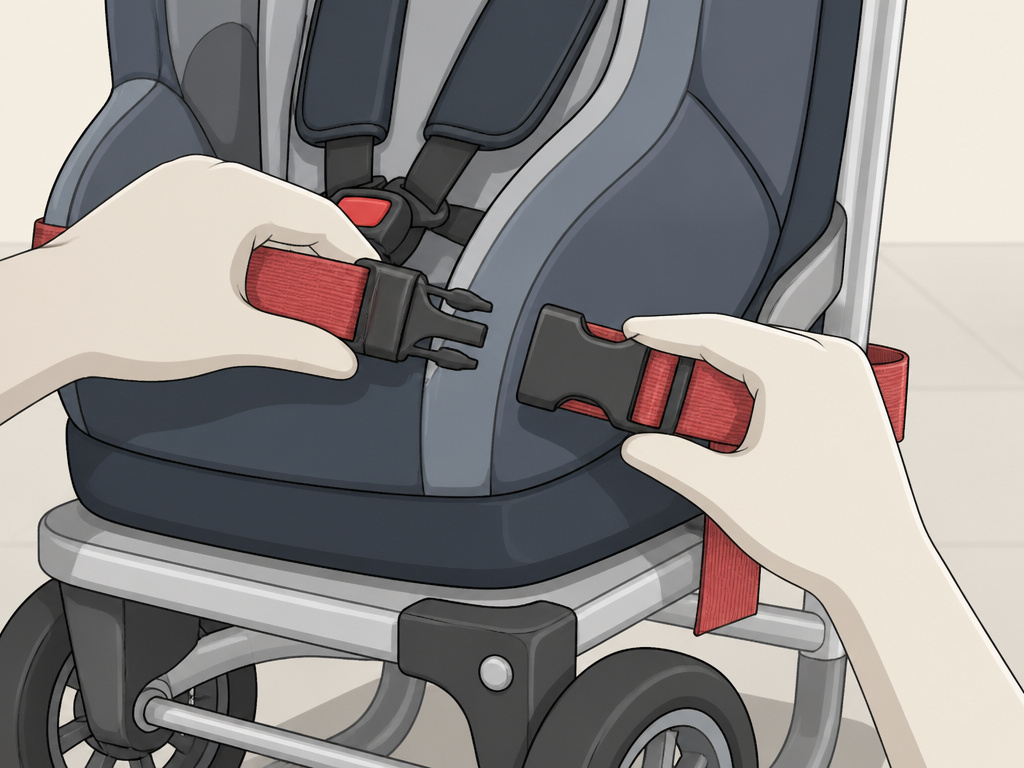
Heavy-Duty Packing Straps ($10). A pair of 1-inch wide nylon straps with quick-release buckles. These are for securing a seat to a luggage dolly or to the top of a rolling suitcase.
- Consequence if skipped: Relying on bungee cords or flimsy luggage straps. The seat will shift and slip, often crashing to the floor mid-sprint to a connecting gate.
The backpack-dolly combination covers 95% of scenarios. Put the seat in the backpack for the long terminal walk. At the gate, transfer it to the dolly if you need to gate-check it, keeping the bag on for protection. This two-tool system costs less than $70 and pays for itself on the first trip by eliminating the need for a porter or a last-minute rental cart.
Hands-Free Carrying Methods: Backpack vs. Dolly vs. Roller Bag
Once you’ve decided on gate-checking, you must physically move the seat from curbside to gate. This is a question of physics, not preference. Each method has a specific use case where it wins.
The Backpack Method wins for solo parents with a lightweight seat. The Cosco Scenera weighs under 10 pounds. In a backpack, it becomes an extension of your body, leaving both hands free to hold a child’s hand or manage a rolling suitcase. The weight distribution across both shoulders prevents fatigue. The limitation is bulk, the seat still protrudes from your back, so be mindful of turning in crowded spaces.
The Dolly Method wins for heavy seats or two-seat scenarios. A typical convertible seat can weigh 25 pounds. Strapping it to a dolly converts it into wheeled luggage. For parents traveling with two seats, a dolly lets you stack and strap them together. The downside is you lose one hand to pulling the dolly, and it’s an extra item to collapse and store if you bring it on the plane.
The Dedicated Roller Bag is a niche pick. These are travel bags with built-in wheels, like luggage. They offer maximum protection but are often heavier and more expensive than the backpack+dolly combo. They make sense if you always check your seat and want a single, sturdy container.
Hand-Carrying (No Bag) is the last resort. It seems simple, just carry the seat. After five minutes, the hard plastic edges dig into your forearm, and the wide profile makes navigating crowds frustrating. You have only one hand free. This method consistently leads to parents abandoning the seat on a terminal floor to regroup.
I won’t recommend the dedicated roller bag for most families. The extra weight and cost aren’t justified when a simple backpack bag provides adequate protection for gate-checking. Save the roller bag for families who frequently check bulky seats on long-haul international flights.
The verdict? Buy a convertible travel bag that works as both a backpack and has straps for a dolly. The J.L. Childress Ultimate Car Seat Travel Bag is one example. This gives you the flexibility to switch tactics based on airport layout and your energy level.
The Security Checkpoint Shuffle: A Step-by-Step Guide
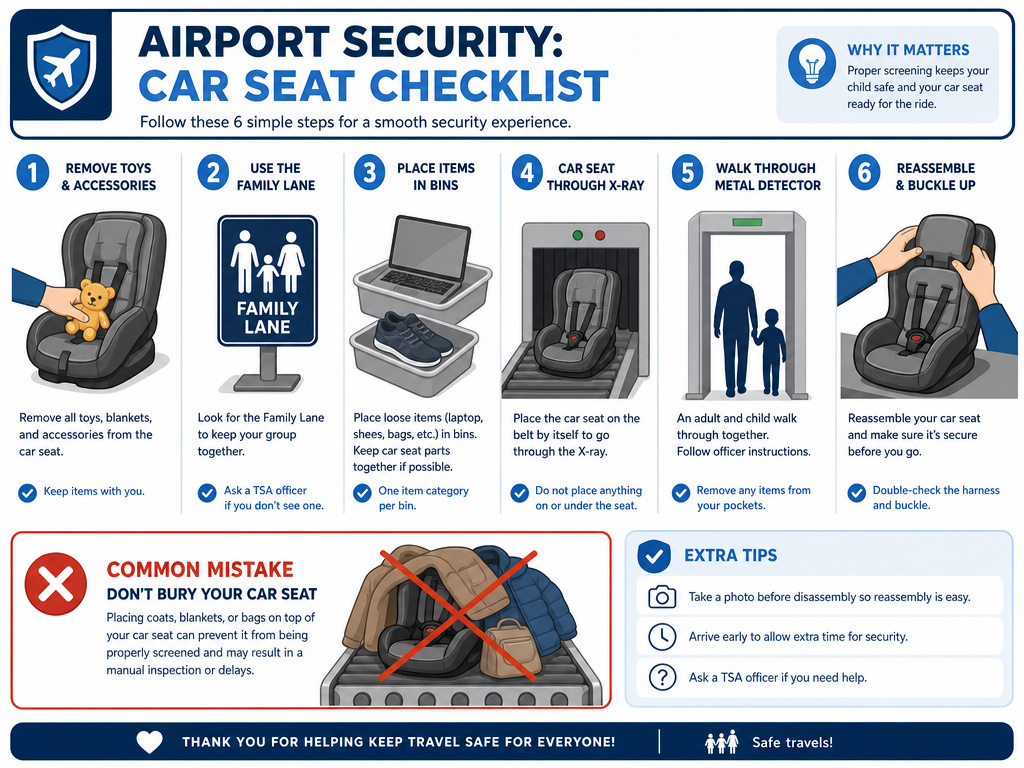
Security is the highest-friction point in your journey. The process is logical, but doing it while managing a child requires a rehearsed sequence. Here is the exact order that minimizes stress.
- Empty the Seat. At home, remove all cupholders, toys, and loose fabric from the seat’s storage compartments. At the checkpoint, you shouldn’t need to detach anything.
- Use the Family Lane. Most major airports have designated lanes for families and travelers needing extra time. Find it.
- Prepare Your Bins. While waiting in line, place your laptops, liquids, and shoes into bins. Keep your child’s shoes on if they can walk through the metal detector.
- Send the Seat Through. Place the car seat directly on the X-ray belt. If it’s in a bag, you may be asked to remove it. Send the empty bag through separately.
- Navigate Your Group. You go through the metal detector/body scanner first, then your child, or vice-versa, depending on their age and ability. A TSA officer can assist.
- Collect and Reassemble. Retrieve your seat, bins, and bags from the belt output area. Move immediately to a bench or seating area to regroup. Do not block the belt exit.
The step everyone skips is Step 6: regrouping in a designated spot. Trying to put your shoes on, repack your laptop, and re-buckle your child into the seat while still in the traffic flow of the checkpoint guarantees lost items and frustration.
Common mistake: Sending the car seat through the X-ray buried under coats and bags. The X-ray image becomes a layered mess, forcing a manual inspection. Send the seat through alone, on its own stretch of belt.
If you are carrying a car seat on the plane, you will repeat a version of this drill at the gate for a visual inspection of the FAA approval label. Have the seat’s label visible and be ready to show the gate agent.
Renting vs. Bringing Your Own: The Safety Calculus
The allure of renting a seat at your destination is strong, one less thing to carry. The reality is a documented safety gamble. The business model of companies like Baby On Board International, which supplies seats to European car rental agencies, is logistics, not safety certification for each individual seat.
- Cleanliness is Unverifiable. You cannot know the cleaning protocol for a rented seat. Spills, bodily fluids, and crumbs can linger in harness straps and crevices.
- History is Unknown. Has the seat been in a crash? Was it checked as airline baggage and potentially damaged? Rental companies rarely track this.
- Fit is Not Guaranteed. As one parent on Reddit noted after 30 flights, a rental counter provided only a booster seat for their 3-year-old. A booster is not a safe, five-point-harness restraint for a toddler.
Bringing your own seat guarantees three things: you know its crash history, you know how to install it correctly, and it fits your child’s current height and weight. The hassle of transporting a car seat is the price of that certainty.
The exception is reputable, baby-geer rental services in your destination city that specialize in delivering clean, inspected, model-specific seats to your hotel. These are more expensive than car-rental counter seats but address the hygiene and history issues. For a one-week trip, the cost often approaches the price of a lightweight travel seat like the Cosco Finale, which you then own forever.
TL;DR: Rent only if you are traveling for a single day or if using a premium, baby-focused rental service. For any trip longer than a weekend, bring your own seat. The peace of mind outweighs the carrying burden.
Frequently Asked Questions
Can I use my car seat on the airplane?
Yes, if it is FAA-approved (look for a label on the seat stating it is certified for aircraft use) and you have purchased a separate ticket for your child. The seat must be installed in a window seat and cannot block any passenger’s path to the aisle.
Do I have to pay to check a car seat?
Most U.S. Airlines allow you to check one car seat and one stroller per child for free, in addition to your standard baggage allowance. This applies to both checking at the ticket counter and gate-checking. Always verify your specific airline’s baggage procedures before you fly.
What is the best lightweight car seat for air travel?
The Cosco Scenera Next is the consensus pick for infants and toddlers. It weighs about 9 pounds, is FAA-approved, and is inexpensive enough that you can buy it solely for travel. For older toddlers and preschoolers, the Cosco Finale is a similarly lightweight, FAA-approved combination harness-to-booster seat.
How do I protect my car seat when checking it?
Use a padded car seat travel bag. The padding absorbs impacts from conveyor belts and baggage carts. For extra protection, you can pack car seat accessories like the harness strap cushions inside the seat’s storage compartment to prevent them from being crushed.
Can I gate-check my car seat if it’s not in a bag?
Yes, airlines will gate-check a bare car seat. However, it will be handled by baggage personnel and placed in the cargo hold without any protection. The seat will get dirty and may sustain scratches or cracks. Using a bag, even a simple nylon one, is strongly recommended to keep it clean and intact.
The Bottom Line
Carrying a car seat through an airport is a test of logistics, not strength. Your primary goal is to choose gate-checking over standard checking, and your secondary goal is to keep your hands free with a backpack-style travel bag. The 2026 TSA incident is your reminder that security screening is a serious process, keep the seat clean and empty.
Buy a Cosco Scenera or Finale as a dedicated travel seat if you fly more than once a year. Invest in a J.L. Childress-style convertible backpack bag. Practice the security checkpoint sequence at home. This turns a chaotic ordeal into a manageable, repeatable routine. Your back, your time, and your child’s safety are worth the fifty-dollar investment in the right gear.
