
Car Seat Removal from Base: Quick Guide & Common Mistakes
This post contains affiliate links. As an Amazon Associate, we earn from qualifying purchases.
To remove a car seat from its base, you must locate and squeeze the release handle or button, then lift the seat straight up. The handle is almost always on the back of the car seat shell, near where it meets the vehicle seat. Pulling up without squeezing first can damage the locking mechanism and make the seat unsafe.
That single action—squeeze, then lift—is the core of every manual. The variation comes in the handle’s exact shape and what you do after the click.
What follows is the breakdown of that universal rule across major brands, the one mistake that jams the mechanism, and the specific steps for seats that double as strollers. By the end, you’ll be able to unclip any carrier in under ten seconds.
Key Takeaways
- The release handle is on the back of the car seat shell for Graco, Chicco, and most Evenflo models. Squeeze it firmly before lifting.
- Never pull up first. Forcing the seat strains the plastic latches inside the base. A damaged latch won’t hold in a crash.
- For convertible seats like the Evenflo Revolve 180, you must unlock the rotating tray before you can access the main release handle.
- The Doona car seat/stroller requires a specific tilt motion while holding the release button; lifting straight up won’t work.
- If the seat feels stuck, check for pinched fabric or harness straps caught in the latch path before applying more force.
The Universal Two-Step Removal Process
Every safe removal starts the same way. You need one free hand and a clear view of the car seat’s back.
To disconnect a car seat from its base, first squeeze the designated release handle or lever, then lift the infant carrier vertically away from the base. This two-step sequence protects the internal locking mechanisms from shear force and ensures the seat detaches cleanly.
First, find the handle. Run your hand along the back of the car seat shell, right where it curves down toward your vehicle’s seat cushion. You’re feeling for a molded plastic lever, a recessed button, or a textured grip area. It’s almost never on the sides or the front.
Second, squeeze and lift. Apply firm, steady pressure to the handle. You should hear or feel a distinct click. Then lift the seat straight up. The timing matters. Lifting while you squeeze is fine. Squeezing, pausing, and then lifting is also fine. Lifting before you squeeze is the problem.
That click is the sound of the locking bar retracting from the base’s catches. If you pull up without that retraction, you’re asking the plastic bar to bend or snap. It might work once or twice. By the third time, the latch won’t engage fully, and the seat will wobble on the base.
Model-Specific Release Locations
While the process is universal, the hardware differs. Knowing exactly where to press saves fumbling in a dark parking lot.
Graco Click Connect & SnugRide Models
For Graco, the rule is simple. The base release handle is a large, often green, lever centered on the back of the car seat. The Graco GoMax manual states: “From the back of the car seat, squeeze the release lever and lift the car seat out of the base.”
You wrap your fingers underneath it and pull toward you. It’s designed for a full-hand squeeze. Don’t just press the top with your thumb.
| Graco Model Series | Release Handle Location | Visual Cue |
|---|---|---|
| SnugRide SnugLock | Back center, near bottom | Large green plastic lever |
| SnugFit 35 LX | Back center, near bottom | Large green plastic lever |
| GoMax | Back center, near bottom | Textured grey lever |
Evenflo LITEMAX & REVOLVE 180
Evenflo uses two systems. For standard infant carriers like the LITEMAX, find the carrier release handle on the seat back. The Evenflo LITEMAX manual instructs: “squeeze the carrier release handle while lifting up the carrier from the base.”
The REVOLVE 180 is different. It has a rotating LockStrong™ tray. You must press a grey button on the side of the seat to unlock this tray before the main release handle is accessible. It’s an extra step that catches everyone the first time.
Doona Infant Car Seat/Stroller
The Doona is an integrated system. The Doona Base User Guide specifies: “Press and hold the base release button (#10) with one hand and slightly tilt the Doona Infant Car Seat toward your body until it is released.”
The release button is on the base itself, near the front. You don’t lift straight up. You press the button, tilt the top of the seat toward you, then lift. This disengages it from the base anchor points. Forgetting the tilt is why people think their Doona is stuck.
Chicco KeyFit Series
The Chicco KeyFit base uses a similar rear-handle system. While the specific manual link was unavailable, the design is consistent: a sizable release lever on the backshell of the carrier. The action is the same—squeeze toward you, then lift.
Common mistake: Pulling up on the carry handle to remove the seat. The carry handle is for carrying, not releasing. It puts all the stress on the wrong parts and can warp the seat’s connection points over time.
What to Do If Your Car Seat Feels Stuck
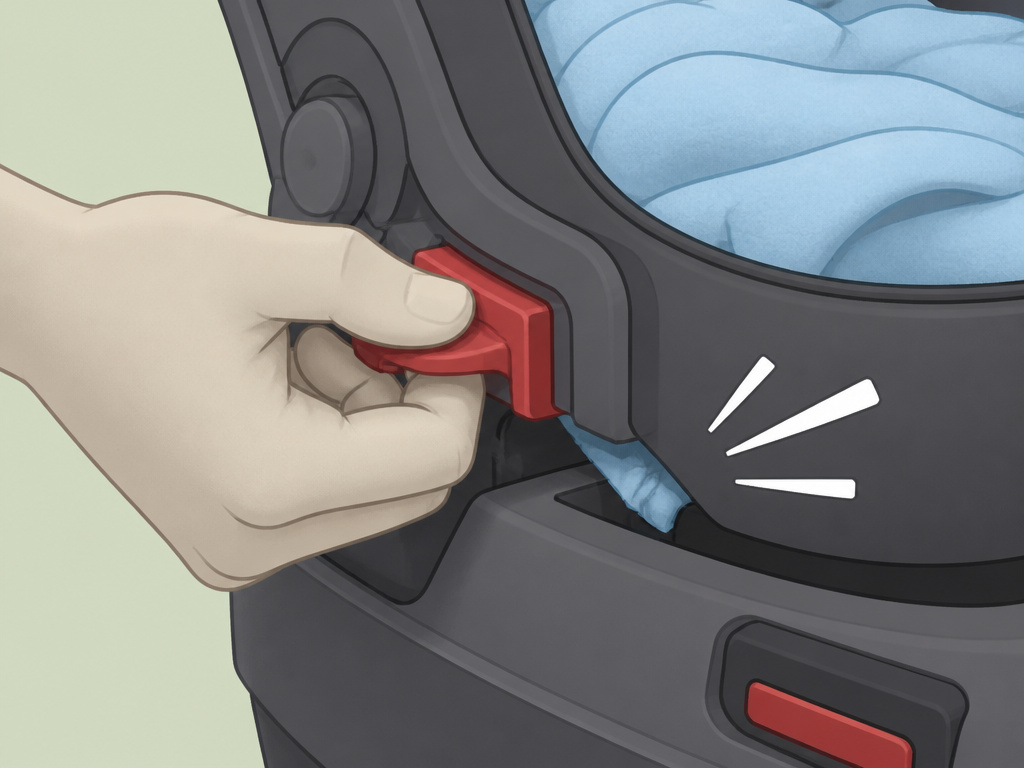
A seat that won’t budge usually has a simple fix. Do not yank it.
First, reassess your grip. Are you squeezing the correct handle with enough pressure? Sometimes a half-hearted press won’t fully retract the lock. Put your whole hand on it and squeeze firmly until you hear the click.
Second, check for obstructions. A loose baby blanket, the tail of the harness strap, or even the edge of the car seat canopy can get pinched in the latch path. Remove the child and any loose items. Look where the seat meets the base for any fabric caught in the gap.
Third, verify the base is installed tightly. A base that has shifted or loosened can misalign the locking bar. Push down on the base to ensure it’s not rocking. If the base is loose, the seat may bind when you try to lift it.
If it’s still stuck, contact the manufacturer. Forcing it is the one move that turns a simple jam into a broken part that requires replacement.
How to Remove the Base from Your Vehicle
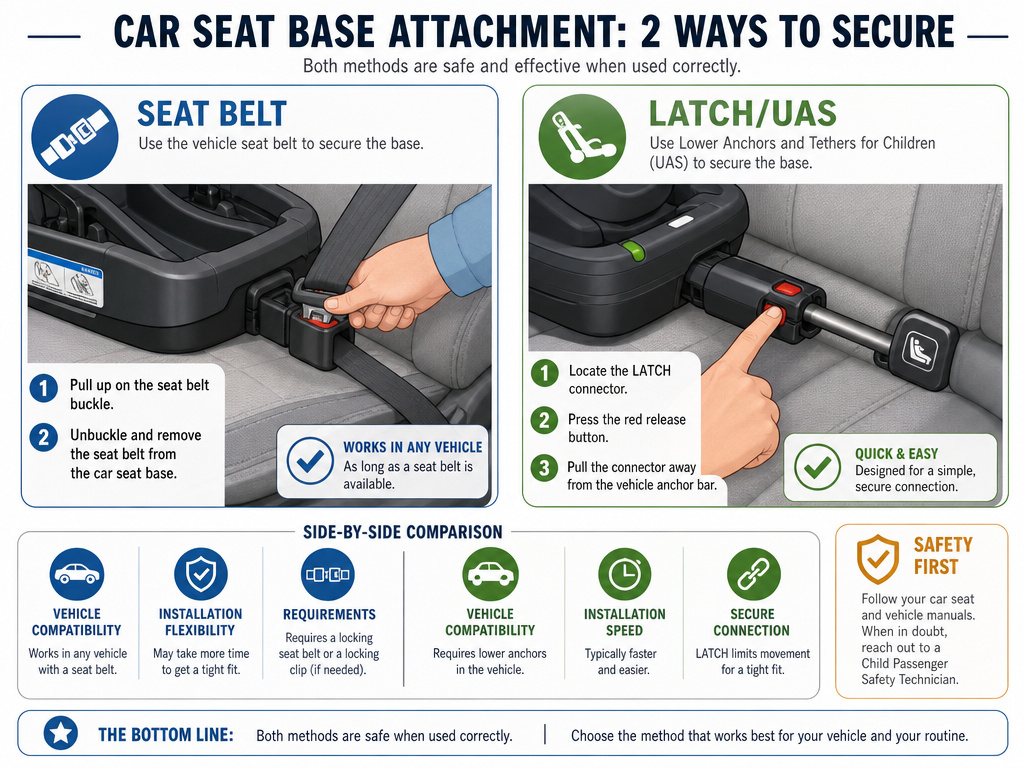
Once the carrier is out, you might need to remove the base itself. This is a separate procedure with its own rules.
There are two ways a base is secured: the vehicle seat belt or the LATCH/UAS system. You must unbuckle or detach both.
- For Seat Belt Installation: Simply unbuckle the vehicle seat belt and lift the base out. Ensure the seat belt retracts fully so it doesn’t get trapped under the base.
- For LATCH/UAS Installation: This requires pressing a release button on each connector. The Graco SnugRide manual shows to “press and hold the UAS release button” then pull the connector away from the vehicle anchor. Do one side at a time.
| Attachment Method | How to Release | Critical Check After |
|---|---|---|
| Vehicle Seat Belt | Unbuckle the belt. | Belt is not tangled or pinched under base. |
| LATCH / UAS Strap | Press red button on connector; pull from anchor. | Connectors are stored on base to prevent damage. |
Never leave the base loosely in the vehicle. An unsecured base becomes a projectile in a sudden stop. If you’re taking it out, store it securely. For more details on this process, see our guide on how to remove the base of a car seat.
Special Cases and Integrated Systems
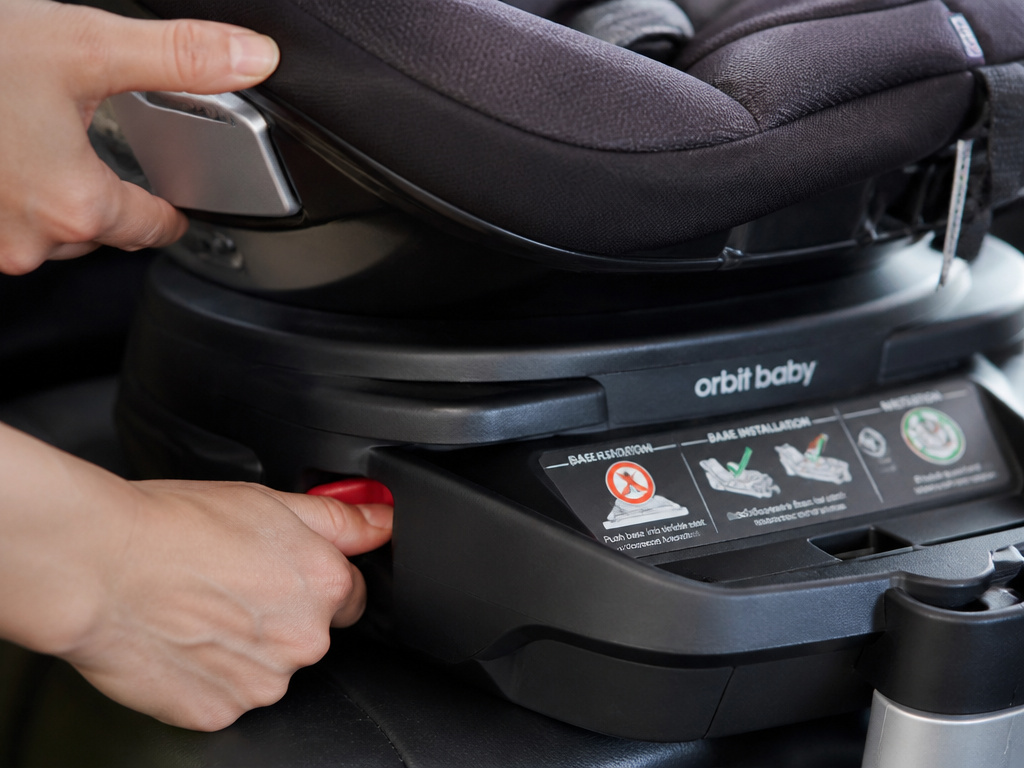
Some designs don’t follow the standard script. They have extra steps because they do extra jobs.
The Orbit Baby seat, for example, has release levers that allow you to rotate the seat before lifting. This is for easier child access. The manual notes you rotate “while still squeezing the release lever(s).”
The Doona, as covered, is the prime example of an integrated system. Removing it is the first step to transforming it into a stroller. After pressing the button and tilting the seat free, you then unfold the wheels and extend the handle. The removal is literally part of the stroller deployment sequence.
These cases highlight why you should always glance at your specific manual. A feature like rotation adds a step that, if missed, makes removal seem impossible.
Frequently Asked Questions
Why won’t my car seat release from the base?
The most common reason is not squeezing the release handle fully before lifting. Apply more pressure. The second reason is an obstruction like a blanket or strap. The third is a misaligned or loose base. Check these before applying excessive force.
Can I remove the car seat without using the release handle?
No. You should never remove a car seat from its base without activating the designated release mechanism. Bypassing it can break the locking components, compromising the seat’s security in the base. Always use the release lever as intended.
Is it safe to use the car seat without the base?
Yes, all infant car seats certified for use in the United States and Canada are also certified for baseless installation using the vehicle seat belt. This is standard for airplane travel. You must follow the manual’s instructions for seat belt routing and tightening precisely. For a full walkthrough, learn how to install a car seat without a base.
How do I detach a seat from an ISOFIX base?
ISOFIX is the international term for LATCH. The process is identical: find the release handle on the back of the car seat, squeeze it, and lift. The base itself is released from the ISOFIX anchors by pressing buttons on the connectors. For specifics, see our article on removing a seat from an ISOFIX base.
Do I always need to use the base?
No. The base is a convenience for quick in-and-out, but it’s not a safety requirement. The seat alone, installed correctly with the vehicle belt, is equally safe. Many parents choose to install without base in secondary vehicles or for travel. You can explore whether you need a car seat base for your situation.
Before You Go
Removing a car seat is a squeeze-and-lift motion. Find the handle on the back, press it until it clicks, then lift straight up. The brand changes the handle’s shape, not the fundamental rule.
Remember that the release mechanism is a safety-critical part. If it ever feels loose, sticks, or fails to click, stop using that seat and base until you can contact the manufacturer. A proper release mechanism should work smoothly every single time.
Your manual has the final say for your specific model. Keep it in the car until the motion becomes muscle memory. After that, you’ll be able to detach the infant seat in seconds, every time.
