
How to Carry Your Car Seat Through the Airport Stress-Free
This post contains affiliate links. As an Amazon Associate, we earn from qualifying purchases.
To carry a car seat through an airport, you need a dedicated travel cart or a compatible stroller, plus a plan for the security checkpoint. Detach the base for infant seats and send it separately through the X-ray. Use a padded travel bag if you plan to gate-check to protect against handling damage that can compromise the seat’s structure within one or two flights.
The base-detach step is the hinge. Most parents know to bring the seat. They don’t realize the base triggers a secondary screening if it stays attached, which adds ten minutes at security while an agent swabs it and inspects the latch mechanism. That’s the delay you can cut.
What follows: the two proven carrying methods, the exact TSA sequence for bases, and the one rule about gate-check bags that actually prevents damage.
Key Takeaways
- Use a folding travel cart or a stroller frame—carrying a 15-20 pound seat by hand for more than a few gates is unsustainable.
- At security, detach an infant seat from its base. Send the seat and base through the X-ray separately to avoid a manual inspection.
- A padded travel bag is non-negotiable for gate-checking. An unprotected seat suffers scuffs, broken adjuster knobs, and harness strap twists that compromise safety.
- Airlines typically allow a car seat and a stroller to be checked at the gate for free, in addition to your regular carry-ons. Confirm this “two-item rule” when you check in.
- Always inspect the seat for damage immediately upon retrieval. Look for new cracks, deep scratches on the shell, or a harness that no longer pulls smoothly.
The Two Core Strategies: Travel Cart vs. Stroller System
You have two hardware paths. The travel cart is a universal solution. The stroller system is integrated but model-specific. The choice decides your speed from curb to gate.
A folding luggage cart with a small platform and bungee cords turns any car seat into a wheeled piece of luggage. The Cosco Foldable Travel Cart is the default. It collapses to fit in an overhead bin, costs a fraction of a stroller, and works with convertible seats, boosters, and infant carriers. You strap the seat on, tilt, and pull.
The universal travel cart is a 10-pound folding frame with bungee cords. It supports seats up to 25 pounds and collapses to 20 x 5 x 5 inches for storage in an overhead bin or under the plane seat in front of you.
The stroller path means your infant seat clicks into a travel stroller frame, like the Chicco KeyFit Caddy or the Baby Jogger City Tour 2. This is smoother for navigating terminals but only works with the specific infant seat model it’s designed for. The moment your child outgrows that infant seat, the frame becomes obsolete.
| Method | Best For | Major Limitation |
|---|---|---|
| Travel Cart | Convertible seats, boosters, any infant seat; one-time purchase. | Requires strapping the seat down securely; less maneuverable than a stroller. |
| Stroller Frame | Parents with a compatible infant carrier; want hands-free navigation. | Only works with specific infant seat models; useless after infant seat is outgrown. |
| Carry By Hand | Very short connections or as a last resort. | Physically taxing beyond one terminal; high risk of dropping or banging the seat. |
The cart wins for longevity. The stroller wins for convenience in the infant stage. Trying to carry a seat by its handle for more than a few hundred feet guarantees a sore shoulder and a higher chance of banging it against doorframes or people.
Step-by-Step: From Curbside to Gate
The process breaks into three zones: pre-security, the checkpoint, and the gate area. Each has a specific task that, if missed, creates a bottleneck.
Before Security: The Setup. Attach your seat to the cart or stroller frame before you enter the terminal. Fumbling in the drop-off lane blocks traffic. If using a cart, center the seat, loop bungee cords through the belt path (not just around the shell), and secure the loose ends. The seat should not shift side-to-side when you tilt the cart to pull it.
The Security Checkpoint: The Base is Key. This is where most delays happen. TSA procedure for car seats is consistent, but parents often misunderstand the trigger.
- Detach the infant seat from its base. If you have an all-in-one or convertible seat, skip to step 3.
- Send the base and the seat through the X-ray belt separately. Place them directly on the belt. Do not stack them.
- Collapse your stroller frame or travel cart and send it through the belt after the seat.
Common mistake: Leaving an infant seat clicked into its base. The dense plastic and metal latch system looks like a solid block on the X-ray, requiring a manual inspection. The agent will pull it aside, swab it for explosives residue, and physically inspect the underside. This adds 8-12 minutes during peak travel times.
If you are carrying a car seat without a base, the process is straightforward. The X-ray sees the hollow shell and harness clearly. The same logic applies to how to travel with an infant car seat—simplicity at security speeds everything up.
To the Gate: Positioning for Check-In. Once through security, re-assemble your system. When you reach your gate, immediately speak to the agent at the desk. Confirm that you will be gate-checking car seats and a stroller. They will issue you special tags. Do this early, not during final boarding call chaos.
The Gate-Check Decision: Bag vs. No Bag
You can take the seat to the jet bridge. There, you hand it to a ramp agent who places it in the aircraft’s cargo hold. This is gate-checking. The critical variable is whether you use a protective bag.
A padded travel bag, like the JL Childress Seat Pack, is a layer of armor. It has padded handles, a shoulder strap, and a durable nylon exterior. Without it, your seat is loose among suitcases, golf bags, and other hard cargo.
Where this goes sideways: Checking a seat without a bag. The shell gets scuffed by asphalt and concrete on the ramp. Adjuster knobs for the headrest or harness can snap off if impacted sideways. Worst case, the seat is placed face-down, grinding the harness straps and chest clip against the cargo bay floor. These aren’t cosmetic issues. A compromised harness or a cracked shell fails its safety job.
The bag also keeps the seat clean. Airplane cargo holds are dusty, greasy places. If you plan to install a car seat upon arrival, you don’t want to strap your child into a grimy seat.
Some parents ask if it’s safe to check at all. The answer is conditional. With a high-quality padded bag, gate-checking is a manageable risk for occasional travel. Checking it as regular baggage at the ticket counter, without a bag, is where significant damage occurs. The baggage system’s conveyor belts and automated sorting are not designed for odd-shaped, fragile items.
Airline Policies and the “Two-Item” Rule
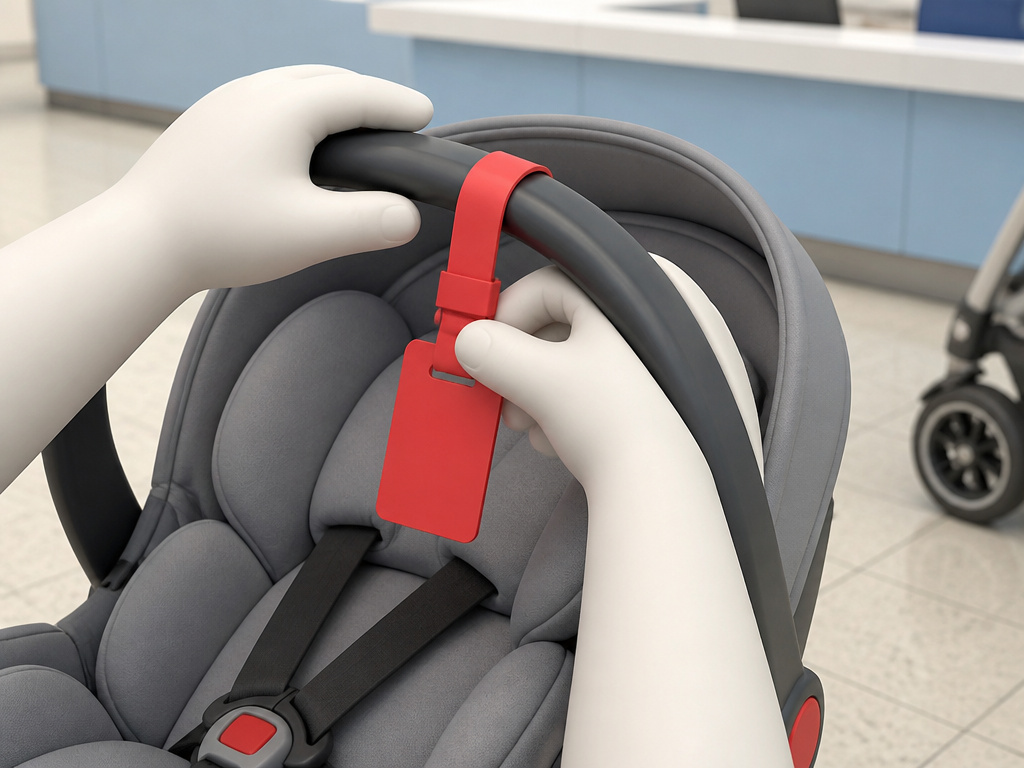
Most U.S. And Canadian airlines follow a similar policy: you can check two child-safety items for free. This usually means one car seat and one stroller per child. They don’t count toward your normal baggage allowance.
| Airline | Car Seat/Stroller Policy | Key Restriction |
|---|---|---|
| Delta, American, United | One car seat and one stroller can be checked free at the gate or ticket counter. | Must be for a child traveling on your itinerary. |
| Southwest | Two child safety devices (car seat, stroller, wearable carrier) fly free. | No size/weight restrictions for gate-checked items. |
| Air Canada | One car seat and one collapsible stroller per child, checked free. | Stroller must weigh under 50 lbs (23 kg). |
Always verify this policy when you check in for your flight. The agent should tag both items. This rule is why you can manage how to fly with a car seat and stroller without paying extra fees. It’s a huge benefit, but you have to claim it.
The policy also clarifies that you can bring a car seat onboard if you purchased a seat for your child. The seat must be FAA-approved and fit in the aircraft seat—usually a width under 17 inches. This is the safest option, as the seat never leaves your control.
What Not to Bring Through the Airport
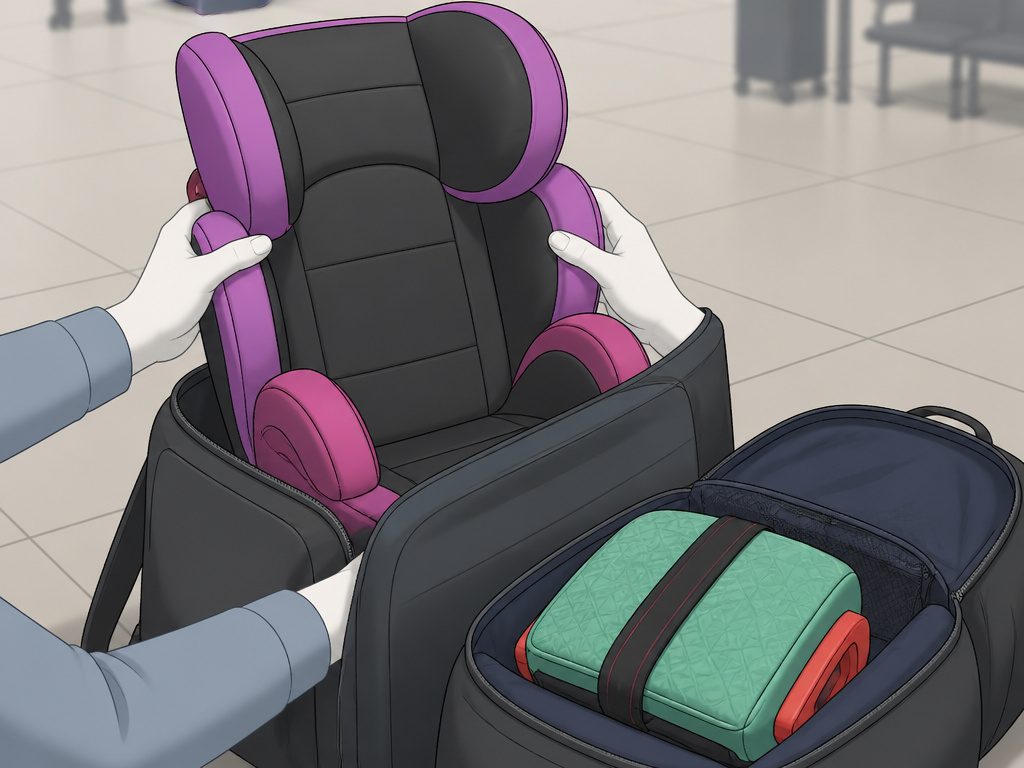
Some gear creates more problems than it solves. Booster seats are the prime example. A high-back booster is bulky, awkward to carry, and not approved for use on the aircraft itself. It offers no safety benefit in flight. If your child needs a booster at your destination, consider a compact, travel-specific booster like the Mifold or BubbleBum that fits in a backpack. It’s one less large item to haul.
Similarly, after-market car seat accessories like strap covers, head supports, or mirrors that didn’t come with the seat should be removed before travel. TSA may ask you to remove them at security, and they can get lost or damaged in transit. Stick to the seat as it came from the manufacturer.
This principle of minimalism extends to packing your car seat for the flight. The seat itself is the essential item. Everything else is a potential complication.
Inspection and Damage Control Upon Arrival
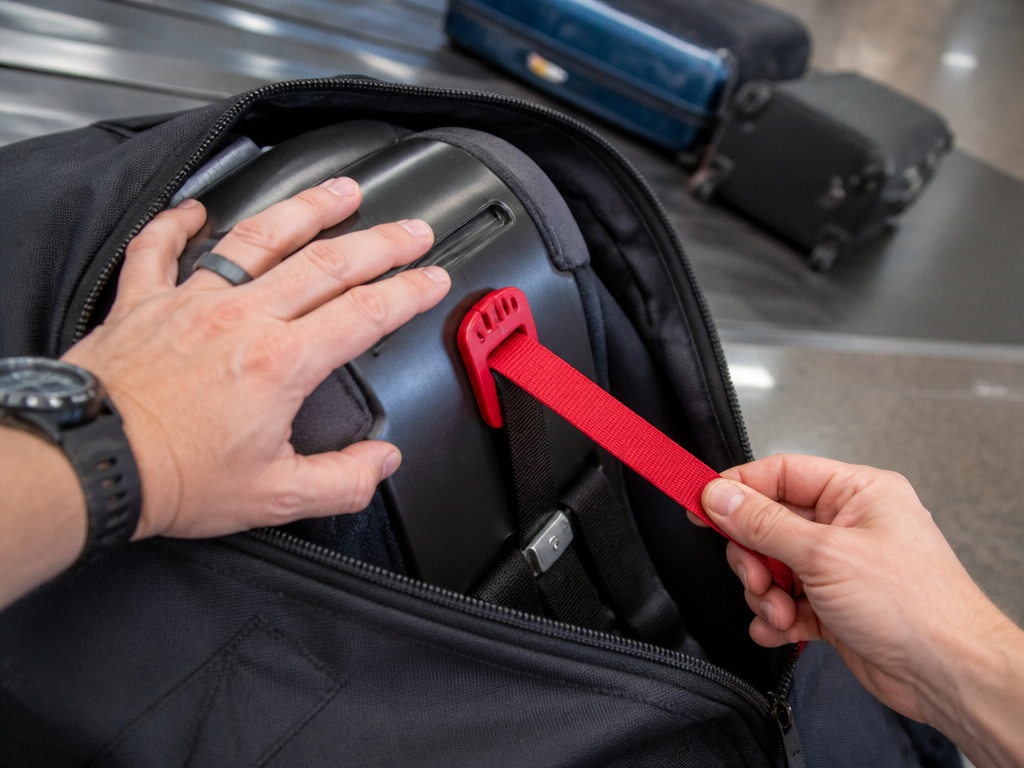
When you get your seat back at the jet bridge or baggage claim, inspect it immediately. Do not leave the airport area before doing this.
Unzip the bag right there. Run your hands over the plastic shell, feeling for new cracks or punctures you didn’t see before. Check the harness adjuster strap—pull it to ensure it tightens and loosens smoothly without catching. Look at the buckle mechanism for any crushed or misaligned parts.
The part nobody mentions: A harness that was slightly twisted when packed can become permanently kinked after being under weight in the cargo hold. This twist creates a weak point that can abrade and fail over time. Untwist it fully before your next car ride.
If you find damage, go directly to the airline’s baggage service office in the arrival terminal. File a report on the spot. They are responsible for damage incurred during handling. Having a photo of the seat from before your trip helps immensely for comparison.
This inspection is the final, critical step in transporting a car seat successfully. It turns the trip from a hopeful gamble into a managed process.
Frequently Asked Questions
Can I wear my baby in a carrier and also bring a car seat?
Yes. The baby carrier is typically considered a personal item worn on your body. The car seat (and often a stroller) counts under the separate “child safety equipment” allowance. You can wear the baby, carry-on a car seat on a cart, and gate-check a stroller.
What if my travel cart doesn’t fit in the overhead bin?
Most airline policies require gate-checked items that don’t fit in the cabin to be checked for free. If your collapsed cart is too large, the gate agent will tag it when you board, and you’ll pick it up with your car seat on the jet bridge after landing.
Do I need to prove my car seat is FAA approved?
It’s rare for an agent to ask, but the approval label is required by law. It is usually a red, white, and black sticker on the seat that states, “This restraint is certified for use in motor vehicles and aircraft.” The AAP air travel safety tips emphasize checking for this label before you travel.
Is it easier to just check the car seat with my luggage?
Easier at the start, much riskier for the seat. The automated baggage system is the primary cause of structural damage. Gate-checking with a bag keeps the seat in the gentle, hands-only part of the luggage stream until the last possible moment.
Can I use a regular suitcase bungee cord on a travel cart?
You can, but dedicated cart bungees with ball-ended hooks are safer. They are less likely to snap loose and whip back, and the balls prevent the hooks from scratching the seat’s shell.
The Bottom Line
Get a travel cart. Detach the base at security. Use a padded bag for gate-checking. Those three moves cover ninety percent of the hassle. The goal isn’t to eliminate effort—it’s to control where the effort happens. A cart moves the physical strain from your body to a wheeled frame. Detaching the base moves a ten-minute security delay into a thirty-second routine. The bag moves the risk of catastrophic damage down to a chance of minor scuffs. Do those three things, and you’ve solved the problem.
