
Master How to Install a Car Seat With LATCH System for Safety
This post contains affiliate links. As an Amazon Associate, we earn from qualifying purchases.
Install a car seat with LATCH by connecting the lower anchor attachments from the seat to the metal bars in your vehicle’s seat bight, tightening until there is less than 1 inch of movement side-to-side or front-to-back at the belt path. For forward-facing seats, you must also attach the top tether strap to its designated anchor point in the vehicle.
That 1-inch tolerance is the line between safe and unsafe. A seat that shifts more than that in any direction transfers crash forces to the child instead of absorbing them through the seat’s structure. The LATCH system. Lower Anchors and Tethers for Children, is designed to eliminate that slop with a direct, rigid connection to the vehicle frame.
What follows is the full walkthrough: where to find your anchors, how to get a tight fit every time, and the three mistakes that void your seat’s safety certification. We’ll cover the 65-pound weight limit math, when you must switch to a seat belt, and why your rear-facing infant seat probably doesn’t use a tether at all.
Key Takeaways
- The LATCH system has a hard combined weight limit of 65 pounds for the child plus the car seat. Exceed it, and you must switch to a seat belt install.
- A proper install allows less than 1 inch of movement side-to-side or front-to-back at the belt path. More movement fails the safety test.
- You must use either LATCH or the seat belt to install the seat, never both, unless both the car seat and vehicle manuals explicitly allow it.
- Forward-facing seats require the top tether for safety; most rear-facing seats in the US do not use a tether.
- Vehicle lower anchors are not created equal. The IIHS grades them on depth, angle, and attachment force, a “Good+” rating means the easiest, most secure install.
What LATCH Actually Is (And Isn’t)
LATCH isn’t just an alternative to the seat belt. It’s a standardized hardware system built into vehicles and car seats since 2003 to reduce installation errors. The goal was to replace the variable locking mechanisms of seat belts with a simple, click-and-tighten connection.
The system has two parts: lower anchors and a top tether. The lower anchors are the pair of U-shaped metal bars buried in the crease (the “bight”) between the vehicle seat’s back and bottom cushion. The top tether is a strap with a hook that connects to a dedicated anchor point in your vehicle, usually on the rear shelf, the seatback, or the floor.
Common mistake: Using both the LATCH lower anchors and the vehicle seat belt together. Unless both your car seat and vehicle manuals explicitly say you can, this dual connection can create uneven force distribution in a crash. The NHTSA states you should install using only one method.
Not all LATCH hardware is equally easy to use. The Insurance Institute for Highway Safety (IIHS) publishes specific LATCH system testing standards that evaluate lower anchors on three criteria: a depth less than 0.79 inches for easy access, a clearance angle greater than 54 degrees so the connector can clip on straight, and an attachment force under 40 pounds. A vehicle with a “Good+” rating means its anchors are unobstructed and simple to clip, which translates directly to a tighter, more reliable install for you.
The 65-Pound Limit You Didn’t Know You Were Calculating
Here’s the part most guides gloss over: LATCH lower anchors have a maximum weight rating. It’s not just your child’s weight. The 65-pound limit set by federal regulation is the combined weight of your child plus the car seat itself.
If your car seat manual doesn’t state the seat’s weight, you’ll need to find it. A typical infant carrier like the Chicco KeyFit Max weighs about 10 pounds. A convertible seat like a Graco Extend2Fit can weigh over 20 pounds.
| Car Seat Type | Approx. Seat Weight | Max Child Weight for LATCH (65 lbs – seat weight) |
|---|---|---|
| Infant Carrier (e.g., Chicco KeyFit Max) | 9–11 lbs | ~54–56 lbs |
| Convertible Seat (e.g., Graco Extend2Fit) | 19–22 lbs | ~43–46 lbs |
| All-in-One Seat (e.g., Britax One4Life) | 24–28 lbs | ~37–41 lbs |
You do the math the day you install. If your 38-pound toddler is in a 22-pound convertible seat, you’ve hit 60 pounds. You’re still okay. When that child hits 44 pounds, you’ve crossed the 65-pound threshold (44 + 22 = 66). That’s the day you stop using LATCH, unclip the lower anchor connectors, and reinstall the seat using the vehicle’s seat belt. There’s no wiggle room, this is a hard engineering limit.
The 7-Step LATCH Installation Checklist
Forget “tight enough.” You’re aiming for “less than 1 inch of movement.” Here’s how to get there, step by step.
1. Find Your Vehicle’s Lower Anchors
Push deep into the seat bight with your fingers. You’re feeling for two rigid metal bars, usually marked by a small symbol of a child in a seat. They’re typically spaced 11 inches apart. If your vehicle seat has a middle position with LATCH, it may borrow the inner anchors from the two outboard seats, check your vehicle manual.
2. Locate the Top Tether Anchor (For Forward-Facing Only)
For a forward-facing LATCH installation, find the tether anchor point. It could be on the rear deck behind the seat, on the back of the vehicle seat itself, or on the floor. Look for the tether anchor symbol or consult your vehicle manual. Most rear-facing seats, including the Joie Mint Latch, do not use the tether in the United States.
3. Connect the Lower Anchor Attachments
Extend the LATCH straps or rigid connectors from your car seat. Press the connector onto the vehicle’s lower anchor bar until you hear and feel a solid click. Many seats, like the Joie Mint Latch, have green indicator windows that show red when unlatched and green when properly connected.
Skip this if: The connector won’t seat fully. Forcing it can damage the mechanism. Check for obstructions like seat cushion foam or a folded seatbelt caught in the path.
4. Tighten the Lower Anchor Straps
Pull the adjustment strap tight. For a rear-facing infant seat, you may need to press your full weight into the seat base while you pull. The goal is to remove all slack from the strap itself. The seat should not lift easily from the vehicle cushion.
5. Attach the Top Tether (Forward-Facing Only)
Route the tether strap over the top of the vehicle seat and connect the hook to the tether anchor. Pull the adjustment strap to remove slack. The tether should be snug but not guitar-string tight; its job is to limit forward head movement in a crash, not to hold the seat down.
6. The 1-Inch Movement Test
Grab the car seat at the belt path, where the seat belt or LATCH strap routes through the seat. Try to move it side-to-side and front-to-back with firm pressure. If it shifts more than 1 inch (2.5 cm) in any direction, it’s not tight enough. Re-tighten, adding more body weight into the seat as you pull the strap.
7. Final Check: Level and Recline
For a rear-facing seat, ensure it’s reclined at the correct angle. Most have a built-in level indicator, a ball or bubble that must sit between two lines. Adjust the recline foot or use a rolled towel under the seat base (only if the manual allows) to achieve the correct angle. A too-upright seat can cause an infant’s head to fall forward, compromising their airway.
When LATCH Isn’t the Answer
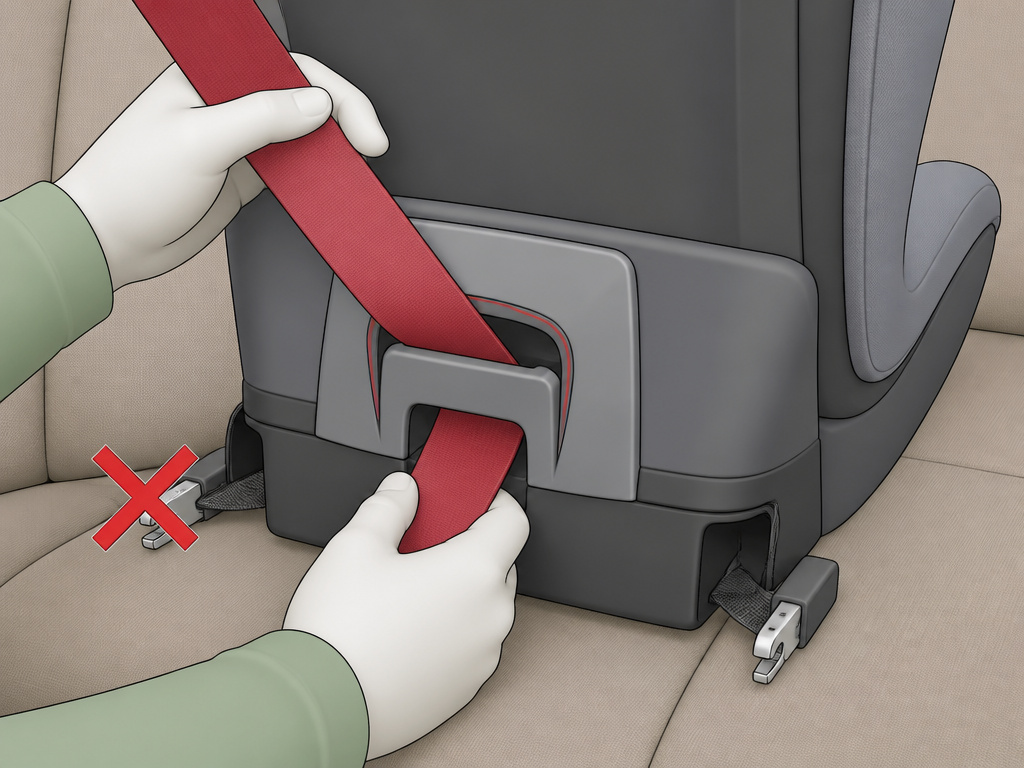
LATCH is a tool, not a universal solution. It has specific failure points where the seat belt becomes the safer, or only, option.
You must use the seat belt instead of LATCH when:
- The combined weight of child and car seat exceeds 65 pounds.
- Your vehicle doesn’t have lower anchors in the seating position you need (common in third rows, jump seats, or some center seats).
- You’re using certain positions in pickup trucks or older vehicles.
- The vehicle manual prohibits LATCH use in that specific seating position.
The seat belt installation method is just as safe when done correctly. It often involves locking the seat belt’s retractor or using a locking clip.
Where this goes sideways: Installing a car seat in the middle seat using LATCH when the vehicle only has outboard anchors. You cannot borrow the inner anchors from both sides unless your vehicle manual explicitly states it’s allowed. Most don’t. In that case, the center seat installation must be done with a seat belt.
Another critical limit concerns infant seats. Most US models, including the Chicco KeyFit Max, are designed for rear-facing LATCH using only the lower anchors. Their bases or shells lack a tether connector for rear-facing use. Using a tether for rear-facing is a feature on some European and Australian seats, but it’s rare stateside. Always follow your specific seat’s manual.
LATCH vs. Seat Belt: The Real Safety Difference
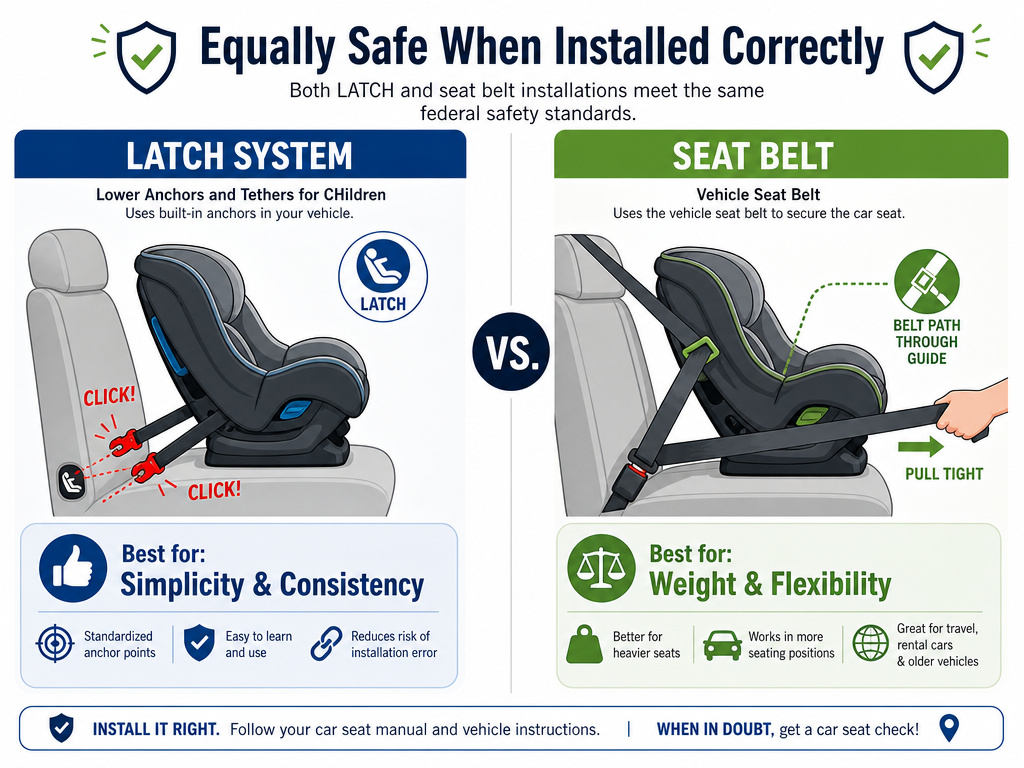
Is one safer? When installed correctly, both the LATCH system and the seat belt provide equivalent protection. The NHTSA states both methods are equally safe. The debate isn’t about safety, it’s about which method gives you a tighter, more correct install.
| Installation Method | Best For | Biggest Risk |
|---|---|---|
| LATCH System | Simplicity, consistent anchor points, less user error. | Exceeding the 65-pound weight limit or using it in a non-approved seating position. |
| Seat Belt | Heavier children, center seats, older vehicles, flexibility. | Failing to lock the seat belt retractor properly, leaving dangerous slack. |
For most people in most 2003-and-newer vehicles, LATCH is easier. The anchors are standardized, and you’re less likely to make a locking error. But for a middle seat installation or for a child approaching the weight limit, the seat belt is not just acceptable, it’s required. The key is mastering one method perfectly, not bouncing between them.
The One Tool You Actually Need
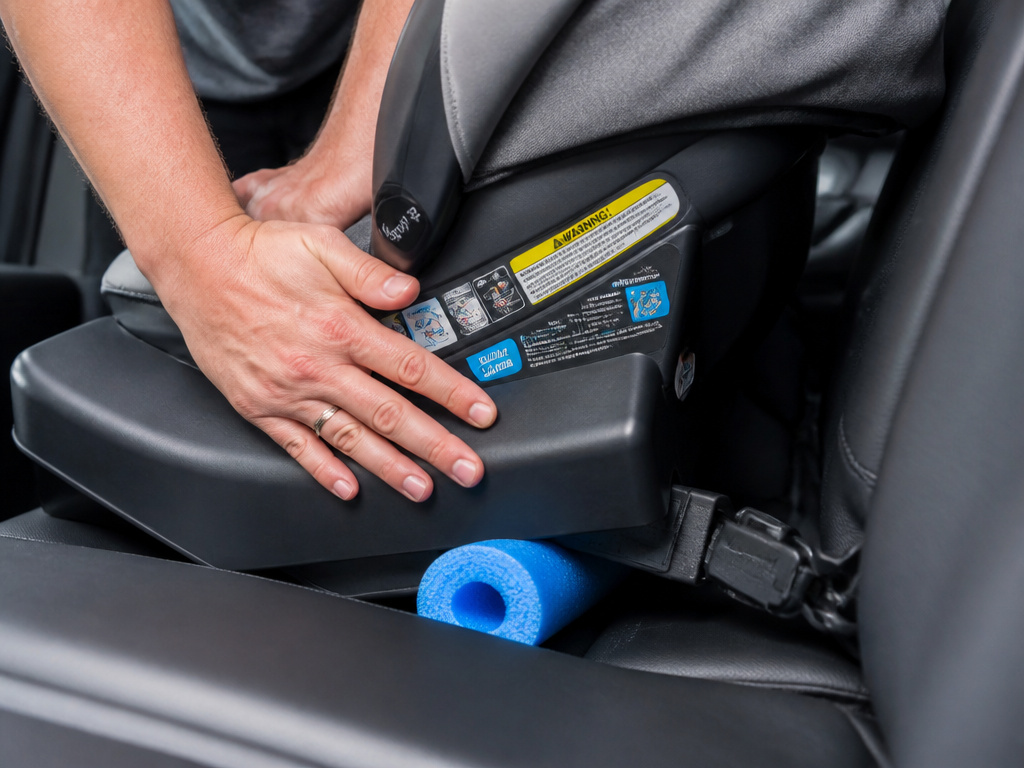
You don’t need a specialty kit. Your hands and body weight are the primary tools. However, a non-stretch pool noodle or a rolled towel (only if permitted by your car seat manual) can help achieve the correct recline angle for a rear-facing seat on a sloped vehicle seat.
Your most important resource is the pair of booklets in your glovebox: your specific car seat’s instruction manual and your vehicle’s owner’s manual. Cross-reference them. The car seat manual dictates how to use its LATCH attachments. The vehicle manual dictates where and if you can use LATCH in each seating position.
Frequently Asked Questions
Can I use LATCH in the middle seat?
Only if your vehicle manual says the middle seating position has its own dedicated lower anchors, or if it explicitly allows you to borrow the inner anchors from the two outboard LATCH positions. Most vehicles do not allow borrowing. If the manual is silent, assume you cannot, use the seat belt for a middle seat installation.
Why can’t I use LATCH and a seat belt together?
Using both systems together is generally prohibited because it can create conflicting force paths in a crash. The seat is tested and certified for one load path at a time. Doubling up can overstress the seat’s structure or the vehicle anchors. Always follow the official LATCH system instructions and your manuals.
My car seat moves a little, is that okay?
No. The standard is “less than 1 inch of movement at the belt path.” Any more means it’s not tight enough. Reinstall, using your knee and full body weight to press the seat deep into the vehicle cushion while you tighten the strap.
When do I switch from LATCH to seat belt?
Switch when your child’s weight plus the weight of the car seat exceeds 65 pounds. For a typical convertible seat weighing 20 pounds, that means switching to a seat belt installation when your child weighs about 45 pounds.
Does a rear-facing seat need the top tether?
In the United States, most rear-facing car seats, including infant carriers and convertibles, do not use the top tether for installation. The NHTSA confirms rear-facing seats here are designed to be secured with lower anchors or a seat belt only. Some European models differ, so check your manual.
Before You Go
Installing with LATCH comes down to three non-negotiable rules: click the connectors fully onto the metal bars, pull until there’s less than an inch of play at the belt path, and stop using it the day your child and seat together weigh more than 65 pounds. The system exists to make a secure install foolproof, but only if you respect its limits. Your vehicle manual and your car seat manual are the final word, when they conflict, the stricter rule wins. When in doubt, find a certified Child Passenger Safety Technician for a hands-on check. They’ll spot the half-click you missed and show you the body mechanics for a install that doesn’t budge.
