
How to Take a Car Seat Out of Its Base – Correct Method
This post contains affiliate links. As an Amazon Associate, we earn from qualifying purchases.
To take a car seat out of its base, find the release lever or handle on the back of the car seat shell. For most models, including Graco and Safety 1st, you squeeze this lever inward while lifting the seat straight up. For some Peg Perego seats, you pull up on a central lever. The critical step is aligning the seat’s lock bars with the base slots before you attempt removal, and always checking for an audible click when reattaching.
The difference between a smooth release and a frustrating jam is about three inches of hand placement and a few pounds of pressure. Get it wrong, and you’re wrestling with a 20-pound seat while a baby cries. Get it right, and it’s a one-handed motion you can do in the dark.
What follows is the breakdown of every common release mechanism, the model-specific hand placements the manuals diagram, and the physical reasons a seat won’t budge. You’ll know the universal rule, the brand exceptions, and how to fix a stuck seat in under a minute.
Key Takeaways
- The release lever is always on the back of the car seat shell, never on the base itself. You operate it from behind the seat.
- Squeeze inward, don’t pull out. Most jams happen because someone yanks the release handle away from the seat, which binds the locking mechanism.
- Lift straight up immediately after activating the release. Hesitating lets the locks re-engage.
- An audible click is non-negotiable when reattaching the seat to the base. If you don’t hear it, the seat is not secure.
- Always check your specific manual. A Graco GoMax squeeze is different from a Peg Perego Primo Viaggio pull-up lever.
The Universal Release: Squeeze, Don’t Pull
The mechanism is the same across nearly every infant seat sold in the US. From the back of the car seat, you operate a lever that retracts a metal bar or hook from a slot in the base. The verb in the manual is almost always “squeeze.”
From the back of the car seat, squeeze the release lever and lift the car seat out of the base.
That quote is verbatim from the Graco GoMax manual. The action is a pinch. Your thumb goes on one side of the lever, your fingers on the other, and you compress it toward the center of the seat. The motion is inward, not outward. Pulling the lever away from the seat shell does nothing except strain the plastic.
Why the squeeze direction matters is simple mechanics. The lever is connected to a cable that pulls the locking bar straight back. Yanking the lever out bends the cable housing and creates slack. The lock bar only retracts a quarter-inch; slack means it doesn’t retract fully. The seat stays stuck.
Place your other hand on the carry handle or the front of the seat. As you squeeze, lift up in one fluid motion. The goal is to break the seat free while the lock is disengaged. If you squeeze, pause, then lift, the spring-loaded lock can snap back into place.
The part nobody mentions: Your knuckles will likely brush against the vehicle seatback. That’s expected. If you have no room to get your hand behind the seat, you cannot release it safely. This is a primary reason to install the base with the front seats moved forward.
What to Do When the Seat Won’t Budge
If you’ve squeezed and lifted but the seat feels anchored, stop pulling. Forcing it can break the release mechanism. Follow this diagnostic table.
| Symptom | Likely Cause | Immediate Fix |
|---|---|---|
| Lever squeezes but seat is stuck | Lock bar is jammed by debris or misalignment. | Remove seat from vehicle. Inspect lock bars on seat and slots in base for blockages. |
| Lever feels loose or floppy | Release cable has become detached or broken. | Do not use the seat. Contact manufacturer for repair or replacement. |
| No ‘click’ when reattaching | Seat is not fully aligned or pressed down with enough force. | Realign seat over base, press down firmly on the carry handle and front corner. |
Model-Specific Variations You Can’t Ignore
While the principle is universal, hand placement and lever design change by brand. Assuming all seats work the same is how you break a $300 piece of safety equipment.
Graco and Safety 1st Models use the classic squeeze lever. The Graco SnugRide 35 Lite manual says “squeeze… and lift.” The Safety 1st guide says “slide the base release handle up.” That’s a crucial difference. Some Safety 1st models have a slide-up handle instead of a squeeze lever. You pull it upward along the back of the shell. Confusing the two types is the most common first-time error.
Peg Perego Primo Viaggio seats have a different system entirely. The manual for the Primo Viaggio 4.35 is specific: “Place your hand on the top of the seat back and pull up on the release lever with your fingers.” For the Primo Viaggio Lounge, it says “Place your hand at the bottom of the seat and pull.” In both cases, you’re pulling a central T-bar lever straight up, not squeezing sides together. The manual also notes: “Pulling near the center of the lever provides the easiest release.”
| Brand & Model | Release Action | Key Hand Placement | Unique Note |
|---|---|---|---|
| Graco GoMax, SnugRide | Squeeze inward | Thumb and fingers on lever, behind seat | The classic design. Listen for the click on reinstall. |
| Safety 1st (some models) | Slide upward | Fingers under handle, pull up along shell | Don’t try to squeeze this style; it won’t work. |
| Peg Perego Primo Viaggio | Pull up | Hand on top (4.35) or bottom (Lounge) of seat | Pull the lever from its center point. |
Where this goes sideways: Using the carry handle as a release lever. The handle is for carrying only. Yanking it to dislodge the seat can fracture the plastic where it attaches to the shell, and the seat will be unusable. The release is always a separate, dedicated mechanism.
Why model-specific instructions exist is about crash force distribution. Each brand’s locking system is engineered to withstand a specific load path. Using the wrong motion doesn’t just fail to release the seat; it can stress the mechanism in a way that compromises its integrity in a crash. This isn’t scare talk. It’s the reason manuals exist.
The 5-Step Removal Process for Any Seat
This sequence works regardless of your seat’s brand. It prioritizes safety and prevents damage.
- Position the Carry Handle. Move the handle to the upright carry position. On most seats, this is required before the release mechanism will even engage. On a Graco seat, the manual explicitly states the carry handle MUST be upright and locked when installed. Skipping this can physically block the lock bars from retracting.
- Locate the Release Lever. Feel behind the seatback, near where it meets the vehicle seat. It will be a prominent plastic lever or handle. Identify if it’s a squeeze (two sides) or a slide (one tab).
- Activate the Release and Lift. Apply the correct action, squeeze, slide, or pull up, and immediately lift the seat straight up. Use your free hand for stability on the handle. The lift should require modest effort. If it feels stuck, re-check step 1.
- Clear the Base. Once free, lift the seat clear of the base and vehicle. Be mindful of the canopy so it doesn’t snag.
- Verify Before Reinstallation. Before you click the seat back in, quickly look at the lock bars on the bottom of the seat and the corresponding slots in the base. Ensure they’re clear of food, fabric, or toy fragments.
What happens if you skip the handle position? On many models, the lock bars are physically blocked by the handle mechanism when it’s in a recline or down position. You can squeeze the lever all day, but the locks cannot move. You’ll assume the seat is broken. It’s just user error.
Reattaching the Seat: The Click is Law
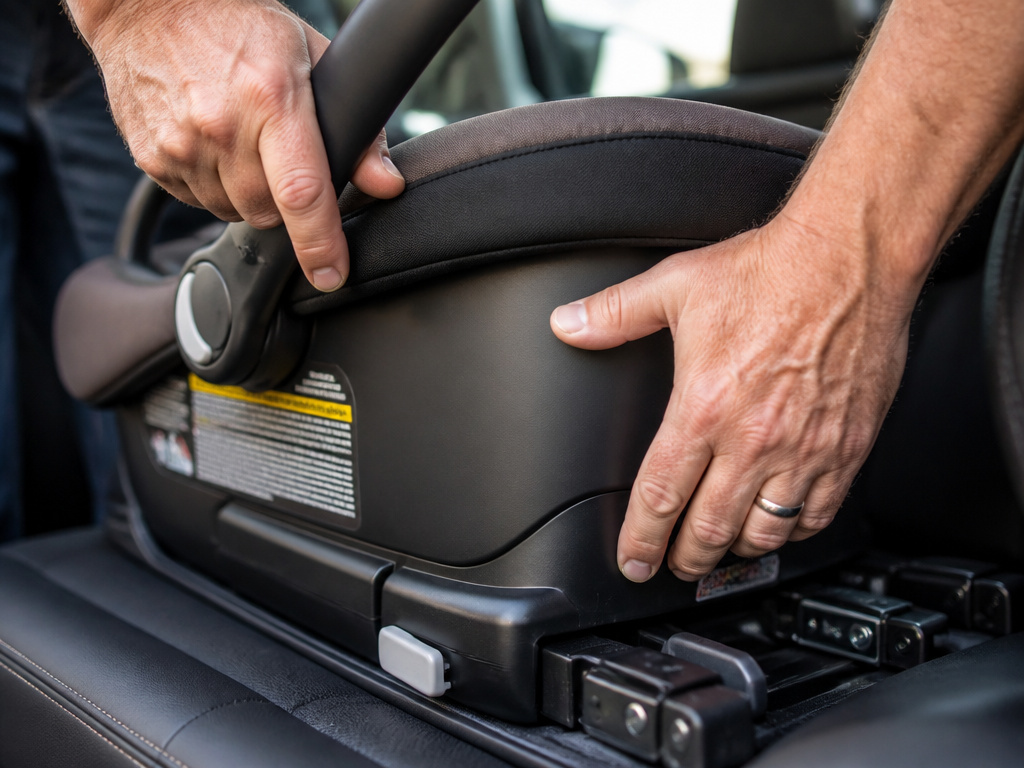
Putting the seat back is simpler, but the margin for error is zero. The seat is not secure until you hear and feel the lock engage.
Align the lock bars on the seat with the receiver slots in the base. Don’t just drop it in the general area. Look. The Primo Viaggio manual says to “align the locking bar at the front and rear of the car seat with the locks in the base.”
Press down firmly on the carry handle and the front of the car seat near the foot area. You must overcome the spring tension in the locks. The Graco manual states: “Push down on the the car seat. You will hear a ‘click’ when it is locked.”
The mandatory tug test. After the click, grab the front two corners of the car seat (near the infant’s feet) and pull up. Try to rock it side-to-side and front-to-back. It should not move. If there’s any lift or wobble, the seat is not locked. Press down again, harder. If it still moves, detach and realign.
Common mistake: Only pushing down on the canopy or the top of the seatback. The locking force needs to be applied at the front, where the primary lock bars are. Pushing on the back alone can leave the front latches unseated.
Troubleshooting a Stuck or Jammed Car Seat

When the standard process fails, you need a systematic approach. Do not resort to excessive force.
First, eliminate user error. Is the carry handle upright? Are you using the correct motion for your lever type? Is your hand placed where the manual specifies? Ninety percent of “jams” are one of these three issues.
Second, inspect for physical obstruction. Remove the entire base and seat from the vehicle if possible. Check the lock bars on the seat’s underside. Look for stray pacifier clips, blanket fuzz, or cracker crumbs packed into the mechanism. Check the receiver slots in the base for the same debris. A single pebble can block a lock.
Third, check for installation interference. A seat belt or LATCH strap routed incorrectly can press against the release lever or the bottom of the seat, creating binding pressure. Ensure all belts are clear of the seat’s shell and the release path.
If the seat releases but feels gritty or loud, the mechanism may need cleaning. Use a dry toothbrush to dislodge debris. Never lubricate the release with oil or silicone spray, as it will attract more dirt and gunk the system.
When to call for help: If the release cable is detached, the lever is broken, or the lock bars are visibly bent, stop. The seat is not safe to use. Contact the manufacturer’s customer service. Most have replacement part programs for safety-critical components.
Frequently Asked Questions
Why won’t my Graco car seat come out of the base?
The most common reason is that the carry handle is not in the upright carrying position. This physically blocks the lock bars from retracting. Ensure the handle is fully upright and locked, then squeeze the release lever at the back of the seat and lift straight up. If it’s still stuck, check for obstructions in the lock bars.
Is it the same for all car seat brands?
The principle is the same, a lever on the back disengages locks, but the action varies. Most Graco and Safety 1st seats use a squeeze lever. Some Safety 1st models use a slide-up handle. Peg Perego seats often use a central pull-up lever. Always check your specific manual for the correct motion and hand placement.
Can you damage the car seat by forcing it?
Yes. Forcing a seat can break the plastic release lever, detach the internal cable, or bend the metal lock bars. Any of these compromises the seat’s ability to remain securely attached to the base in a crash. If it’s not releasing with correct technique, diagnose the problem; don’t use brute force.
How do you remove a car seat base from the car?
To remove the base itself, you must first uninstall it. If installed with LATCH, squeeze the release button on the lower anchor connector and loosen the strap. If installed with a seat belt, unbuckle it and release the locking mechanism (like a lock-off clip or retractor). The base should then lift freely from the vehicle seat.
What if I never hear a click when putting it back?
No click usually means the seat is not fully locked down. Realign the seat over the base, making sure the lock bars are directly above the slots. Then, press down firmly with your body weight on the carry handle and the front of the car seat. The click is the sound of the locks snapping into place. Always perform the tug test afterward.
The Bottom Line
Taking a car seat out of its base is a five-second task that hinges on one motion. Find the lever on the back, use the correct action for your model, and lift straight up. The carry handle must be up, and the click must be present when you return it.
Forget generic advice. Your seat’s manual has the exact diagram. The difference between a smooth release and a broken latch is knowing whether to squeeze or slide. Now you know both.
