
How to Get Aria Car Seat Out of Base: Release Handle Guide
This post contains affiliate links. As an Amazon Associate, we earn from qualifying purchases.
To remove the UPPAbaby Aria car seat from its base, press and hold the carrier release button on the back of the carrier, then lift the carrier straight up. The button is lower on the seat back than on many competitors, and you must ensure the load leg is disengaged and the handle is in the correct position before lifting.
That button placement is the whole trick. It’s not broken. You just haven’t pushed far enough down the seat back yet.
What follows: the exact two-step sequence from the manual, why the handle position matters for safety, how to deal with a stuck seat, and the critical rules for using the carrier without the base on a plane.
Key Takeaways
- The carrier release button is a large, recessed button low on the back of the Aria carrier, not near the carry handle.
- Always set the carry handle to the 5th (rebound) position—the one closest to the baby’s feet—before driving or removing the seat.
- If the base has a load leg and your car allows it, you must push its release lever on the bottom of the base before trying to lift the carrier.
- The seat expires 7 years from its manufacture date; using an expired seat compromises the plastic’s integrity.
- For airplane travel, only the carrier is certified; you cannot use the base on board.
The Two-Step Removal Process
The official UPPAbaby Aria product manual gives a direct two-step instruction. It sounds simple because it is, provided you find the right part.
Pull and hold carrier release button on back of the carrier. Lift carrier off base.
That’s the entire technical procedure. The manual assumes you have located the button, which is the most common point of failure for new users. The mechanism is a simple mechanical latch, not electronic.
Step 1: Locate and Press the Release Button. Do not look near the carry handle adjustment buttons. The carrier release is a separate, larger button centered on the lower half of the carrier’s back. It is recessed slightly. You will feel it click when pressed. You must hold it down for the entire removal.
Step 2: Lift Straight Up. With the button held, grasp the carrier by its sides or the carry handle (if it’s in a locked position) and lift vertically. Do not twist or rock it. A clean, straight lift disengages the locking pins from the base’s receivers. If it doesn’t budge, you are not pressing the button fully, or the load leg is still engaged.
Forgetting to disengage the load leg is the second most common hang-up. This metal leg extends from the base to the vehicle floor for stability. If it’s under tension, it locks the base in place, which can make the carrier feel stuck.
| If This Happens | The Likely Cause Is | The Fix |
|---|---|---|
| Carrier won’t lift at all | Release button not fully pressed & held | Press harder, lower on the seat back. Hold it. |
| Carrier lifts but feels stuck | Load leg still engaged with floor | Push the load leg release lever on the base’s bottom, then retract the leg. |
| Button feels mushy, no click | Obstruction in latch mechanism | Check for toys, fabric, or food in the base’s receiver area. |
The process takes five seconds when you know where to push. The first time, it might take a minute of fumbling. That’s normal.
What Most People Get Wrong: The Hidden Handle
Where this goes sideways: Looking for the release near the carry handle. On the Aria, it’s much lower on the seat back, and missing it means you’ll pull against a locked latch.
The Aria’s design differs from seats like the Graco SnugRide, where the release is often a prominent lever near the headrest. UPPAbaby placed it lower for a cleaner look. This is a known point of confusion noted in the Car Seats For The Littles review, which calls it “pretty far down the back of the base.”
You are not pressing a small tab. You are pressing a large, recessed button. Use the pad of your thumb, not a fingertip. Get your hand behind the seat and slide it down the back until you feel the distinct circular indentation.
Why the handle position is non-negotiable. Before you even touch the release button, the carry handle must be in the 5th position—the one swung fully forward toward the baby’s feet. This is the “rebound position.” In a crash, it’s a critical part of the seat’s safety system, helping to manage energy. If the handle is in the carry position (up and back), it can interfere with the seat’s performance and make removal awkward.
Check it every time. It’s a one-second habit that becomes automatic.
Pre-Removal Safety Checklist
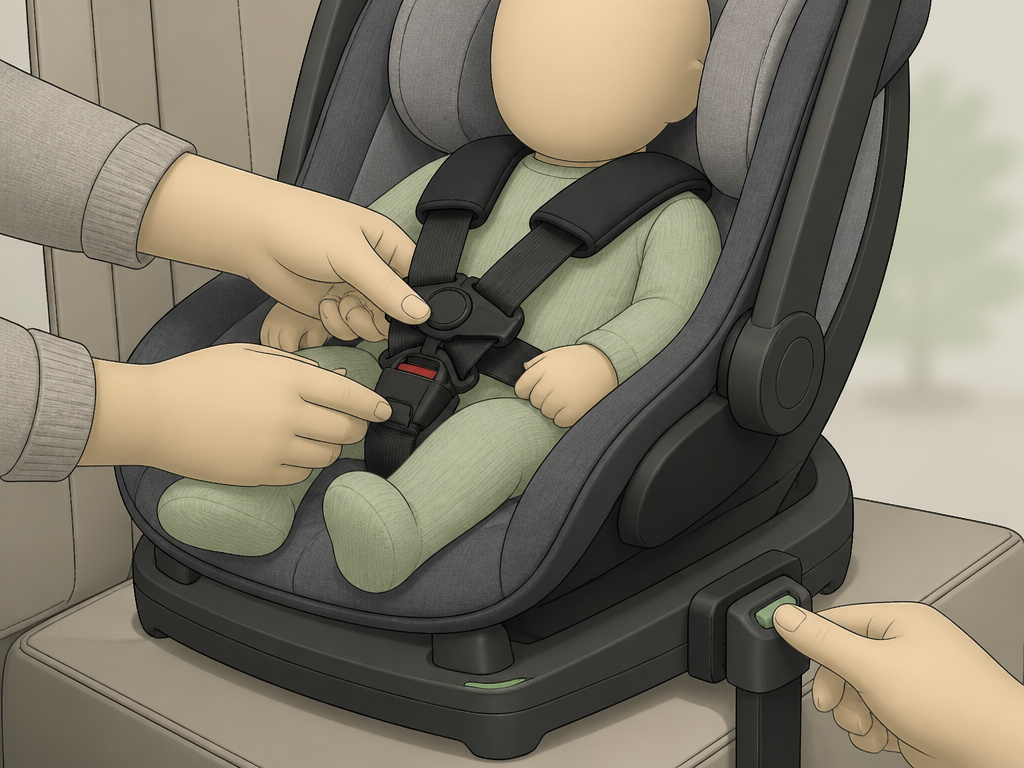 Removing the seat isn’t just about mechanics. It’s about verifying the child is still safe to be in that seat and that the seat itself is ready to be moved.
- Unbuckle the Child First. Never try to remove the carrier from the base with your child still buckled in. The sudden shift can pinch them or cause the seat to tilt unexpectedly.
- Check Handle Position. As above, confirm it’s locked in the 5th rebound position. The manual is explicit: “Carry handle must be locked in the (5th) rebound position when in use in the vehicle.”
- Disengage the Load Leg. If your vehicle is compatible and you’ve used it, find the release lever on the bottom of the base. Press it to unlock the leg’s tension, then push the leg up until it clicks into its stowed position.
- Verify Base Security. Before you lift the carrier, give the base itself a quick check. It should not move side-to-side or front-to-back more than 1 inch at the belt path. A loose base is a separate problem you need to fix before re-installing the carrier.
Skipping these steps turns a simple task into a struggle. It can also mask a bigger installation issue you’re about to carry into your house.
When the Seat Won’t Budge: Troubleshooting a Stuck Aria
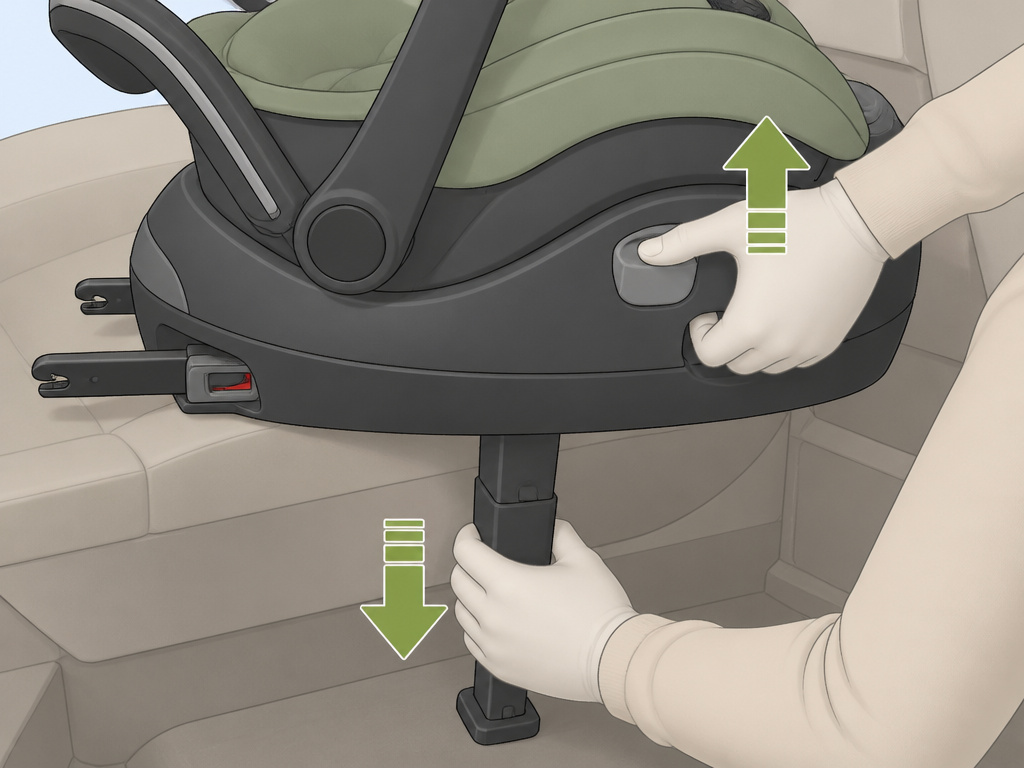 Even following the steps, sometimes a seat sticks. Here’s how to diagnose it without forcing anything.
- The Load Leg is Forgotten. This is the number one culprit. The load leg creates immense downward pressure on the base. If it’s still extended and pressed into your car’s floor, the base won’t budge, making the carrier seem fused to it. Get on the floor, find the lever, and retract it.
- The Anti-Rebound Panel Has a Gap. This panel on the base must touch the vehicle seat back. If there’s a “waterfall” gap, the base can tilt, binding the carrier latches. The official UPPAbaby Aria instruction manual PDF solution is specific: uninstall the base, place a rolled hand towel in the gap flush with the top of the base, then reinstall.
- Debris in the Latch. Crumbs, sand, or a stray piece of plastic from a toy can jam the simple latch mechanism. Inspect the metal locking pins on the bottom of the carrier and the corresponding holes on the base. A quick vacuum or blast of compressed air can clear it.
- Extreme Temperature. In very cold weather, plastic contracts. In very hot weather, it can expand and become sticky. If the seat was installed in one extreme and you’re removing it in another, apply firm, steady pressure on the release button and lift. Avoid jerking.
Forcing it is the worst move. You risk breaking the plastic latch housing, which is a one-way ticket to replacing the entire carrier. If gentle troubleshooting fails, contact UPPAbaby customer service before proceeding.
Rules for Using the Aria Carrier Without the Base
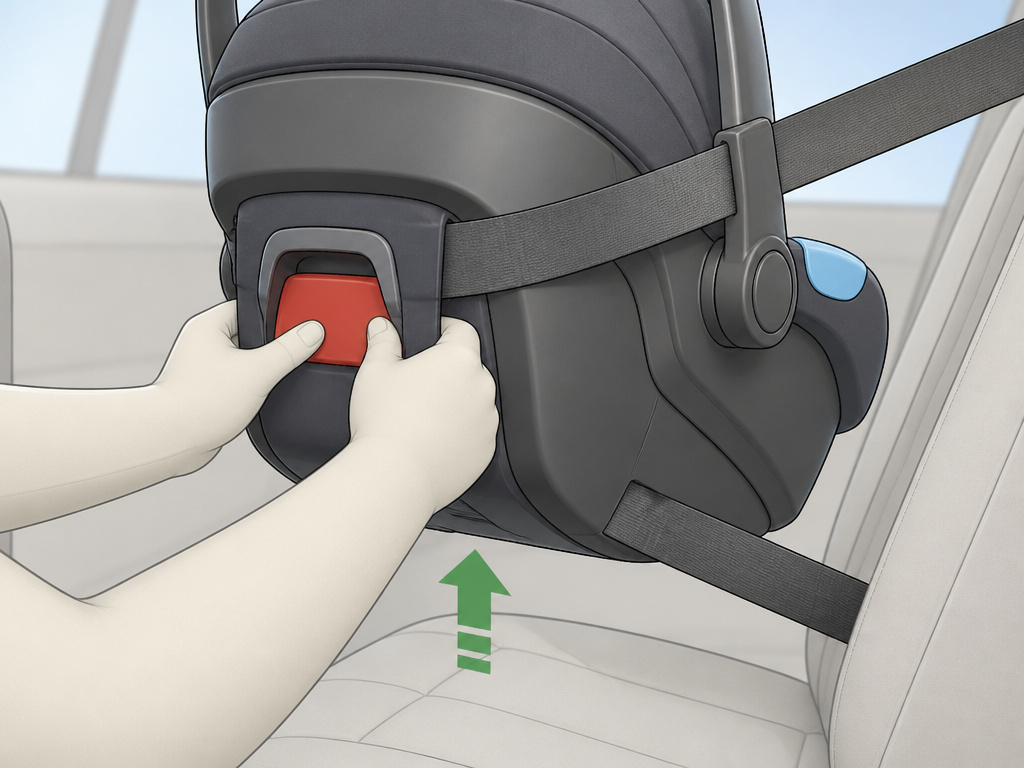 You don’t always use the base. For taxis, grandparent’s cars, or airplanes, you’ll need to install the carrier directly with a seat belt. Knowing how to detach car seat from the base is the first step to this method.
The Aria is certified for aircraft use—but only the carrier. The base must stay behind. The UPPAbaby Aria instruction manual PDF states this clearly: “DO NOT use base with aircraft installation.”
Installing the carrier alone has its own rules:
- Use the Belt Guides. Thread the lap belt through the two lap belt guides on the sides of the carrier. For a lap/shoulder belt, you can also use the optional European routing clip on the back.
- Level the Seat. A red line on the side of the carrier must be parallel to the ground. Use a rolled towel under the foot end to achieve this angle if your vehicle seat is sloped.
- Lock the Belt. Pull the seat belt all the way out to engage the retractor’s locking mode, then tighten until the carrier has less than 1 inch of movement at the belt path.
This method is secure and versatile. It’s also how you’ll manage a safely detaching the seat scenario in a ride-share. Practice it at home before you need it at an airport.
Aria-Specific Limits You Must Know Before Removing
Taking the seat out is one thing. Knowing if your child still fits in it is another. The Aria has strict boundaries.
| Limit | Specification | Why It Matters for Removal |
|---|---|---|
| Weight Limit | 4 – 30 lbs (1.8 – 13.6 kg) | Exceeding 30 lbs means the seat is outgrown. Do not reinstall it. |
| Height Limit | 30 inches (76.2 cm) or less AND head must be 1+ inch from top of headrest/SIP | If the child’s head is less than an inch from the top, the seat is outgrown, regardless of weight. |
| Harness Height | Straps must be at or 1-2 positions below the child’s shoulders when rear-facing. | Incorrect harness height reduces protection. Check this every time you secure your child. |
| Expiration | 7 years from date of manufacture (on label under carrier) | An expired seat’s plastic may be brittle. Do not use it, and do not give it away. |
Check the label under the carrier for the manufacture date. Add seven years. If you’re past that date, the seat is done. This isn’t a marketing ploy. It’s because plastics degrade under UV light and temperature cycles.
Frequently Asked Questions
Why is my UPPAbaby Aria so hard to get out of the base?
You are likely not pressing the release button fully, or the load leg is still engaged. The release button is lower on the seat back than you think. Press firmly with your thumb and hold it. Also, check the bottom of the base for the load leg release lever.
Can you use the Aria car seat without the base?
Yes. The UPPAbaby Aria carrier can be installed directly in a vehicle using the seat belt through its integrated belt guides. It is also certified for use on airplanes without the base. Always follow the manufacturer installation guide for belt routing.
Where is the release button on the Aria car seat?
The carrier release button is a large, recessed button centered on the lower half of the carrier’s back. It is not near the carry handle adjustment buttons. Run your hand down the back of the seat until you feel the distinct circular indentation.
What position does the handle need to be in?
When the seat is in the vehicle (and when you are removing it), the carry handle must be locked in the 5th position. This is the position swung fully forward toward the baby’s feet, often marked as the rebound position. This is a critical safety requirement.
How do you retract the load leg on an Aria base?
Locate the release lever on the bottom of the base, near where the load leg connects. Push the lever to unlock the leg’s tension. Then, lift the foot of the leg up toward the base until it clicks securely into its stowed position. This must be done before lifting the carrier.
The Bottom Line
Getting the Aria out of its base comes down to two actions: find the low-slung button, and lift straight up. The challenge isn’t complexity—it’s learning the specific feel of this seat’s latch.
Master the pre-removal checklist: handle in the 5th position, load leg retracted, child unbuckled. That turns a fumbling minute into a five-second smooth motion. Remember, for travel, the carrier works alone. For safety, always respect the height, weight, and expiration limits printed on the seat itself.
