
Professional Car Seat Installation: Is It a True Necessity?
This post contains affiliate links. As an Amazon Associate, we earn from qualifying purchases.
No, a car seat does not legally require professional installation. Federal regulation 49 CFR § 571.213 mandates that manufacturers provide “printed installation instructions in English that provide a step-by-step procedure, including diagrams,” so a competent adult can do it themselves. However, observational studies of over 5,000 children show misuse rates greater than 72%, with errors like a loose seat or an unused tether being the most common.
That gap between the law’s assumption and real-world outcomes is the entire question. You can follow the manual perfectly. You can also miss one critical step that voids the seat’s crash protection entirely. The difference isn’t a fine point, it’s a public health line drawn at the one-inch movement rule and the mandatory use of a forward-facing tether.
What follows is a breakdown of what “correct” actually means, the two mistakes that show up in three-quarters of installations, and a clear flowchart for when your situation demands a certified technician. We’ll cover the specs you must check yourself, the single biggest reason people pay for an inspection, and why your vehicle’s manual is as important as the car seat’s.
Key Takeaways
- Federal law assumes you can install a car seat using the provided manual, but misuse rates exceed 72%.
- A “correct” installation means the seat moves less than 1 inch at the belt path and all manufacturer instructions for your specific seat and vehicle are followed.
- You must stop using the lower anchors and switch to the seat belt once the combined weight of your child and the car seat exceeds 65 pounds.
- A forward-facing car seat must use its tether strap if both the car seat and vehicle manuals permit it.
- Professional help is non-negotiable for rear seats without factory anchor points, after any moderate or severe crash, or if you cannot get the seat to pass the 1-inch test.
What Makes an Installation “Correct”?
The definition isn’t subjective. It’s a series of pass/fail checks written into the car seat manual and your vehicle’s owner’s manual. Miss one, and the installation is wrong.
The most cited standard is the 1-inch movement rule. Once the car seat is installed and tightened, grab it at the belt path, the spot where the seat belt or lower anchor strap routes through the seat shell. Push and pull it side-to-side and front-to-back. If it shifts more than 2.5 cm (1 inch), it’s too loose. This test is the baseline every certified technician uses.
The restraint shouldn’t move more than 2.5cm (1 inch) in any direction once installed. This is the physical standard you’re trying to meet.
But a tight seat is just the first box. Correctness is a checklist: * The right belt path: Using the rear-facing path for a rear-facing seat, the forward-facing path for a forward-facing seat. * Locked seat belt: If using the vehicle seat belt, it must be locked according to your vehicle’s manual (usually by pulling it all the way out and letting it retract). * Tether engaged: For a forward-facing seat, the tether strap must be connected to the designated anchor in your vehicle and tightened until snug. * Recline angle correct: For a rear-facing seat, the recline angle must be within the range specified by the car seat manufacturer, often indicated by a built-in level line. * Harness at or below shoulders: For a rear-facing seat, the harness straps must be at or below the child’s shoulders. For forward-facing, they must be at or above.
Skip any of these, and you’ve built a failure point. The most common error is a loose installation, followed closely by an unused tether on a forward-facing seat.
The Two Most Common DIY Mistakes
You can follow every step in the manual and still get these wrong. They account for the bulk of that 72% misuse rate.
First, people confuse “tight” with “secure.” You can crank down on the seat back or the armrest and think it’s solid. But if you’re not tightening at the belt path, you’re just flexing the plastic shell. The seat can still pivot at the belt path in a crash. Always test movement there.
Second, and far more dangerous, is ignoring the forward-facing tether or using it incorrectly. The tether isn’t optional extra security. It’s a critical component that limits the forward head excursion of a child in a crash by up to 6 inches. NHTSA recommends always using a tether with a forward-facing car seat “as long as it is permitted by both the car seat and vehicle manufacturers.” That “as long as” clause is where people trip. You must check both manuals. Some vehicles have tether anchors only in certain seating positions. Some car seats have specific routing instructions for the tether strap.
Where this goes sideways: Assuming the tether anchor is behind any seat. In many SUVs and trucks, the anchor is on the back of the seat, the ceiling, or the floor. Using the wrong anchor point can cause the strap to slip in a crash.
The tether strap should be tight enough that it has no slack, but you shouldn’t be using your body weight to cinch it. A firm pull on the adjustment strap is enough.
When a Professional Installation Isn’t Just Advice. It’s Required
The law says you can do it yourself. Reality says you might hit a wall where you shouldn’t. Here are the scenarios where seeking a certified technician isn’t a nice-to-have; it’s the only safe path forward.
Your vehicle lacks factory-installed lower anchors or tether anchors. This is common in older vehicles. While you can install with a seat belt only, doing it correctly requires understanding the locking mechanism (switchable retractor vs. Locking latchplate) and finding a seating position with a lap-and-shoulder belt, not just a lap belt. A pro has the guides and know-how to secure it.
You’ve been in a moderate or severe crash. NHTSA has specific criteria for what constitutes a crash severe enough to compromise a car seat. If you’re unsure, maybe the airbags didn’t deploy but the bumper is cracked, a technician can help you assess based on the car seat manufacturer’s replacement policy.
You cannot achieve a tight installation (less than 1 inch of movement) after multiple attempts. This usually points to an incompatibility between the car seat’s design and your vehicle’s seat contours. A technician has experience with different models and may know a trick, like using a rolled towel or pool noodle under the seat base to achieve the proper angle on a sloped vehicle seat.
Your child is approaching the lower anchor weight limit. Lower anchors have weight limits set by both the vehicle and car seat manufacturers. You can find this limit on a label on the side of the car seat. The federal formula is 65 pounds minus the weight of the car seat itself. Once your child outgrows this limit, you must stop using the lower anchors and switch to a seat belt installation. Transitioning from one method to the other is a common point of error, and a technician can ensure the seat belt install is just as secure.
| Scenario | DIY Risk | Professional Value |
|---|---|---|
| Older vehicle (pre-2002) | May lack LATCH anchors; seat belt lock types vary. | Identifies correct belt path and locking method. |
| After any crash | Uncertainty about seat integrity. | Applies NHTSA & manufacturer crash replacement guidelines. |
| Persistent looseness | Potential seat/vehicle shape incompatibility. | Uses approved tools (rolled towel, pool noodle) to correct angle. |
| Switching from LATCH to seat belt | Incorrect belt routing or locking. | Ensures continuity of security at the belt path. |
How to Find and Use a Certified Child Passenger Safety Technician
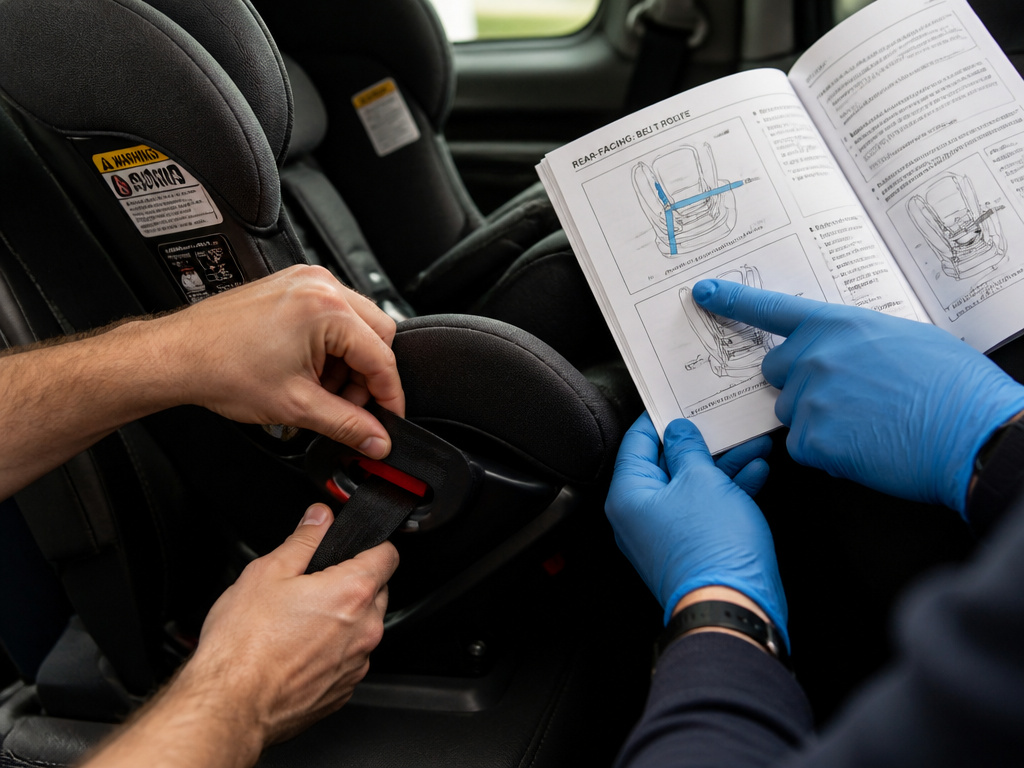
Not all installers are created equal. A “professional” could be a well-meaning firefighter with outdated training. A Child Passenger Safety Technician (CPST) is someone who has completed a standardized, NHTSA-sanctioned curriculum and passed a hands-on skills test.
You can find a CPST near you through the NHTSA car seat safety guidelines website, which maintains a database of inspection stations. Many offer free checks. When you go, bring both your car seat manual and your vehicle owner’s manual. The technician’s job is to educate you on the correct use of your specific equipment, not to install it for you and send you on your way. They should walk you through the process so you can do it yourself next time.
Common mistake: Using a “car seat check” event staffed by volunteers without current certification. Their advice may be years out of date. Always verify the individual is a currently certified CPST.
A true professional installation involves more than just tightening a strap. It’s a verification that your specific seat is compatible with your specific vehicle and that you understand all the components, from the LATCH system lower anchors to the top tether, well enough to replicate it. This is the core service at any certified installation locations.
The Legal Backstop: What the Federal Standard Actually Says
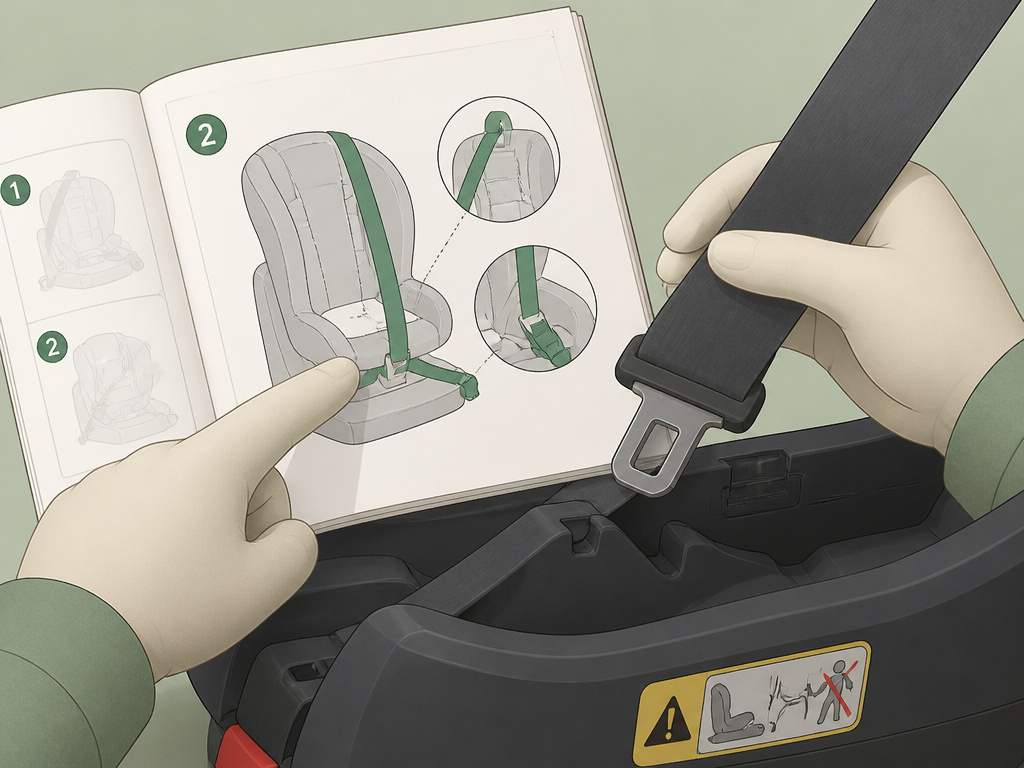
The federal child restraint system standard, FMVSS 213, is what every car seat sold in the U.S. Is certified to meet. It doesn’t mention professional installers. Its entire framework is built on the premise that a caregiver, following the instructions, can achieve a safe installation.
The regulation mandates that every car seat come with “printed installation instructions in English that provide a step-by-step procedure, including diagrams.” It also requires permanent labels on the seat itself with critical warnings. The system is designed for self-installation. The 72% failure rate, documented in studies like the 2005 Decina & Lococo research, shows the gap between design and real-world execution.
This is why the role of the technician has evolved. As noted in a peer-reviewed car seat use study, “the current role of the car seat technician is to inform the caregiver of best practice recommendations and the manufacturer’s instructions and then allow the caregiver to make the decision if the recommendations and instructions are at odds.” They are educators, not just installers.
DIY Installation Checklist: Get It Right the First Time
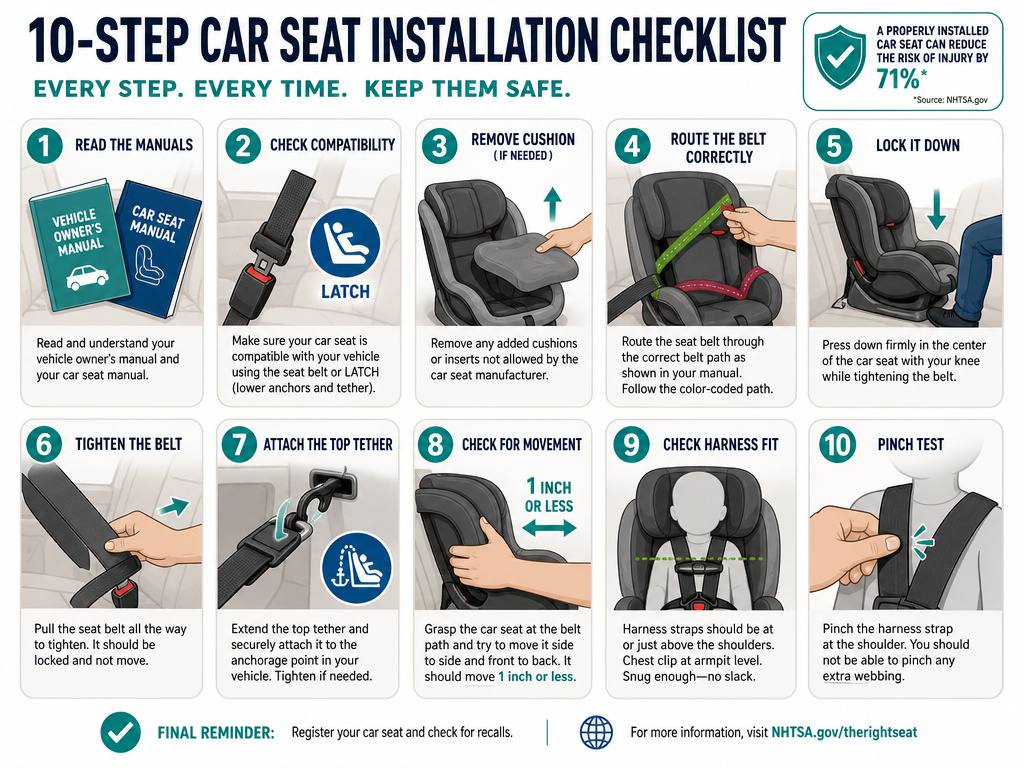
If you’re going to do it yourself, follow this sequence. Missing a step is how errors happen.
- Read both manuals. Not just the car seat manual. Your vehicle’s owner’s manual has a whole section on child restraint installation that specifies which seating positions are approved, where the tether anchors are, and how the seat belts lock.
- Choose your method. Decide whether you’re using the LATCH lower anchors or the vehicle seat belt. You cannot use both simultaneously. For forward-facing seats, plan to use the tether.
- Clear the seat. Remove all aftermarket cushions, headrests, or seat protectors that did not come with the car seat. They can interfere with the seat’s ability to grip the vehicle seat.
- Route the belt or strap. For a seat belt installation, ensure it goes through the correct color-coded belt path on the car seat. For LATCH, connect the lower anchor connectors to the vehicle’s anchor bars until you hear/feel a click.
- Apply your weight and tighten. Put a significant amount of your weight into the car seat (kneel on it) while you pull the seat belt or LATCH strap tight. This compresses the vehicle seat cushion and removes slack.
- Lock the seat belt. If using a seat belt, pull the shoulder belt all the way out and let it retract to engage the locking mechanism. Check your vehicle manual, some cars have switchable retractors.
- Attach and tighten the tether. For forward-facing seats, connect the tether hook to the anchor point in your vehicle (check the manual for location) and tighten the strap until it’s snug with no slack.
- Perform the 1-inch test. Grab the car seat at the belt path and try to move it side-to-side and front-to-back. If it moves more than 1 inch, it’s not tight enough. Re-tighten.
- Position the child and harness. Place your child in the seat. The harness straps should be at or below shoulder level (rear-facing) or at or above (forward-facing). The chest clip should be at armpit level.
- Perform the pinch test. After buckling the harness, try to pinch the strap vertically at the child’s collarbone. If you can pinch a fold of webbing, the harness is too loose.
This is your baseline installation check guide. If you complete all ten steps and the seat is tight, you’ve likely achieved a correct installation.
Frequently Asked Questions
Can I install a car seat in the front seat?
The back seat is the safest place for any child. If you must use the front seat (e.g., in a pickup truck with no back seat), you can only put a rear-facing seat there if you can manually turn the passenger airbag off. Most car seat manufacturers prohibit using a rear-facing seat in front of an active airbag. Always check both manuals.
What if my car doesn’t have LATCH anchors?
You install the car seat using the vehicle’s seat belt. Ensure you know how your seat belt locks (automatic locking retractor vs. Locking latchplate) by checking your vehicle owner’s manual. A seat belt installation is just as safe as a LATCH installation when done correctly.
How do I know when to stop using the lower anchors?
Lower anchors have a weight limit, typically found on a label on the side of the car seat. The federal formula is 65 pounds minus the weight of the car seat. Once the combined weight of your child and the car seat exceeds that limit, you must uninstall the lower anchor connectors and switch to a seat belt installation.
Is it worth paying for a professional check if I think I did it right?
Yes. Observational studies show most parents think their seat is installed correctly. A free check with a certified technician at an inspection station takes 20 minutes and gives you peace of mind. They often catch one subtle error, like an incorrectly routed tether strap or a locked-but-still-loose seat belt.
My car seat moves a little when I turn corners. Is that okay?
No. Any noticeable movement while driving indicates the installation is too loose. The seat should be solidly fixed to the vehicle seat. This movement often stems from not using the correct belt path or failing to fully lock the seat belt. Reinstall following the checklist, focusing on step 5 (applying your weight) and step 8 (the 1-inch test).
The Bottom Line
You are legally allowed to install a car seat yourself, and the manuals are written for that purpose. But the 72% misuse rate is real. The line between a DIY job and needing a pro isn’t about skill, it’s about specific, high-stakes scenarios: an older car without anchors, a tricky vehicle seat shape, or the transition from LATCH to seat belt.
Your goal isn’t just to follow instructions. It’s to pass the 1-inch movement test and use every component, especially that forward-facing tether, exactly as both manuals dictate. If you can’t confidently check both those boxes, the safety checks a CPST provides are the single best investment you can make in your child’s safety.
