
Is My Car Seat Installed Correctly? The 1-Inch Rule & Key Checks
This post contains affiliate links. As an Amazon Associate, we earn from qualifying purchases.
A car seat is installed correctly when it moves less than 1 inch (25 mm) side-to-side or front-to-back at the belt path, the harness is snug on the child (you can fit no more than one finger between the strap and their collarbone), and you are using only one installation method—either the vehicle’s lower anchors OR the seat belt, never both.
That answer is the standard. The problem is that a seat can pass the one-inch test and still be unsafe in ways a quick wiggle won’t reveal.
The real verification lives in the specs most people never open: the car seat’s own instruction manual and the vehicle’s owner’s manual. These documents contain the model-specific limits, warnings, and compatibility notes that turn a generic “tight enough” into a certified safe install. Missing a single clause—like the lower anchor weight limit on your specific seat—means the entire setup is compromised, regardless of how little it moves.
What follows is a breakdown of the physical tests, the manual-bound rules you must check, and the three consequences that happen only after you’ve driven away.
Key Takeaways
- The 1-inch movement rule applies only at the belt path where the seat connects to the car. Movement elsewhere doesn’t count.
- Lower anchors have a combined weight limit (car seat + child), usually 65 lbs. Exceed it, and you must switch to the seat belt.
- Never use both the seat belt and lower anchors simultaneously. This creates conflicting force paths and can fail in a crash.
- Bulky coats and snowsuits prevent a proper harness fit. Compress the padding first, then tighten the straps.
- Seats have expiration dates, typically 7-10 years from manufacture. UV exposure and plastic fatigue weaken them silently.
The 1-Inch Movement Test (And What It Actually Means)
Grab the car seat where the seat belt or lower anchor strap routes through it. This is the belt path. Pull it side-to-side, then forward-and-back. If it shifts more than 1 inch (25 mm) in any direction, it’s not tight enough.
A correctly installed child restraint should not move more than 1 inch (25 mm) side-to-side or front-to-back at the belt path. This tolerance is specified in manuals from Chicco, the Canadian Paediatric Society, and other safety authorities.
That measurement isn’t arbitrary. In a crash, a seat that moves too much before engaging the restraint system transfers crash forces to the child instead of absorbing them through its structure. The one-inch limit ensures the seat is fully coupled to the vehicle’s frame from the first moment of impact.
But here’s where people get it wrong. You’re testing the seat’s connection to the car, not the seat’s internal recline mechanism or the child’s movement within the harness. A properly installed convertible seat will still have some flex in its back or base. That’s fine. Focus your pull at the exact point where the metal hook or seat belt latches. If you installed with LATCH, pull on the lower anchor strap. If you used the seat belt, pull on the belt itself where it passes through the belt path.
Skip this if: you’re pulling on the headrest or the cupholder. You’ll get movement even on a perfect install. The belt path is the only point that matters.
Three Checks Most People Forget
Passing the wiggle test feels like a win. It’s not. These three details, buried in the manuals, are where most installations fail silently.
1. The Lower Anchor Weight Limit Math
Your vehicle’s lower anchors (LATCH system) have a maximum weight rating. It’s not just your child’s weight. It’s the combined weight of the child plus the car seat. The NHTSA standard sets a common limit of 65 pounds.
If your car seat manual doesn’t have a label, you do the math: 65 lbs minus the weight of the car seat. The Chicco Fit360 manual, for example, states you must stop using the lower anchors rear-facing when the child exceeds 30 lbs, and forward-facing when they exceed 35 lbs. Other seats have different limits.
Common mistake: Assuming LATCH is always safer than the seat belt. After the weight limit, it’s not. Exceeding it can overload the anchors. You must unclip the lower anchor straps and reinstall using the vehicle’s seat belt.
2. The Harness Fit That Lies
You pinch the harness strap at the child’s shoulder. No extra fabric. It feels snug. But did you remove their puffy winter coat? That coat compresses in a crash, creating inches of slack. The child can submarine under the straps or be ejected.
The Joie Saffron SI manual warns against bulky clothing. The fix is simple: buckle the child in without the coat, place the coat over them like a blanket, or put the coat on backwards after the harness is secure. The harness must be tight against the child’s body, not the exterior of a compressible layer.
3. The Expiration Date You Can’t See
Plastics degrade. Fabrics fatigue. Standards change. Every car seat has an expiration date, usually 6 to 10 years from the date of manufacture. The Joie Saffron SI manual states a 10-year life. The BeSafe iZi Go Modular manual specifies 7 years.
This isn’t a marketing ploy. It’s a material-science limit. UV exposure, temperature cycles, and normal stress weaken the plastic shell and internal components. A seat past its expiration date may not perform as designed in a crash. You’ll find the manufacture date on a sticker on the seat’s back or bottom.
| Check | Where to Find It | Consequence If Missed |
|---|---|---|
| Lower Anchor Weight Limit | Car seat manual label or spec sheet | Overloaded anchors may detach in a crash. |
| Harness Fit with Bulky Clothing | Visual & pinch test at child’s collarbone | Harness slack leads to ejection or internal injury. |
| Expiration Date | Sticker on seat shell (month/year) | Weakened plastic may crack under crash forces. |
How to Verify Installation Method by Method
You used only one method, right? Both the NHTSA and the Joie Saffron SI manual are absolute: use the vehicle seat belt OR the lower anchors, never both together. Mixing methods can cause the seat to be over-constrained and increase stress on the wrong parts. Here’s how to verify each.
Using the LATCH System
Lower Anchors for Children (LATCH) is the two sets of metal bars between your vehicle’s seat cushions. Your car seat has hooks or connectors that clip onto them.
First, confirm a positive connection. On seats like the Joie i-Gemm 3 with ISOFIX, you should hear and see a click, and the indicator window should turn completely green. Tug hard on the connector itself, not the seat. It should not release.
Second, check the angle. Many rear-facing seats require a specific recline angle, indicated by a level line or bubble. An overly upright seat can let an infant’s head slump forward, affecting breathing. A too-reclined forward-facing seat changes the harness geometry.
Finally, attach the top tether if the seat is forward-facing. This strap from the top of the car seat back to an anchor in your vehicle (often in the seat bight, trunk floor, or back of the seat) limits forward head movement in a crash. The NHTSA recommends always using it with a forward-facing seat. Tighten it until there’s no slack.
For a complete walkthrough, our guide on LATCH installation details the hook types, common errors, and vehicle-specific quirks.
Using the Vehicle Seat Belt
If your child exceeds the LATCH weight limit or your vehicle doesn’t have anchors, the seat belt is your only option. It must be a locking seat belt.
There are two types: switchable retractors (you pull the belt all the way out to engage lock mode) and cinching latchplates (the metal buckle piece has a built-in lock). Your vehicle manual will specify which you have. If the belt doesn’t lock, you need a locking clip, which your car seat likely came with.
Route the belt exactly as shown in your car seat’s manual. This usually means through a specific color-coded path on the seat shell. Once buckled, kneel into the seat and use your body weight to compress the vehicle cushion while you pull the belt tight. Then, perform the one-inch test.
Where this goes sideways: Using an inflatable seat belt. The Chicco Fit360 manual explicitly forbids this. The interaction of the inflating belt with the car seat can cause injury. If your vehicle has them, you must use the lower anchors or move the car seat to a position with a standard belt.
Our resource on seat belt installation covers locking mechanisms, routing diagrams, and how to use a locking clip.
The Professional Inspection: When to Get Help
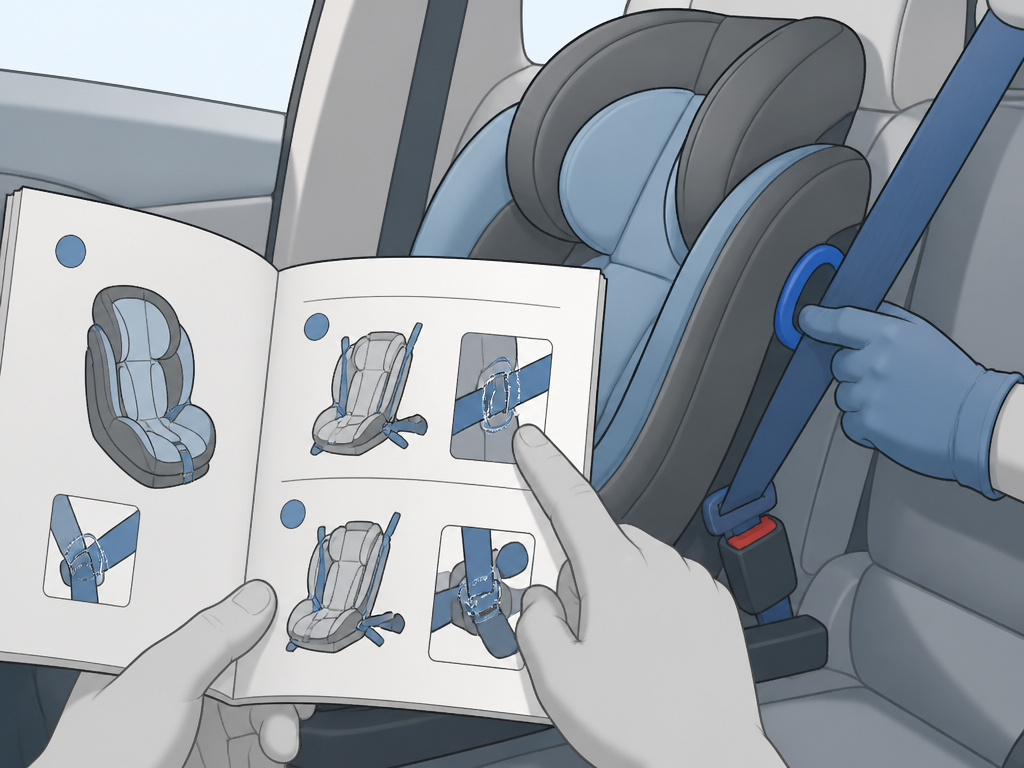
You’ve read both manuals. You’ve passed the one-inch test. The harness is snug. You’re still unsure. That’s the right time to seek a professional inspection.
Certified Child Passenger Safety Technicians (CPSTs) are trained to spot errors even careful parents miss. They know the specific compatibility issues between certain car models and seat brands. Many fire departments, hospitals, and health departments offer free inspection events.
Bring your car seat, your child (if possible), and both the car seat and vehicle manuals. The technician will walk you through the entire installation verification process so you can do it yourself next time. It’s not a failure to get a check; it’s a final layer of validation.
Frequently Asked Questions
How often should I check my car seat installation?
Check it every month, and definitely after any adjustment like changing the harness height or moving the seat to another vehicle. Also check after any collision, even a minor fender-bender. Many manufacturers, like BeSafe, state the seat must be replaced after any accident, as damage may not be visible.
Can I use aftermarket accessories like strap covers or head supports?
Only if they are sold and approved by your car seat’s manufacturer. The Chicco Fit360 manual states that using unapproved accessories voids the warranty. More importantly, non-approved items can interfere with the harness system or degrade in a crash, failing to protect your child.
My car seat seems tight, but it’s reclined more than the indicator shows. Is that okay?
No. The recline angle is critical for infant breathing and for proper crash performance. An incorrect angle can direct crash forces incorrectly. Use rolled towels or a pool noodle (only if permitted by your car seat manual) under the seat base to achieve the correct angle before tightening.
Is the center seat the safest place?
Often, yes. It’s farthest from any point of impact. However, the safest seat is the one where you can achieve a proper, tight installation. Some vehicle center seats have humps or only a lap belt, making a secure correct installation impossible. Always prioritize a correct install over a perceived “best” position.
What does it mean if my forward-facing seat doesn’t have a top tether strap?
All forward-facing car seats sold in the U.S. And Canada for the past two decades have a top tether strap. If yours is missing, the seat is likely expired or was not designed for the North American market. Do not use it. The top tether is a non-negotiable safety feature for forward-facing installations.
Before You Go
Installing a car seat correctly is a mix of brute force and meticulous reading. The force gets it tight; the manual tells you what “tight” means for your specific model. The one-inch test is your baseline. The lower anchor weight limit, the harness fit over actual clothing, and the expiration date are your pass/fail criteria.
Your next step is simple. Go to your car right now. Perform the one-inch test at the belt path. Then, pull out your car seat’s manual and find the lower anchor weight limit. Check the manufacture date sticker. That twenty-minute exercise is what stands between a checklist item and a genuinely safe install.
