
The 1″ Rule: How to Fix a Car Seat Base That Won’t Get Tight
This post contains affiliate links. As an Amazon Associate, we earn from qualifying purchases.
If your car seat base moves more than 1 inch (2.5 cm) side-to-side or front-to-back at the belt path, it’s not tight enough. The universal fix is to use your full body weight, kneel or push down into the seat cushion, while tightening the LATCH strap or seat belt, then re-check at the belt path, not the front of the base.
That 1-inch limit isn’t a suggestion. It’s the engineering tolerance printed in every manual from the Graco SnugRide SnugLock to the Evenflo SafeMax. A base that shifts more than that in a crash transfers force through the seat shell instead of absorbing it through the vehicle’s frame. Your job is to eliminate that slack.
What follows is the mechanics behind that 1 inch. We’ll break down the three things that actually matter: your vehicle’s belt type, the exact spot you apply force, and the one tool most parents never use. This isn’t about strength. It’s about technique.
Key Takeaways
- The 1-inch (2.5 cm) movement rule applies only at the belt path, grab the base where the seat belt or LATCH strap routes through it.
- Never use both the seat belt and LATCH system together. This creates dangerous slack and is prohibited by every manufacturer.
- Your body weight is the tool. Kneel into the base seat cushion or push down with your full weight while tightening the strap.
- An unlevel base cannot be tightened securely. The level indicator must be correct for your child’s weight before the final tighten.
- If your vehicle has a sliding latch plate seat belt, you likely need a free locking clip from the car seat manufacturer to lock the belt.
The 1″ Movement Test (And Where to Grab)
You check for movement at the belt path. Not the front of the base. Not the top near the carrier. The belt path is the tunnel or channel where the vehicle’s seat belt or LATCH strap physically passes through the base’s plastic shell.
Grab the sides of the base at the belt path, push and pull the base from side to side and front to back. If the base moves less than 2.5 cm (1 in), it is tight enough. Graco SnugRide SnugLock DLX Infant Car Seat Base Manual
That’s the technical snippet every manual agrees on. The belt path is the anchor point. Any movement beyond an inch here means the connection to the vehicle is loose. The front of the base can and will flex, that’s normal. The belt path should not.
Where this goes sideways: Testing at the front of the base. You’ll always get movement there, which leads to over-tightening, stripped LATCH straps, or the mistaken belief that you need both the seat belt and LATCH. Focus your test at the source.
Never Do This: The LATCH + Seat Belt Mistake
This is the most common and dangerous error. In a desperate attempt to stop movement, parents thread the seat belt through the base and attach the LATCH connectors. Every single manual in our research forbids this.
NEVER use the vehicle seat belts when using the lower anchor connector assembly. Using both together can cause slack in a sudden stop or crash. Evenflo SafeMax Car Seat Base Manual
Using both systems doesn’t make it safer. It makes it unpredictable. In a crash, the two systems can interact, creating slack in one as the other loads. The base can pivot on the uneven tension points. The rule is absolute: pick one. Use the seat belt or use LATCH. Not both.
If you’re in the middle seat and your vehicle doesn’t have dedicated LATCH anchors there, you must use the seat belt. Don’t “borrow” the inner anchors from the outboard seats unless your vehicle manual explicitly allows it, most don’t. Your seat belt installation is your only safe option in that spot.
Your Body Weight Is the Missing Tool
You can’t get it tight by pulling the strap with your arms alone. The cushion of your vehicle seat compresses. You must compress it first, and hold it compressed, while you take up the slack in the belt or LATCH strap.
For LATCH installations:
- Attach both connectors to the anchors until they click.
- Place your knee (or both knees) firmly into the seat cushion of the base. Put your full weight into it.
- While maintaining that pressure, pull the LATCH strap tail to remove all slack. The base should sink into the vehicle seat.
- Lock the LATCH adjuster (if your base has one).
For seat belt installations:
- Route the belt through the correct belt path and buckle.
- Press down on the base with your hand, arm, or knee, use as much body weight as you can.
- While pushing down hard, pull the shoulder belt webbing to tighten. For lap belts, pull the free end tight.
This kneeling technique isn’t a secret. It’s the standard installing the base procedure that fire station technicians use. Your muscle isn’t fighting the base; it’s pre-loading the vehicle seat so the belt can lock against a solid object.
Is Your Seat Belt Compatible? (The Locking Clip Fix)

Not all seat belts work. Your base needs a belt that locks and stays locked. The three safe types are: a lap belt with a locking latch plate, a lap belt with an Automatic Locking Retractor (ALR), or a lap/shoulder belt with a switchable retractor you can lock.
The problem belt is the lap/shoulder belt with a sliding latch plate and emergency locking retractor (ELR). This is the most common type in modern cars. The latch plate slides freely; the retractor only locks in a sudden stop. It cannot hold a car seat tight during normal driving.
| Belt Type | How to Identify | Can It Lock the Base? |
|---|---|---|
| Locking Latch Plate | Metal bar on underside of buckle tongue. Lap belt gets tight and stays. | Yes. Pull tight, it stays. |
| Automatic Locking Retractor (ALR) | Pull the entire belt all the way out. It will ratchet as it retracts, not pull out smoothly. | Yes. It locks at the retractor. |
| Switchable Retractor (ELR to ALR) | Pull the shoulder belt slowly all the way out until it clicks. It then ratchets like an ALR. | Yes, after you switch it. |
| Sliding Latch Plate + ELR | Latch plate slides easily on webbing. Belt retracts smoothly unless yanked. | No. Requires a locking clip. |
If you have the sliding latch plate type, you need a locking clip. It’s a small, H-shaped metal bar that comes with your car seat (or you can get one free from the manufacturer). You pinch the seat belt webbing together and clip it 1 inch from the latch plate. This prevents the belt from sliding.
Route the vehicle seat belt through the proper belt path and buckle it in. Pull the vehicle seat belt tight. While pushing down on the base, pinch the two straps together behind the buckle tongue… Attach locking clip to lap and shoulder belts as shown. Graco SnugRide 35 Lite LX Standalone BASE Manual
If your installing a car seat base without LATCH attempt fails because the belt just slips back loose, a locking clip is your answer. It turns an incompatible belt into a fixed-length loop.
The Level Indicator Isn’t Just for Recline

That little window with a bubble isn’t only about your baby’s comfort. A base that’s not level to the ground according to the indicator cannot achieve a secure, tight fit against the vehicle seat back.
The base needs to sit flush. If the front is too high (bubble toward the back), there’s a gap under the front edge. When you tighten the belt, it pulls the base upward, pivoting on that front edge instead of pulling it straight back into the seat. The result is a base that seems tight but rocks front-to-back.
Fix it before you tighten:
- Check the level indicator after a preliminary tighten.
- If the bubble is out of the correct zone for your child’s weight, adjust the base’s recline foot.
- If the foot is fully adjusted and it’s still not level, place a tightly rolled towel or a pool noodle under the front edge of the base, against the vehicle seat bight (the crack where the seat back and cushion meet).
- Re-tighten the belt or LATCH strap with your weight. The bubble should now be level.
This step ensures the base’s entire footprint is in contact with the vehicle seat. A flush contact patch is the foundation of a proper base setup. Skip it, and you’re building on a wobble.
When to Try a Different Seat Location
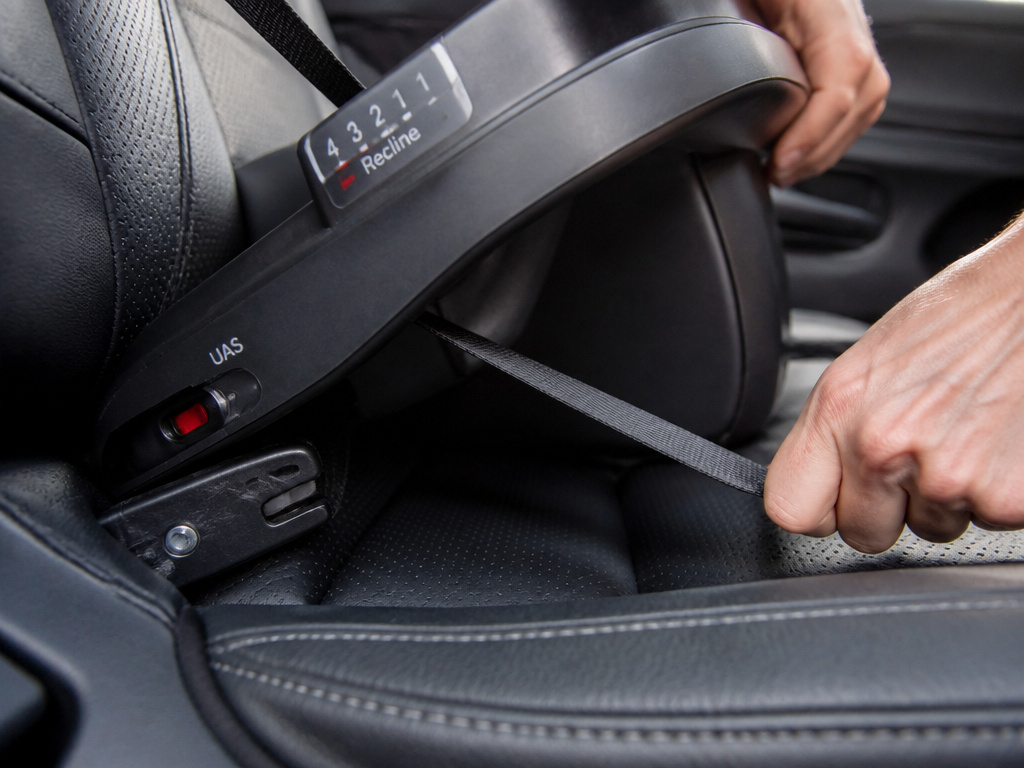
Sometimes, the vehicle seat itself is the problem. Deeply contoured buckets, slippery leather, or a pronounced hump in the center can prevent a secure fit. The manuals are clear: if you cannot get a tight installation, move the base.
If the LATCH/UAS belt does not remain tight or the car seat base can move more than 2.5 cm (1 in) in any direction, do not use this seating location. Orbit Baby Infant Car Seat + Car Seat Base Manual
Try an outboard seat. The geometry is often different, and LATCH anchors are always dedicated. A middle seat install is ideal for safety, but a rock-solid install in an outboard seat is safer than a loose one in the center. Your vehicle manual will list which seating positions are approved for child restraints.
Step-by-Step Tightening Checklist
Follow this sequence. Do not skip steps.
- Choose Your Method: Decide to use LATCH or the seat belt. Do not use both.
- Check Belt Type: If using the seat belt, confirm it’s a locking type. If it’s a sliding latch plate, get your locking clip ready.
- Position the Base: Set the recline foot. Place the base on the vehicle seat, ensuring at least 80% of the base is on the seat.
- Route the Belt/LATCH: Thread the seat belt through the correct, rear-facing belt path (usually marked with a blue label) and buckle. Or, attach both LATCH connectors to the anchors until they click.
- Apply Weight: Kneel or push your full weight into the base seat cushion.
- Tighten: While maintaining pressure, pull the seat belt webbing or LATCH strap tail until all slack is gone. Lock the mechanism.
- Check Level: Verify the level indicator bubble is in the correct zone for your child’s weight. Add a rolled towel under the front edge if needed, then re-tighten.
- The 1″ Test: Grab the base at the belt path. Push and pull side-to-side, then front-to-back. Movement must be less than 1 inch.
- Attach the Carrier: Click the infant carrier onto the base. Pull up on the handle to confirm it’s locked.
If you fail the 1″ test at step 8, go back to step 5. You likely didn’t use enough sustained body weight while tightening.
Frequently Asked Questions
Can the fire department check my car seat base?
Yes. Many fire stations have certified Child Passenger Safety Technicians (CPSTs) who will check your installation for free. You can also find a CPST near you through the National Highway Traffic Safety Administration (NHTSA) website. They’ll show you the kneeling technique and spot compatibility issues.
My base is tight but the front still moves. Is that okay?
Yes. The test is at the belt path. The front of the base, especially where the carrier attaches, has some flex by design. That’s different from the base itself shifting on the vehicle seat. Focus your test where the belt goes through.
I have an older car with no LATCH. What do I do?
You use the seat belt. The seat belt system, when used correctly with a locking clip if needed, is equally safe. Your process is a seat belt only install. The key is identifying your belt type and using the locking clip.
What if I’ve been in a minor crash?
The NHTSA states a seat or base does not need replacement after a minor crash if all of these are true: the vehicle was drivable, the door nearest the seat wasn’t damaged, no one was injured, airbags didn’t deploy, and there’s no visible damage to the seat. In a moderate or severe crash, replace the base immediately.
Can I just install the car seat without the base?
Yes. Every infant seat is designed for a baseless installation using the vehicle seat belt routed through the car seat’s own rear-facing belt path. This is useful for travel, taxis, or grandparents’ cars. You still follow the same 1-inch movement rule at the seat’s belt path.
Before You Go
A loose base isn’t a small worry. It’s a complete failure of the safety system. The fix almost never requires more strength, it requires the right technique. Match your belt type, use your body weight as a tool, and test at the belt path for that critical 1 inch of movement. If your vehicle seat won’t cooperate, move the base. The goal isn’t a perfect middle seat location; it’s a base that doesn’t budge where it’s anchored. When it’s tight, you’ll feel it. The base becomes part of the car. That’s the feeling you’re looking for.
