
A Step-by-Step Guide on How to Adjust an Infant Car Seat
This post contains affiliate links. As an Amazon Associate, we earn from qualifying purchases.
Adjusting an infant car seat harness is about two numbers: the slot position relative to your baby’s shoulders and the slack you can’t pinch. For rear-facing seats, the harness straps must be at or just below the shoulders, never above. Newer seats use a no-rethread headrest; older models require manually rethreading the straps through the shell.
That “at or just below” rule isn’t a suggestion. Straps above the shoulders in a rear-facing crash let the child ramp up and out of the seat, increasing head and neck injury risk. The difference between a snug harness and a loose one is the space between life-altering injury and walking away.
What follows is the breakdown of the two adjustment systems, the exact steps for each, and the test that matters more than any other check.
Key Takeaways
- Shoulder rule is absolute: For rear-facing, harness straps must be at or just below the shoulders. Above is unsafe.
- Identify your system first: No-rethread seats (Cybex, Evenflo LiteMax) adjust with a headrest lever. Manual-rethread seats (Britax B-Safe 35) require unbolting and rethreading the straps.
- The pinch test is non-negotiable: If you can pinch a vertical fold of harness webbing at the collarbone, it’s too loose.
- Check monthly: Babies grow fast. A fit that was perfect four weeks ago is likely wrong today.
- The chest clip position is separate: It stays at armpit level, regardless of harness height adjustments.
No-Rethread vs. Manual Systems: The Headrest is Key
The first question isn’t how to adjust, it’s what you’re adjusting. Modern infant seats split into two camps.
No-rethread systems integrate the harness straps into a sliding headrest. You pull a handle or lever behind the seat, slide the entire headrest up or down, and the harness height moves with it. The Cybex Cloud T offers 12 adjustable positions this way, and the Evenflo LiteMax NXT Sensory Soothe has eight. It’s a five-second job.
Manual-rethread systems, like the Britax B-Safe 35, have fixed harness slots molded into the plastic shell. To change the strap height, you must physically remove the harness straps from the current slots and rethread them through a higher or lower set. This involves unbuckling the seat from its base, flipping it over, and often removing the cover.
The part nobody mentions: On a manual-rethread seat, you must rethread BOTH shoulder straps through the SAME slot position on each side. Mismatching them, left strap on slot 2, right strap on slot 3, creates uneven force in a crash. The Britax manual states the harness strap should lie in a “relatively straight line” across the child’s back; a diagonal pull from mismatched slots guarantees it won’t.
The Rear-Facing Shoulder Rule: Why “At or Below” is Physics
For a rear-facing infant, the harness straps must be at or just below the child’s shoulders. This isn’t about comfort; it’s about crash geometry.
In a frontal collision, the most common and severe type, a rear-facing seat rotates toward the point of impact. If the straps are above the shoulders, the child’s body can “ramp” upward, increasing the risk of head and neck injury. Straps at or below the shoulders hold the child down and back into the seat’s protective shell, distributing crash forces across the stronger back and shoulders.
The rule is consistent across every manual from Transport Canada to the American Academy of Pediatrics. The Evenflo LiteMax NXT manual states it plainly: “For rear-facing, harness straps must be AT OR JUST BELOW the child’s shoulders, never above.”
| Strap Position | Effect in a Frontal Crash | Safe? |
|---|---|---|
| Above Shoulders | Child can ramp up and out of seat shell | No |
| At Shoulders | Child is held down and back into seat | Yes |
| Just Below Shoulders | Optimal restraint, prevents ramping | Yes |
How to Adjust a No-Rethread Harness (Cybex, Evenflo)
For seats like the Cybex Cloud G Pro or Evenflo LiteMax NXT, the process is built into the headrest.
- Locate the adjustment handle. It’s typically on the back of the seat shell, just behind the headrest. On a Cybex, it’s a large, often green, lever.
- Lift or pull the handle while supporting the headrest with your other hand. This disengages the locking mechanism.
- Slide the headrest up or down until the harness straps align at or just below your baby’s shoulders. You’ll feel or hear it click into discrete positions. Cybex uses 11 or 12, Evenflo uses 8.
- Release the handle to lock the headrest in the new position.
- Re-check the strap path. Ensure the straps aren’t twisted and exit the headrest cleanly.
I prefer the Cybex system for its audible clicks. The Evenflo’s is smoother but quieter, you have to visually confirm the lock. With a wiggling baby, that extra tactile feedback matters.
How to Adjust a Manual-Rethread Harness (Britax, Chicco KeyFit)
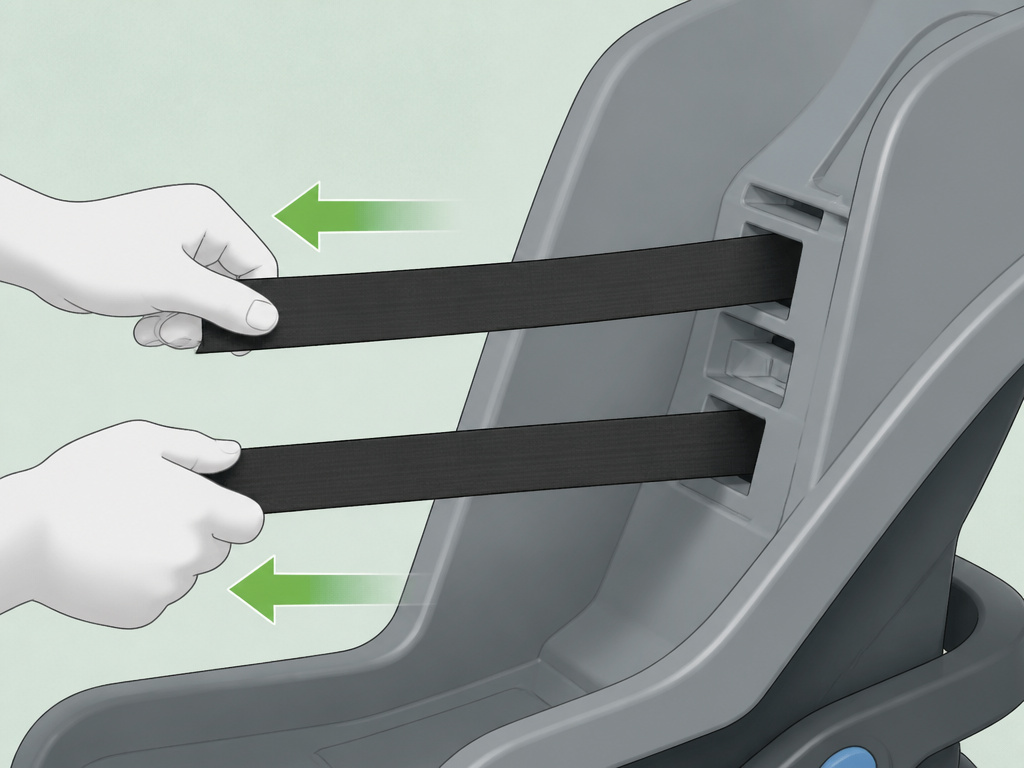 For seats like the Britax B-Safe 35, you’re doing minor surgery. Set aside ten minutes.
- Remove the infant carrier from the vehicle base. You cannot do this properly with the seat installed.
- Unbuckle the harness and open it fully. Move the chest clip and buckle out of the way.
- Remove the seat cover. Most require you to unhook elastic bands from the underside and pull the cover up over the shell. Refer to your manual, the Britax B-Safe 35 guide shows tucking the cover into a channel around the seat.
- Locate the harness straps where they pass through the plastic shell. You’ll see them threaded through a set of metal or plastic slots.
- Unthread the straps from the current slots. You may need to loosen the harness adjuster strap completely to get enough slack.
- Rethread both straps through the new, correct set of slots. This is the critical step: both left and right straps must go through the same level slot on their respective sides.
- Reassemble. Pull the straps back through the cover, reattach the cover, and secure the elastic. Before reinstalling, perform the pinch test.
Common mistake: Rethreading one strap at a time. This almost always leads to a twist in the webbing inside the shell. Pull both straps completely free, lay them flat, and rethread them together.
The Pinch Test That Guarantees a Snug Fit
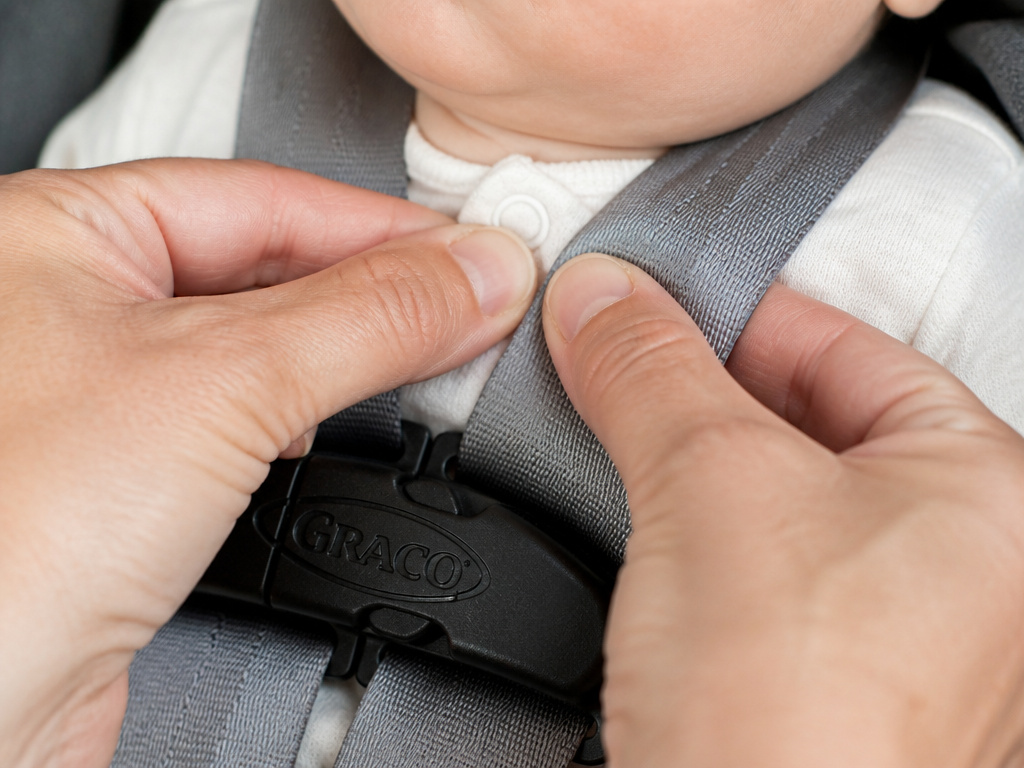 Harness tightness is more important than the exact slot. A perfectly positioned but loose strap is useless.
After buckling your child in, tighten the harness using the front adjuster strap. Pull until the slack is gone. Then perform the pinch test:
Pinch the harness strap vertically at the child’s collarbone. Try to pinch a fold of the webbing between your thumb and forefinger.
- If you can pinch any material, the harness is too loose. Tighten further and retest.
- If the webbing is taut and you cannot pinch a fold, it’s snug enough.
The official manuals call this the “pinch test.” It’s the only objective measure you have. Your sense of “tight enough” is unreliable; the webbing’s resistance isn’t.
Where Else to Check: The Buckle and Chest Clip
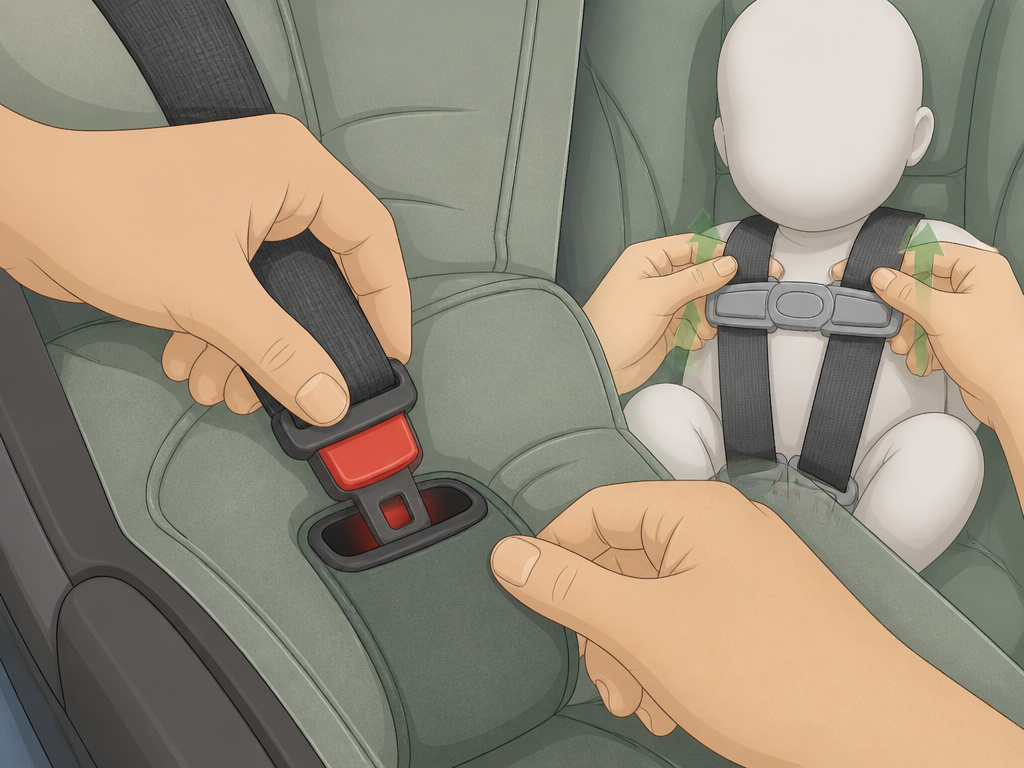 Harness height isn’t the only adjustment. Two other points need a monthly glance.
The Buckle Tongue (or Crotch Buckle): Many seats, like the Evenflo LiteMax NXT, have multiple buckle positions. The buckle should be as close to the child’s body as possible without being underneath them. As your baby grows, you’ll move this buckle to the next slot outward. A buckle too far out creates a loose lap belt section; too far in can be uncomfortable and hard to snap.
The Chest Clip: Its job is to hold the shoulder straps in position. It has nothing to do with crash restraint. It must be at armpit level, not on the belly, not on the neck. After you raise the harness height, the chest clip often needs to be slid up the straps to maintain this position.
When to Make the Adjustment (It’s Not Just Size)
You adjust the harness height when your baby’s shoulders rise above the current strap slots. But you check the fit every single time you buckle them in.
Growth isn’t linear. An infant can outgrow a slot position in a matter of weeks during a growth spurt. Mark your calendar for a formal monthly check. Lift the headrest or inspect the slots with your child in the seat. If the shoulders are above the straps, adjust immediately.
Other triggers for a check: * After any long trip where the child was in the seat for hours. * When you switch between bulky winter clothes and lighter layers. * If you ever notice yourself having to loosen the harness more than usual to get the buckle snapped.
Worth knowing before you start: A too-tight harness isn’t the danger most people fear. You’re not hurting them. The real risk is a harness one slot too low or a buckle you can pinch. That’s the gap that lets a child submarine or eject.
Troubleshooting a Hard-to-Adjust Harness
Sometimes the mechanism fights you. Here’s what’s usually wrong.
| Problem | Likely Cause | Fix |
|---|---|---|
| Headrest won’t slide | Twisted harness strap inside the shell | Unthread the strap, remove the twist, rethread |
| Strap won’t tighten | Harness locked in retractor mode (on convertible seats) or twisted in buckle tongue | Check for a lock-off button; unbuckle, straighten all straps, rebuckle |
| Chest clip won’t move | Grime or dried milk in the slider channel | Wipe the strap clean with a damp cloth; avoid lubricants |
| Buckle is too hard to snap | Debris in the buckle mechanism | Use a toothpick to gently clear crumbs; never use liquids |
For a persistent problem, the answer is often in the manual for your specific car seat installation. A twisted strap path is the most common culprit after a cleaning harness session.
Frequently Asked Questions
How often should I adjust my infant car seat straps?
Check the fit every month. Babies grow quickly, and a proper adjustment timing is critical for safety. The harness should be at or just below the shoulders, and you should not be able to pinch any slack at the collarbone.
Can I adjust the straps with my baby in the seat?
For no-rethread systems, yes, you can lift the headrest with the child seated. For manual-rethread systems, no. You must remove the child and the seat from the base to properly rethread the harness straps through the shell.
What if the straps are always twisted?
This usually happens during reassembly after cleaning or adjusting. When rethreading a manual system, lay both straps completely flat and feed them through the slots simultaneously. For no-rethread seats, ensure the straps are straight where they exit the headrest before locking it in place.
My child seems squished. Are the straps too tight?
Probably not. A safe harness is snug. If you cannot pinch any webbing at the collarbone, it’s correct. Babies will fuss about being restrained, that’s normal. Comfort is a well-padded seat and proper recline, not a loose harness. If red marks are left on the shoulders, check the padding on the infant insert.
The Bottom Line
Adjusting an infant car seat harness is a binary task: you either did it right or you didn’t. Identify your seat’s system, no-rethread headrest or manual slots, and move the straps to at or just below the shoulders. Then pull the adjuster strap until you cannot pinch any webbing. That’s the entire job. Check it monthly, because the consequences of getting it wrong don’t offer a second chance. When your child’s shoulders creep above those slots, it’s time to switch car seats to a model that accommodates their new size.
