
Correct Timing for Adjusting Straps on an Infant Car Seat
This post contains affiliate links. As an Amazon Associate, we earn from qualifying purchases.
Adjust the straps on your infant car seat when one of three things changes: the harness slot position relative to your baby’s shoulders, the tightness of the harness, or your baby’s head height relative to the seat shell. For rear-facing seats, the straps must be at or just below the shoulders, you should not be able to pinch excess webbing, and the top of the head must stay at least one inch below the seat top.
That answer is the rule. The follow-up is where parents get tripped up, not by the rule itself, but by the physical cues that signal it’s time to move.
You check the straps every single time you buckle your baby in. That’s non-negotiable. But you only adjust them when a specific milestone is met or a specific fit fails. This guide breaks those triggers into a concrete checklist, pulls the exact numbers from the manufacturer manuals most people never open, and shows you where the common, dangerous assumptions live.
What follows: the three checkpoints, the step-by-step mechanics for your specific seat model, and the one adjustment most caregivers miss until it’s pointed out in a parking lot by a certified technician.
Key Takeaways
- The harness height adjusts when your baby’s shoulders rise above the current strap slots. For rear-facing, the rule is “at or just below”, an inch above means it’s time to move them up.
- Harness tightness needs a daily check via the pinch test. If you can pinch a horizontal fold of webbing at the shoulder, it’s too loose. This isn’t about comfort; it’s about eliminating slack that becomes whip in a crash.
- The infant insert must come out as soon as your baby meets the minimum weight listed on the insert label, usually around 10-11 pounds. Leaving it in longer creates dangerous slack and improper shoulder positioning.
- Never use the harness adjuster strap to lift or carry the seat. On models like the Britax B-SAFE 35, this can damage the internal webbing and compromise the adjustment mechanism.
- Adjustment is not a set-it-and-forget-it task. A growth spurt can change the needed settings in a week. Mark your calendar for a monthly “fit audit” beyond the daily pinch test.
The Three Non-Negotiable Checkpoints
You don’t adjust on a hunch. You adjust when a measurement crosses a line. These three checkpoints are printed in every manual, but they’re often buried under warnings and diagrams.
For rear-facing use, the harness straps must come through the car seat slots at or just BELOW your child’s shoulders. The harness must be snug, if you can pinch a horizontal fold of webbing at the child’s shoulder, it is too loose. The top of the child’s head must be at least 1 inch (2.5 cm) below the top of the child seat shell. Paraphrased from the Safe Kids Worldwide Ultimate Car Seat Guide and OEM manuals.
1. Shoulder-to-Strap Height: The “At or Just Below” Rule
This is the most frequent adjustment. For a rear-facing infant seat, the harness straps must be at or just below the baby’s shoulders.
The logic is mechanical. In a frontal crash (the most common severe collision), a rear-facing seat cradles and moves with the child. Straps at or below the shoulders keep the child contained and pressed back into the seat, distributing crash forces across the back. Straps above the shoulders can cause the child to ramp upward and potentially be ejected.
When to adjust: The moment the baby’s shoulders are consistently above the current harness slot height. Don’t wait for them to be “way above.” An inch is your signal. * Check weekly: With your baby seated in the car seat, press on the shoulder to find the bony protrusion. Look at where the harness strap comes through the shell. Is the strap below that point? Good. Is it level with it? Also good. Is the strap visibly lower, with the shoulder above it? Time to move the straps up.
2. Harness Tightness: The Pinch Test
Snugness is everything. A loose harness is arguably more dangerous than incorrect height.
The pinch test is the universal standard. After buckling and tightening, try to pinch the harness webbing vertically at your child’s shoulder. If your fingers slide off, it’s tight enough. If you can pinch a horizontal fold of webbing, it’s too loose.
Why the pinch test works: It tests for functional slack. Your fingers can’t pinch material that’s under tension. That horizontal fold you might grab represents inches of slack that will multiply into feet of forward movement in a crash.
When to adjust: Every. Single. Ride. This is a daily, before-you-drive check. Bulky clothing is the usual culprit. Perform the test with the coat off, then put the coat on backward over the buckled harness.
3. Head Height: The One-Inch Rule
This checkpoint often gets missed because it’s about outgrowing the seat entirely, not just adjusting the straps. The top of your baby’s head must be at least one inch below the top of the hard plastic seat shell.
This isn’t about the soft canopy or head cushion. It’s about the structural shell. If the head is too close to the top, there’s insufficient containment in a crash.
When to adjust: This isn’t a strap adjustment, it’s a seat transition signal. When there’s less than one inch of shell above the head, your baby has outgrown the infant seat in height. It’s time to switch car seats to a rear-facing convertible model. Check this monthly.
| Checkpoint | Rule | When to Act | Consequence of Ignoring |
|---|---|---|---|
| Strap Height | At or just below shoulders (rear-facing) | Shoulders rise above current slot | Increased risk of ejection; poor crash force distribution |
| Harness Tightness | Cannot pinch horizontal webbing at shoulder | Every time you buckle in | Whiplash-like motion; potential contact with vehicle interior |
| Head Height | ≥1 inch of shell above head | Less than 1 inch of clearance | Head not fully contained; risk of head-strike injury |
How to Adjust: Loosening vs. Tightening Mechanics
The process isn’t mysterious, but doing it wrong can break the mechanism. The two actions, loosen and tighten, use different parts of the harness system.
Loosening the Straps to Get Your Baby Out
This is usually a one-handed motion. You’re working the harness release lever, often a large button at the crotch buckle or on the front of the seat.
- Locate the main harness release lever. On a Graco SNUGRIDE SNUGLOCK 35 LX, it’s under the seat pad near the buckle.
- Press and hold the lever while gently pulling the two harness straps forward from the shoulder area.
- The entire harness should slacken evenly, allowing you to open the chest clip and lift your baby out.
Common mistake: Yanking the straps apart without pressing the release lever. This strains the internal locking mechanism and can warp the plastic over time. You’ll feel resistance, then a sudden give, that’s the strain.
Tightening the Straps for a Secure Fit
This is where you use the harness adjustment strap, the tail of webbing that hangs below the seat or comes out the back.
- Buckle the chest clip and crotch buckle.
- Pull the harness adjustment strap straight back, in line with the seat. Do not pull it upward or downward at an angle.
- Pull steadily until the harness is snug against your baby’s shoulders and hips. Perform the pinch test.
- Release the strap. The internal lock should hold the tension.
Where this goes sideways: Pulling the adjustment strap at an angle. The Britax Römer BS3iS-iSense manual explicitly warns “Do not pull adjustment belt upwards or downwards.” Angled pulls can cause the webbing to bind inside the mechanism, leading to inconsistent tightening and eventual failure.
For a detailed walkthrough of this motion, see our guide on how to tighten infant car seat straps. If you need to create slack to get your baby in on a cold morning, the steps for how to loosen straps on an infant car seat are equally specific.
The Adjustments Most People Miss (Until It’s Too Late)
The strap height and tightness are front-of-mind. These two settings are not, and they directly impact safety.
The Infant Insert Removal Deadline
The plush infant insert is for tiny newborns. It is not a permanent comfort pillow. Every insert has a minimum weight requirement for removal, typically printed on a tag.
When to adjust: Remove the insert as soon as your baby meets that minimum weight, often around 10-11 pounds. The Reddit post from the horrified mom finding the insert still in place for her 10+ pound baby is a perfect example of this common, dangerous oversight.
Why it matters: The insert positions a smaller baby correctly within the shell. For a larger baby, it creates a gap between their back and the seat, allowing the harness to be tightened “snug” against the insert, not the child. This creates deadly hidden slack. The criteria for when to take the infant car seat insert out are weight-based, not age-based.
The Hidden “No-Lift” Rule
You would never lift a 30-pound weight by a thin strap. Yet parents do this with car seats daily.
The rule: Never use the harness adjustment strap as a carry handle. The Britax B-SAFE 35 manual states this clearly: “Never use the adjuster strap to lift or carry this infant car seat. Doing so could cause damage to the harness adjuster and webbing.”
The adjuster mechanism is designed for linear, in-line tension. The twisting, jerking force of lifting the entire seat’s weight can strip internal gears or stretch the webbing. The seat will still look fine, but the adjuster may not hold tight in a crash.
Troubleshooting Common Strap Problems
 Even with perfect technique, things go wrong. Here’s how to diagnose the usual suspects.
| Problem | Likely Cause | Immediate Fix |
|---|---|---|
| Straps won’t tighten | Adjustment strap pulled at an angle; webbing twisted inside shell; mechanism jammed with debris. | Stop pulling. Release tension completely. Ensure strap path is clear. Pull straight back. If stuck, consult manual—don’t force it. |
| Straps won’t loosen | Harness release lever not fully depressed; twisted strap jamming in buckle tongue. | Press release lever firmly and hold. Gently wiggle buckle tongues while pulling straps apart. Never cut the straps. |
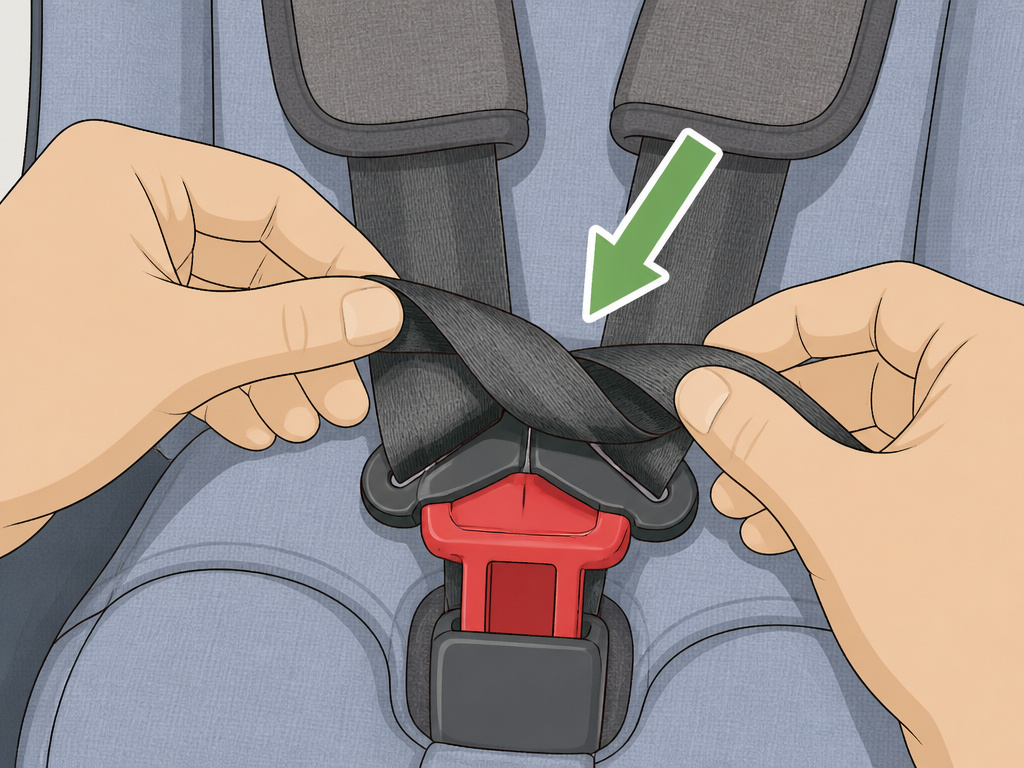
| One strap tighter than the other | Harness webbing is twisted somewhere between the back of the shell and the shoulder pad. | Unbuckle completely. Follow each strap from buckle to back of shell, removing all twists. Re-thread if necessary. |
| Pinch test passes but harness looks loose | Bulky clothing compressing under tension; baby slouching to one side. | Remove bulky coats. Place baby squarely in seat, back flat. Re-tighten. Consider cleaning the straps if stiff from spills. |
If your adjustments aren’t working and your baby is approaching the seat’s limits, it’s time to check if they outgrow the seat. The limits are hard stops.
Frequently Asked Questions
How often should I check the strap height?
Check the strap-to-shoulder height every two weeks for a newborn, and monthly for an older infant. Growth isn’t linear. A spurt can require an adjustment within a week. The rule is visual: if the shoulders are above the slots, move them up. Don’t wait for the next pediatrician appointment.
Can straps be too tight?
Yes, but it’s far less common than straps being too loose. “Too tight” means the straps are leaving deep red marks on your baby’s skin that don’t fade within a few minutes of removing the harness, or are causing obvious discomfort and restricted breathing. Snug is secure; constricting is dangerous. The harness should lie flat without digging in.
Why do I have to re-thread the straps to adjust the height?
Most infant car seats use a re-thread harness system for maximum security and simplicity. While some convertible seats offer no-rethread adjusters, the infant seat design prioritizes a direct, unbroken strap path. It takes five minutes. The process for adjusting the car seat harness height involves threading the webbing through the correct shell slot and the plastic yoke on the back. It’s a deliberate safety feature, not an oversight.
My baby slouches to one side. Is that a strap problem?
Usually, it’s a posture problem, not a strap problem. First, ensure the crotch buckle is in the slot closest to your baby without being underneath them. A buckle too far away causes slouching. Second, make sure the hip straps are low and tight across the hip bones, not the stomach. This anchors the pelvis. If slouching continues, consult your manual or a CPST to rule out a fit issue with the seat itself.
Before You Go
Adjusting straps isn’t about periodic maintenance. It’s about responsive fitting. The three triggers, shoulder height, pinch-test failure, and head clearance, are your direct signals.
The takeaway is blunt: check the fit every trip. Move the straps up the day you see the shoulders crest above them. Pull the infant insert the day your baby hits the weight on the tag. This isn’t guesswork. The manuals from Britax, Graco, and Joie give you the exact numbers, and resources like the NIH car seat safety study underline why those numbers matter.
Your final step? After your next adjustment, find a certified Child Passenger Safety Technician for a free check. They’ll spot the twist you missed and confirm what you got right. That’s the confidence you’re after.
