
How to Tighten Infant Car Seat Straps & Ensure Proper Fit
This post contains affiliate links. As an Amazon Associate, we earn from qualifying purchases.
To tighten infant car seat straps, you must pass the official pinch test: you should not be able to pinch any extra webbing at the child’s shoulder. This requires the harness straps to be at or just below the shoulders, the chest clip at armpit level, and all bulky clothing removed. Use the harness adjuster strap while pushing down on the seat to pull out slack, repeating the pinch check every single use.
That test is the line between safe and unsafe. It is not a suggestion. Every government safety agency and car seat manufacturer defines a properly tightened harness by that single, physical check.
What follows is the breakdown of that test, the precise sequence to make it pass, and the three mistakes that leave a gap you cannot see until it is too late.
Key Takeaways
- The only valid test for tightness is the pinch test: if you can pinch harness webbing at the shoulder, it is too loose.
- Remove all bulky clothing like snowsuits before buckling. A puffy coat creates deadly hidden slack that the pinch test misses.
- Harness height is non-negotiable. Straps must be at or just below the baby’s shoulders for rear-facing seats. Wrong height prevents proper tightening.
- Use the “pull up, push down” method: pull the adjuster strap while firmly pushing down on the car seat itself to remove slack.
- Check tightness every single time you buckle your child in. A harness loosens with use and growth.
The Official “Pinch Test” — What It Really Means
Forget “snug.” That word is too vague. The National Highway Traffic Safety Administration (NHTSA) states the objective standard: “The harness is snug enough when you cannot pinch any extra material at the shoulder.”
To perform the pinch test: After buckling and tightening, try to pinch the harness webbing vertically at the child’s collar bone. Use your thumb and forefinger. If you can gather any material, the harness is not tight enough. Pull the adjuster strap more and re-check.
Transport Canada offers a second official method. Try to slide a single finger under the harness at the collar bone and pull gently outward. The harness should feel snug on your finger. Both methods aim for the same result: zero slack.
This is not about comfort. It is about crash physics. In a sudden stop, a loose harness allows the child’s body to move forward several inches before the straps catch them. That extra travel dramatically increases the forces on their neck and spine. A strap you cannot pinch eliminates that dangerous movement.
The Step-by-Step Tightening Sequence
Do not just yank the adjuster strap. A systematic approach removes slack from every part of the harness system.
- Prepare the Seat and Child. Ensure the car seat is correctly installed with less than one inch of movement at the belt path. Place your baby in the seat with their back and bottom flat against the backrest. Remove any thick coats or snowsuits.
- Position the Harness Straps. Thread the straps through the slots at or just below the baby’s shoulders. This is a fixed rule for rear-facing seats. Verify the straps are not twisted.
- Buckle and Close the Chest Clip. Insert the buckle tongues until you hear a click from each side. Then, snap the chest clip closed at armpit level. The clip’s job is to hold the straps in position, not to provide restraint.
- Execute the “Pull Up, Push Down” Technique. This is the core move from the Graco SNUGRIDE SNUGLOCK 35 LX manual. With one hand, push down firmly on the car seat near your baby’s hips. With your other hand, pull the harness adjuster strap steadily upward. This action pulls slack from around the child’s waist and thighs.
- Perform the Pinch Test. Immediately after tightening, go to the shoulder and try to pinch the webbing. If you succeed, repeat step four. Pull the adjuster again, then test again.
- Do the Final Fit Check. Look for a straight line of harness from the shoulder down to the buckle. There should be no sagging curves. The chest clip should be at armpit level, and the child should be sitting upright, not slouching.
Skipping the “push down” step is the most common reason the pinch test fails. Pulling the adjuster strap alone often tightens the strap between the adjuster and the child’s back, leaving slack around the hips untouched. The push transfers force to the buckle area, where slack hides.
Where this goes sideways: Only pulling the adjuster strap. This tightens the upper harness but leaves a loop of slack around the child’s waist and legs. In a crash, the child’s pelvis can submarine under the lap belt, leading to abdominal injuries.
Why Harness Height and Chest Clip Position Are Non-Negotiable
You cannot tighten a strap that starts in the wrong place. If the harness straps are above the shoulders on a rear-facing seat, the angle of pull is wrong. The child can be forced downward in a crash instead of being cradled back into the seat shell.
The rule is printed in every manual: “Harness straps must be at or just below the child’s shoulders” for rear-facing use. For the Britax B-SAFE 35, this means using the closest slot at or below the shoulders. The Cybex ATON G manual states it in all caps: “Harness Straps MUST be AT OR JUST BELOW your child’s shoulders.”
| Incorrect Position | Why It Fails | How to Check |
|---|---|---|
| Straps above shoulders (rear-facing) | Child risks ramping up the seat in a crash, increasing head excursion. | With child seated, mark shoulder level on seat shell. Straps must be at or below this line. |
| Chest clip too low (on abdomen) | Does not hold straps in place, allowing them to slip off shoulders. | Clip must be level with the child’s armpits. |
| Chest clip too high (on neck) | Can cause neck injuries or be difficult to release in an emergency. | Same as above – armpit level is the only safe position. |
The chest clip is a pre-crash positioning device. Its sole function is to keep the harness straps properly located on the child’s shoulders in the moments before a collision. If it is too low, the straps can splay outward. If it is too high, it becomes a hazard. Its placement has no bearing on the harness’s tightness, but incorrect placement makes proper tightening impossible.
You must adjust the straps to the correct height before you can achieve a safe, tight fit.
The Bulky Clothing Trap (And What to Do Instead)
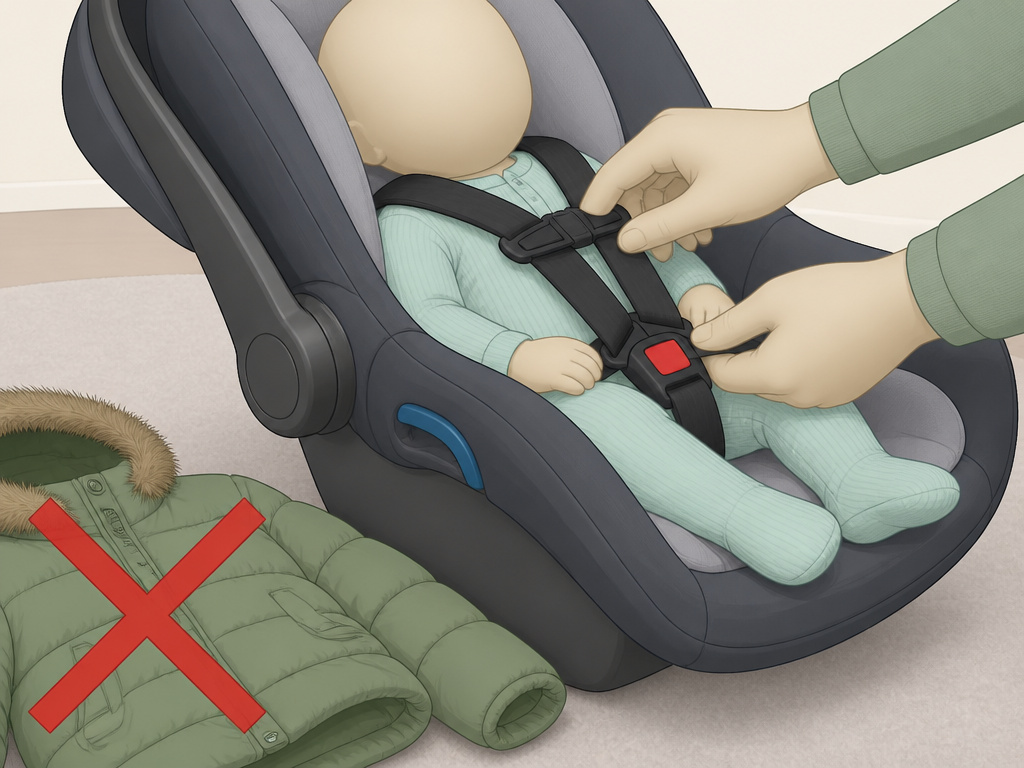
This is the most dangerous mistake because it is invisible. A winter coat or snowsuit is compressible. You can tighten the harness over the puffy material and pass the pinch test. In a crash, the force of the child’s body compresses the coat instantly, creating inches of deadly slack.
The Graco manual is explicit: “Bulky clothing can prevent the harness straps from being tightened properly.” It does not say “might.” It says can prevent.
In cold weather, do not put snowsuits or bulky garments on your child when placing them in the car seat. To keep child warm, buckle your child in the car seat and place a blanket around the child or place the child’s coat on backwards after buckling in.
The safe alternative is simple. Dress your baby in thin, tight-fitting layers like a thermal onesie and pants. Buckle them into the seat, pass the pinch test, and then tuck a blanket over the secured harness or put their coat on backwards. This applies to fleece buntings and thick sweaters, too. If you can compress the material with your hand, it will compress in a crash.
This rule extends to aftermarket accessories. Using a non-approved infant insert or a thick seat cover can create the same compressible layer, voiding the seat’s safety certification. Stick to the padding that came with your seat.
How to Troubleshoot a Stubbornly Loose Harness
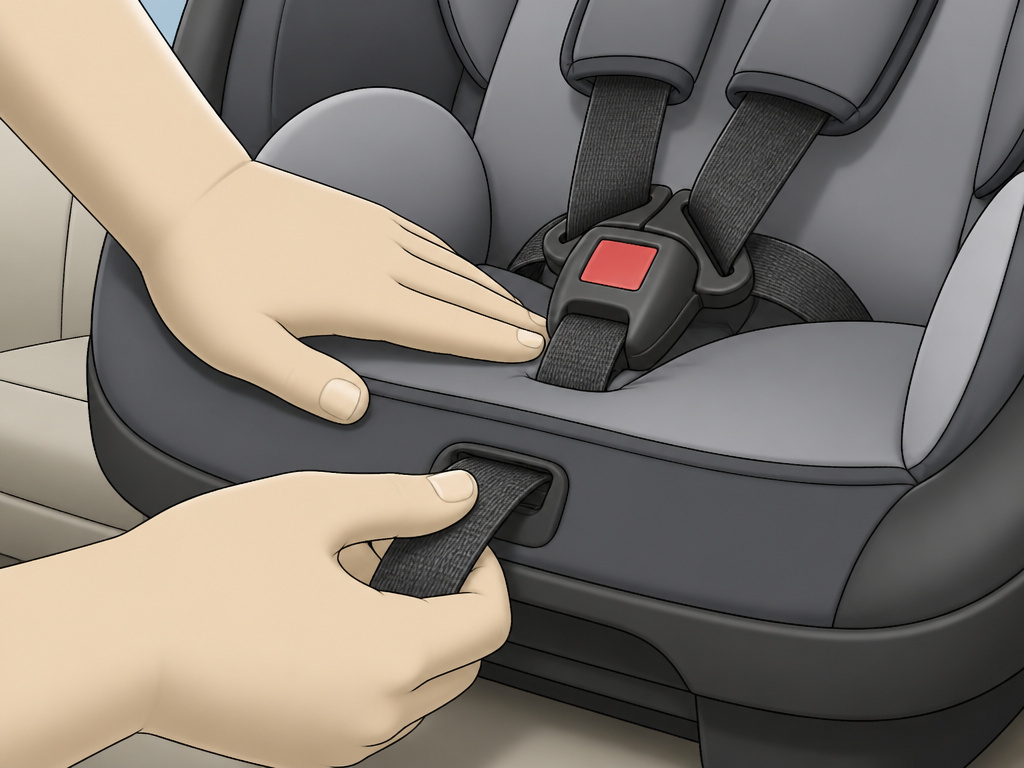
Sometimes you pull the adjuster strap and nothing happens. The harness stays loose. Here are the likely culprits and fixes.
- The Harness is Twisted. Even a single twist along the strap’s path can jam the adjuster mechanism. Unbuckle, straighten each strap completely from the back of the seat to the buckle tongue, and re-thread.
- The Adjuster Strap is Not Fully Engaged. On some models, you must press a release button to loosen, but pulling should automatically engage the ratchet. Ensure you are pulling the correct strap—it’s usually a loose, textured strap emerging from near the buckle area. Refer to your manual, like the Evenflo Litemax NXT guide, which shows the exact parts.
- There is Slack Behind the Back. This is the “pull up, push down” fix. You are not pushing down hard enough on the seat to tension the lower harness. Lean your weight into it.
- The Car Seat is Improperly Installed. If the entire car seat can rock more than an inch side-to-side or front-to-back at the belt path, the harness will never tighten correctly. A loose installation absorbs the tightening force. Reinstall the seat firmly before trying again. For help, see our guide on how to install a Safety First infant car seat.
If you consistently struggle, the mechanism may be faulty. Contact the manufacturer. Do not use a seat with a broken adjuster.
When to Adjust and Re-Tighten
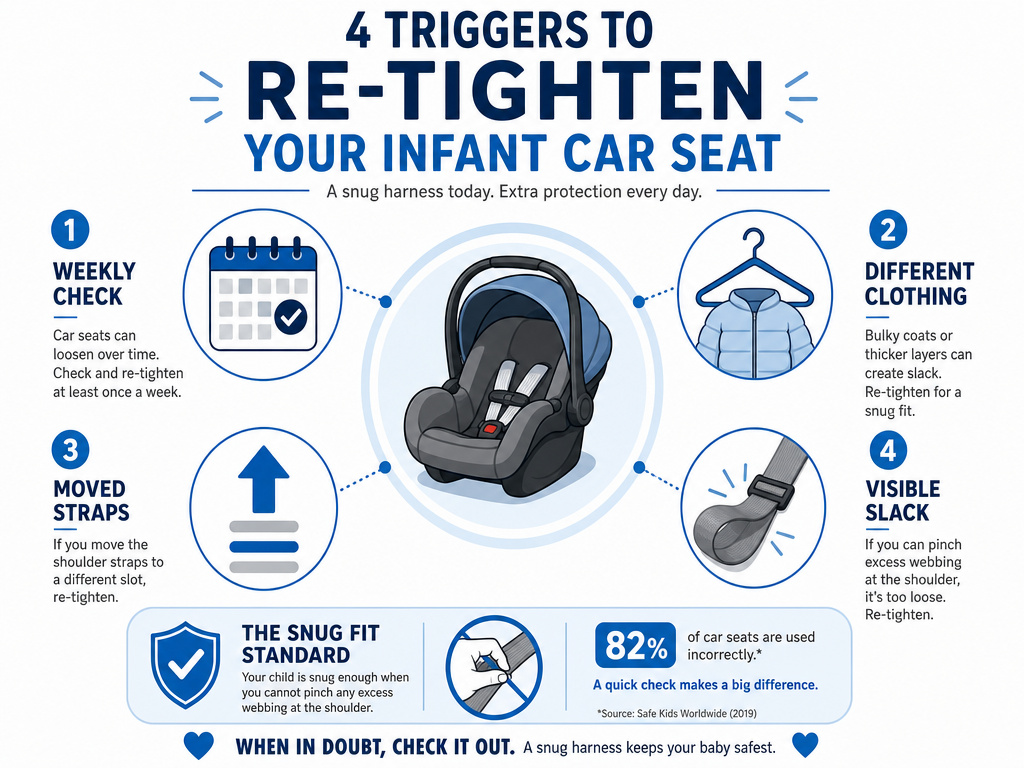
Harness tightness is not a set-and-forget setting. You need to check it at least weekly, if not every trip.
Check every time:
- After placing your child in the seat.
- If the child is wearing different clothing thickness.
- When you move the straps up to a higher slot as they grow.
You will know it’s time to adjust the straps when:
- The pinch test fails consistently.
- The chest clip rests below the armpits even when the harness is tight.
- The child’s shoulders are above the harness strap slots.
- You notice visible slack in the straps before even testing.
Cleaning can also affect the straps. If you’ve recently washed them, they may feel stiffer and require a different technique to tighten. Always consult your manual’s cleaning instructions to avoid damage.
Frequently Asked Questions
How tight is too tight for infant car seat straps?
Harness should be snug against the body, not constricting. You should not be able to pinch webbing, but you should be able to slide a flat hand between the strap and your child’s collarbone. The straps should lie in a straight line without digging into the skin or forcing the child’s body into an unnatural position. If the straps are leaving deep red marks or the child is visibly uncomfortable, you have overtightened.
Can I use aftermarket strap covers or padding?
Only if they are specifically approved by your car seat’s manufacturer. Unapproved covers can interfere with the harness’s ability to tighten properly, compress in a crash, or interfere with the chest clip placement. The Britax B-SAFE 35 manual explicitly warns against the use of non-BRITAX covers and inserts. Always check your manual first.
Why won’t my car seat straps tighten anymore?
The most common reason is a twisted harness webbing that is jamming in the adjuster mechanism. Fully loosen the straps, unbuckle, and ensure every inch of the strap from the back of the seat to the buckle tongue is flat and untwisted. If the problem persists, the adjuster mechanism may be broken or jammed with debris, and you should contact the manufacturer.
How do I know when my baby has outgrown the infant seat harness?
Your baby has outgrown the infant seat when one of three things happens: their weight exceeds the seat’s limit (usually 30-35 lbs), the top of their head is less than one inch from the top of the seat shell, or the harness straps are below their shoulders even on the lowest setting. At that point, you need to transition to a convertible seat. Researching the safest car seat options for the next stage is your best move.
The Bottom Line
Tightening an infant car seat harness is a binary check, not a feeling. It passes the government’s pinch test or it fails. Your job is to master the sequence that makes it pass every single time: correct strap height, removed bulky layers, the “push down, pull up” technique, and that final pinch at the shoulder.
That test is the difference between a harness that holds and one that just looks tight. Do not guess. Perform the check, and if you can pinch, tighten again. When your child outgrows the infant seat and you remove the insert for the last time, take the same discipline with you to the next seat. The rule does not change.
